Submitting Work
All homework for CSCI 1012 is submitted on the submission server.
File Names
Important: The submission requirements are stringent . You MUST name files exactly as described.
In particular: be careful to avoid spaces where they shouldn’t be spaces, and to use lowercase when asked.
For example, if the problem specifies real_numbers.py:
real_numbers.py(correct)real-numbers.py(wrong: dash instead of underscore)
realnumbers.py(wrong: no underscore)
real_numbers.txt(wrong:txtintead ofpyfile).
Your programs must do what’s asked, no less no more. Be careful to implement exactly what is asked.
If you’ve forgotten how to make folders, zip files etc, now may be a good time to review basic computer skills.
Many code editors have a ‘feature’ to save your program when you run your program.
Consider the case where you write a program, get it running, and save it for submission. Afterwards, you edit code in the same window for a different program. When you hit run in that window, you might be overwriting your old program!
To avoid this problem, always save a program with the name you want it to have before you start working on it.
Making a zip File to Submit
It is a good practice to separate the files for each homework assignment into a different folder. Every module and every assignment will feature multiple files. All files will be Python programs. The names of these will end in .py. For example: hello.py.
When you zip your files when preparing to submit them, you must zip only the files for the current module. We recommend naming the zip file for the homework assignment.
The easy way to do this is to zip the folder containing the files. For example, for Homework 1, when it’s time to submit, you will upload this zip file (example: homework1.zip ) to the homework1 assignment on the submit server.
For each homework, we recommend:
- Creating a folder for each assignment
- Putting all of the files for assignment in the folder
- Creating a zip file of all of these files before submitting
With the file structure illustrated, it looks like this:

It’s also safe to zip the .py files without the folder:

What’s most important is that:
- You make one zip file
- It contains all
.pyfiles for the assignment- All
.pyfiles are correctly named
- All
Submit Server Setup
First, register for an account on the submit server. Use your @gwu.edu email address, not @gwmail.gwu.edu. If an account for your email already exists (some will be automatically created), reset your password using the reset link.

You should see CSCI 1012 as a course. (Note: this will not be available until after the first lab sessions of the class.)
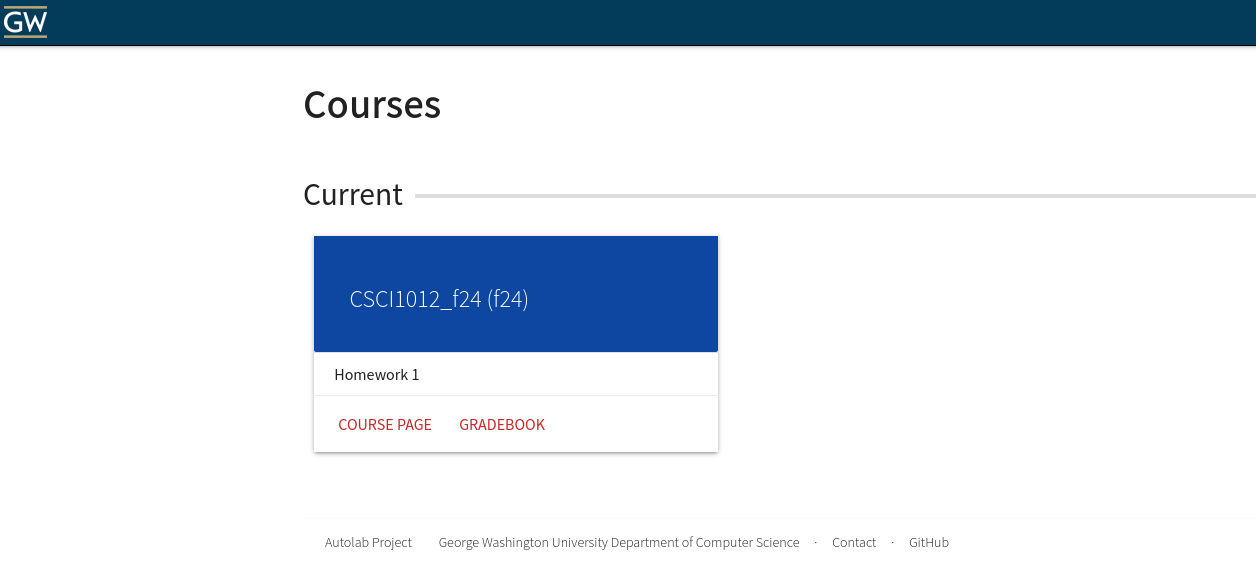
Click on the course, and you should see available homework assignments.
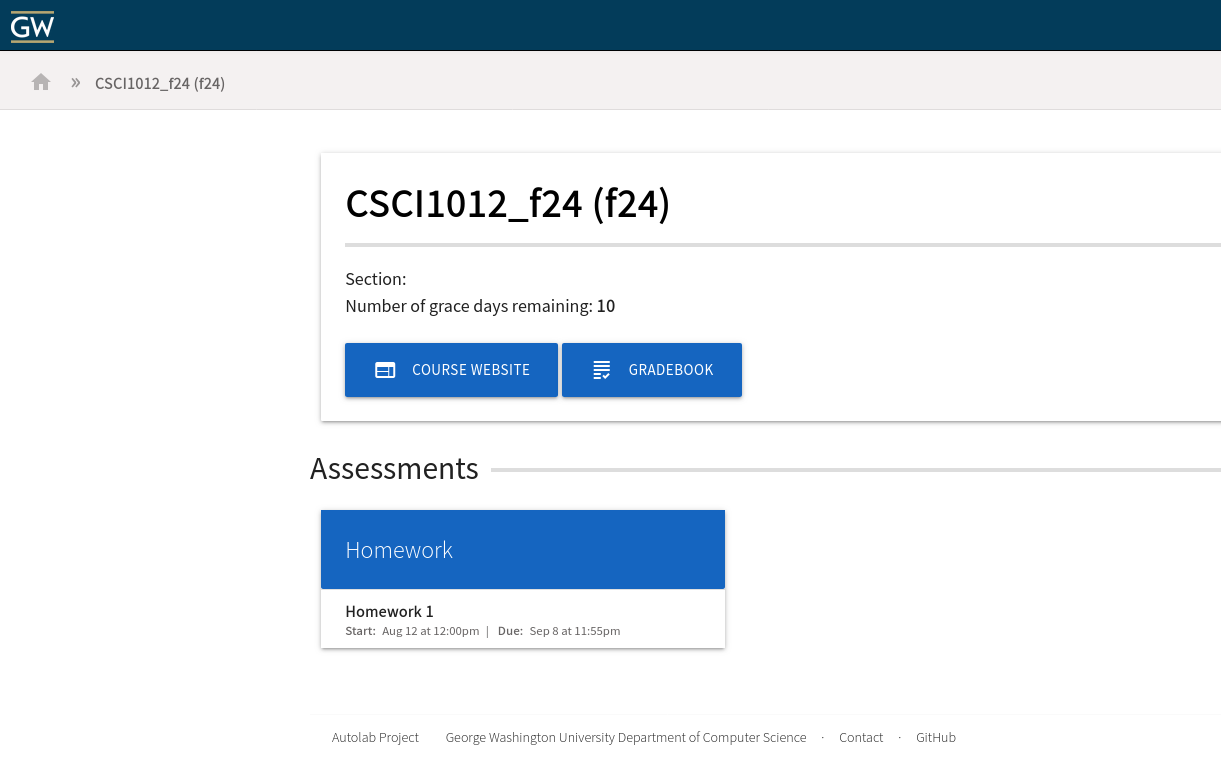
Let’s look at Homework 1. There’s a drop box where you can submit your homework1.zip file. You can also see how many full-credit (unpenalized) submissions you have remaining.
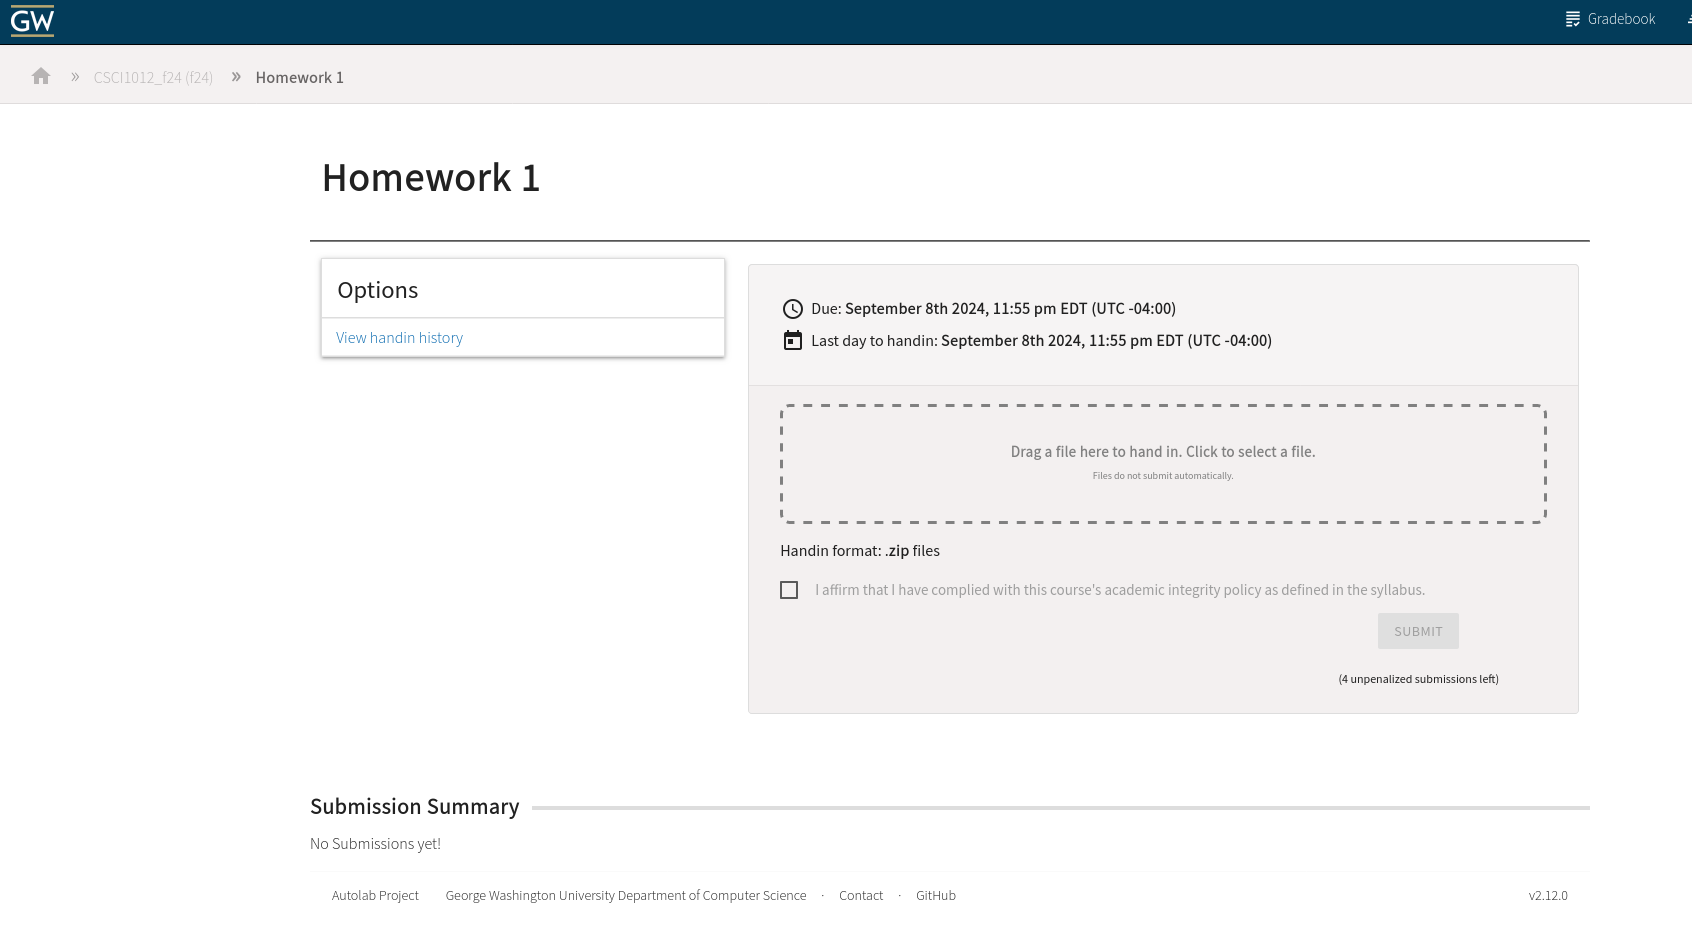
Your submission will be graded immediately after you submit it! This usually takes only a few minutes.

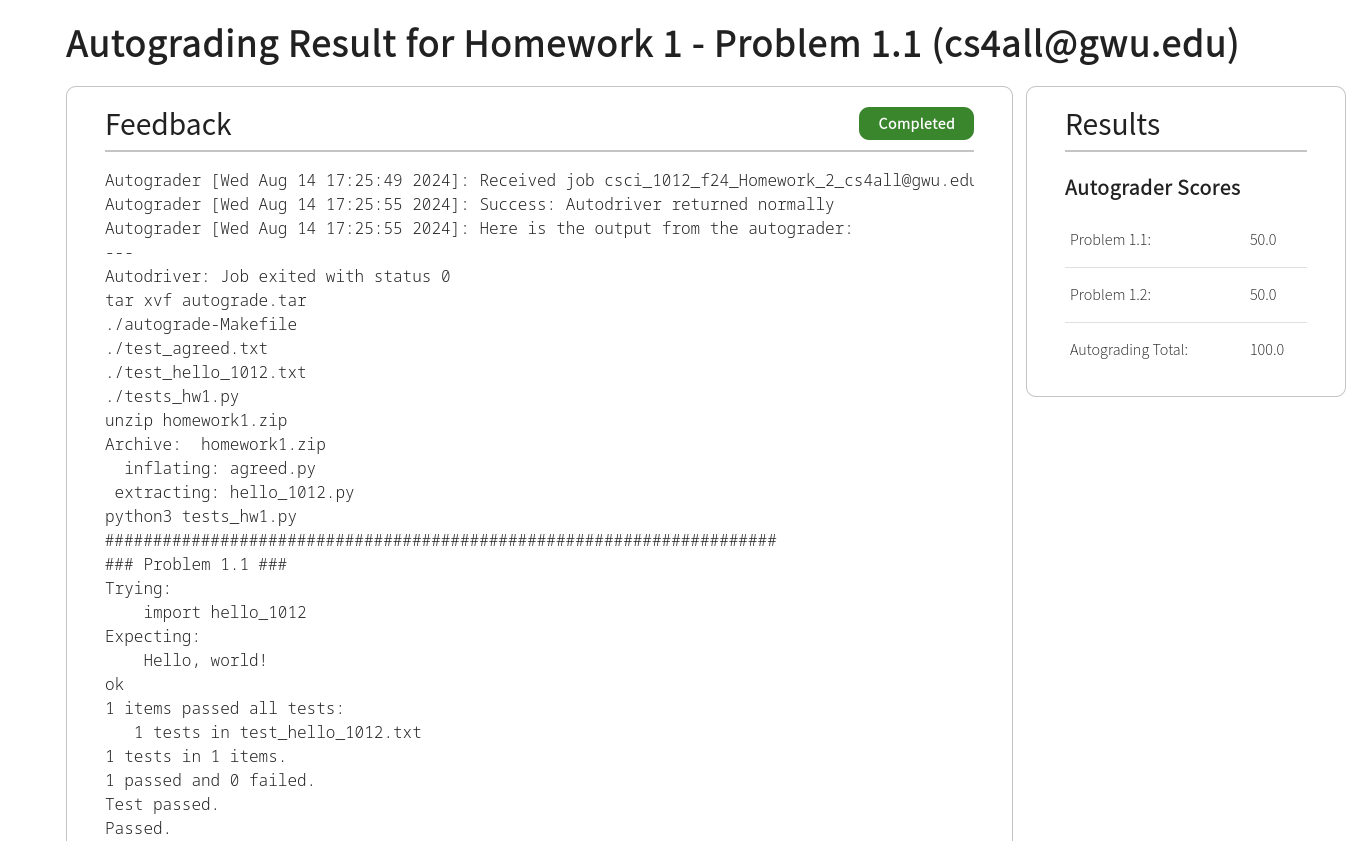
This is what you will see when the autograder has finished. This submission earned full credit.
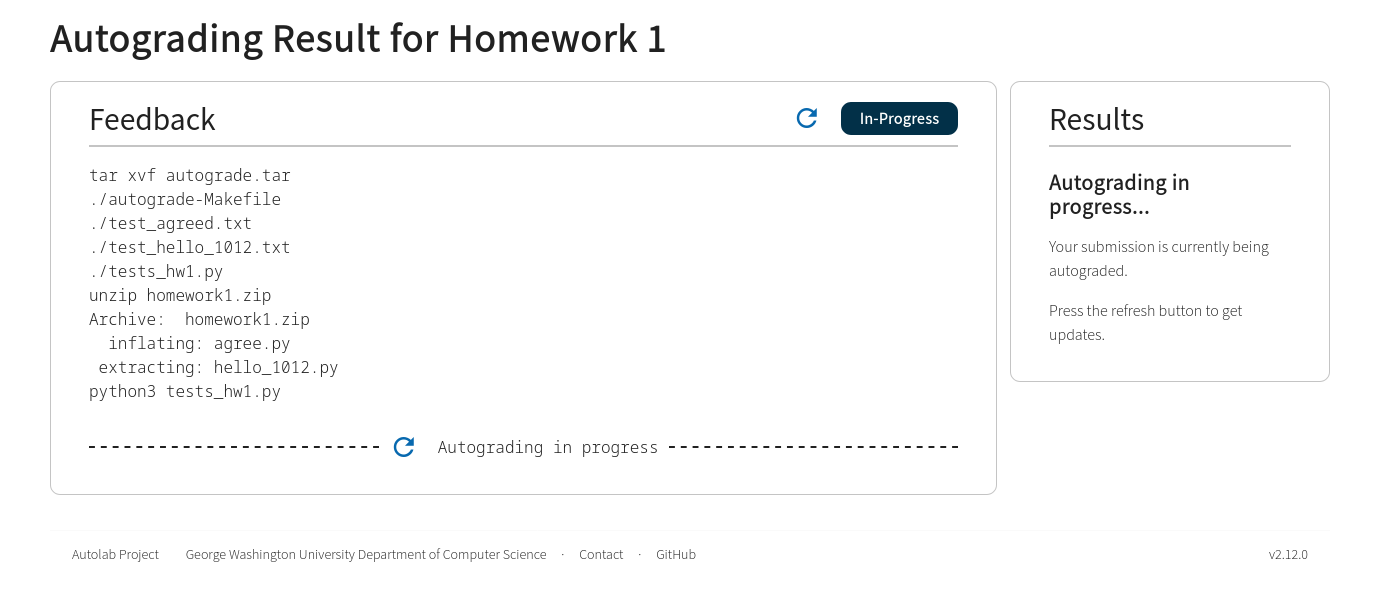
This is what you will see when the autograder is still working:
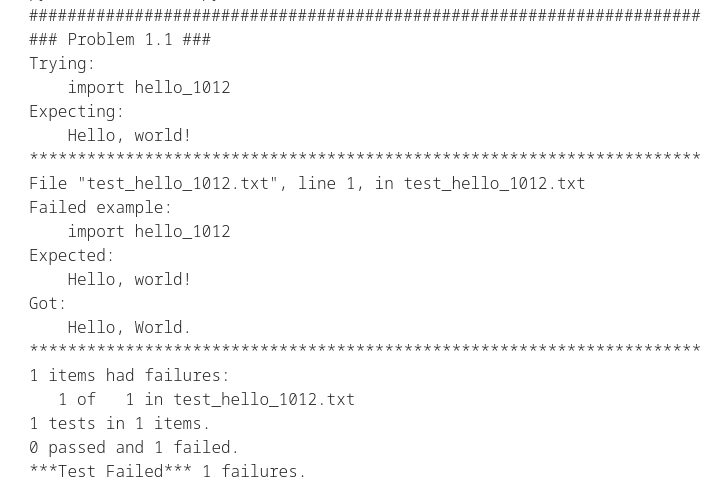
The autograder’s output will give you information about why you got problems wrong:
This problem has output that’s slightly misformatted:
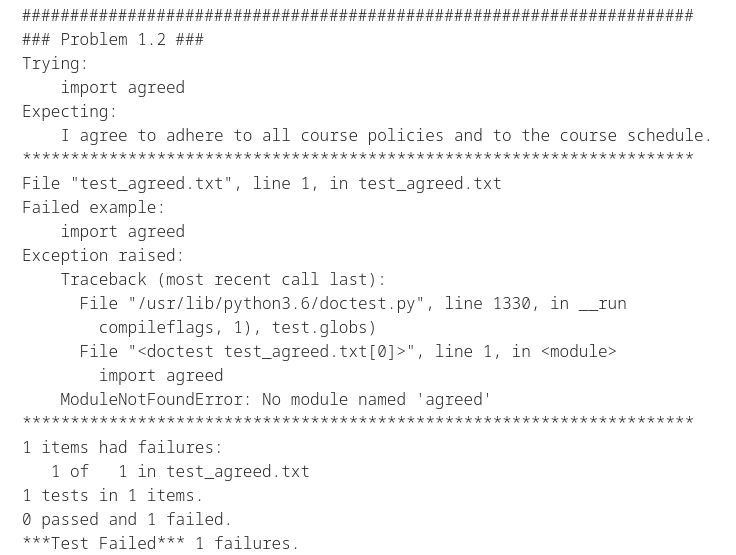
This problem has the wrong file name: agree.py instead of agreed.py.
After you fix your errors, try again– you can resubmit multiple times (for full credit) per homework assignment. Each assignment will specify how many full-credit attempts are allowed.
If you’ve used all of your full-credit attempts, you get one more 50% credit attempt– but if you show your work to a TA (explain what errors you got and how you fixed them), this extra attempt will be upgraded to full credit.
Test It Out
Homework 1 allows an unlimited number of attempts for full credit– you can try as many times as you need to.
Like everything else in this course, you learn by doing, so try it out, and ask for help if you get stuck.