Video: Useful info about files.
Video: Useful info about editing.
Useful screenshots and step-by-step instructions for:
Windows Users: creating folders
Step 1.
To create a new folder on your desktop (which is the main area of your computer that you see if you have nothing else open. It usually has a nice picture and a couple icons), right click on any open area on your desktop that is not occupied by an icon. You'll then see the above image pop up, with some minor variations (you might not have "Git GUI Here" or "Git Bash Here", but you'll absolutely have the red circled option "new". Keep your mouse on that option and you'll see another menu pop up for the different options for a new thing to create:
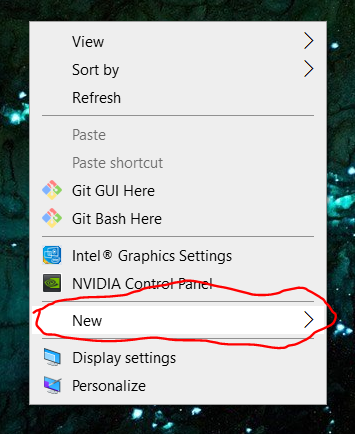
Step 2.
The top option of the new menu shown above should say "Folder", click on that, and it will create a new folder for you (literally named "New Folder" -- unless you have other folders already called "New Folder", in which case it will call the folder "New Folder (X)" where X is just some number based on how many other new folders you already had existing.
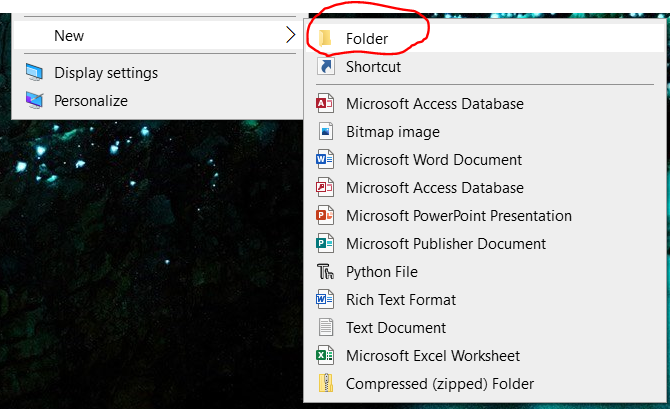
Step 3.
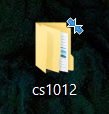
Above is what the "New Folder" should look like! Now, we're going to rename it with the course name "cs1012". Shown in the next step:
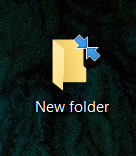
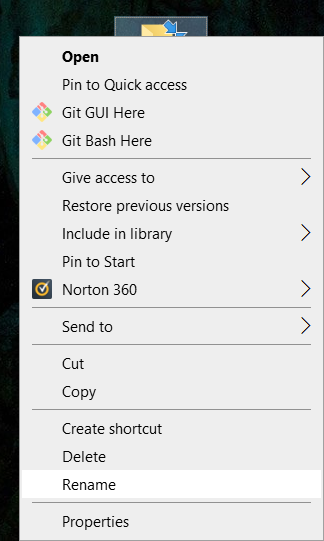
Step 4.
Right click on the icon of the new folder that was just created, and you'll see another menu. Again, you might not see many of the options in the image, but the only option you need is the one near the bottom that says "rename". Click on that option, and the menu will disappear, and you'll see the old name of the folder is highlighted in blue, meaning it is ready for you to type a new name for the folder.
Step 5.
5. Type in "cs1012", and press enter. If you mistype it, it's not a problem, just rename the folder again! In that case, you'll then see "cs1012" highlighted in blue like above rather than "New Folder".

Step 6.
If you double click on the folder we've created and renamed (now called "cs1012"), you'll see a pop up called "File Explorer", which is how Windows shows you what files and folders you have.
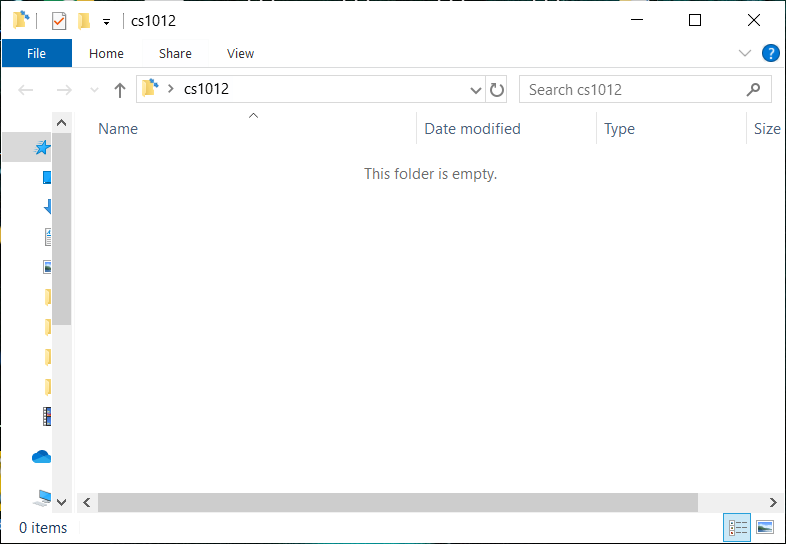
Step 7.
There are a couple important things to point out:
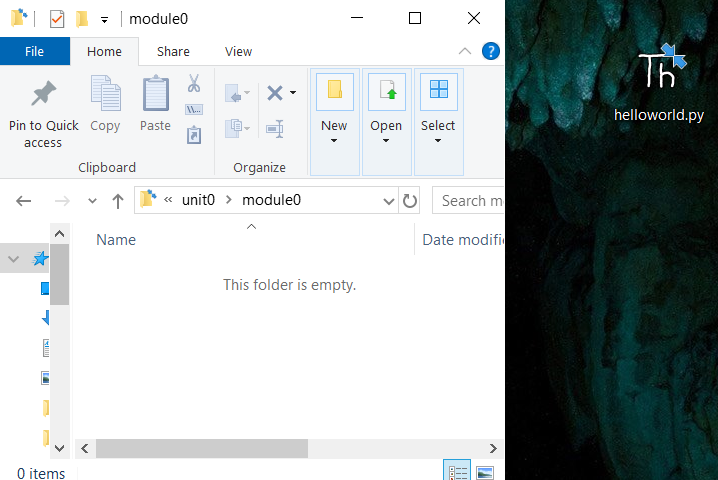
"This folder is empty" -- we'll change that shortly.
Then: "cs1012" -- this tells us the name of the folder we are currently looking at, called the "PATH" as well as eventually what other folders are containing it (in this case, since this folder is from our desktop, all we see is cs1012. Once we make a unit0 folder and look at that, we'll notice the "PATH" says "cs1012 > unit0", which means we're inside "unit0", which is inside "cs1012", which we know was created inside the desktop).
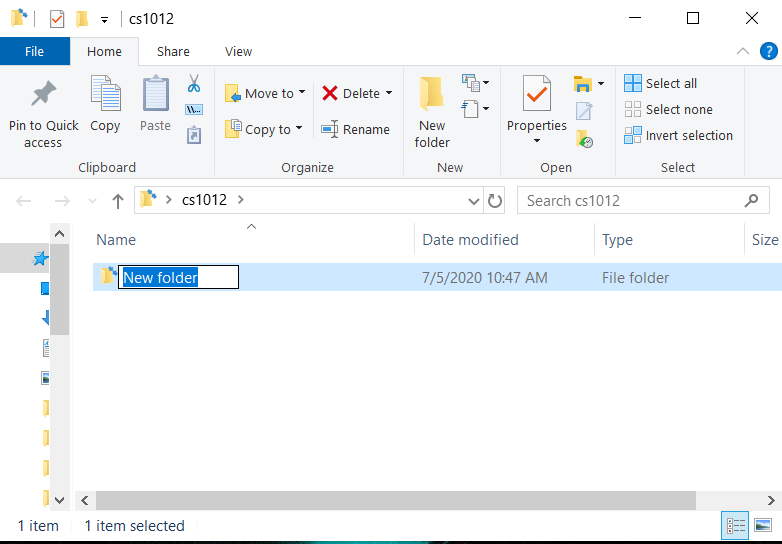
Here's what we need to click on to create our folders! First, click the "Home" button, and you'll then see the rest of the options shown in the image, like "New Folder", which is what we want to click on next! It will create a folder again called "New Folder", which we will rename the same way we renamed cs1012.

Step 8.
By default actually, when you create a new folder it will allow you to type a name for it directly. If you clicked somewhere else just after clicking new folder, then Windows assumes you've given the folder the name you want. If you haven't clicked somewhere else just yet, cool! Type the name "unit0" (with no spaces) and press enter or click somewhere else to complete the renaming.
If you clicked somewhere else before you had a chance to rename the folder, no worries, there are two ways to rename it. One shown in the image above -- you'll need to right click on the folder and choose "rename". Or, if you look at the top bar again, just to the left of the "New Folder" button is a button called "rename". This is the same button! (Just click the folder first once before clicking "rename", otherwise Windows doesn't know what item you're trying to rename.
Step 9.
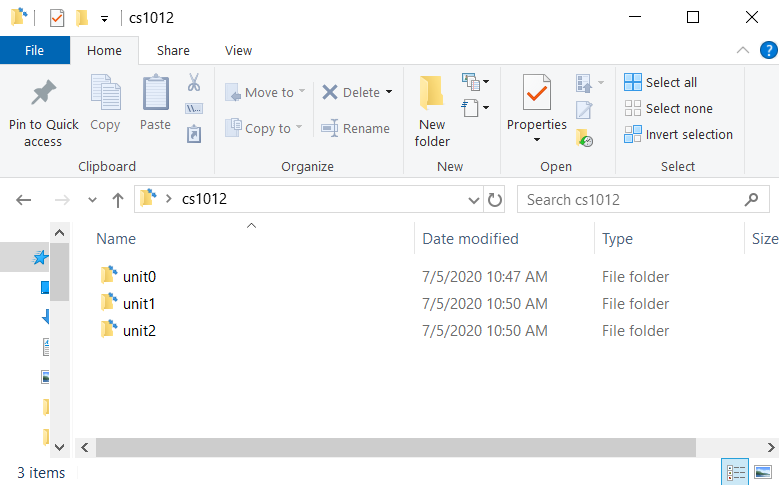
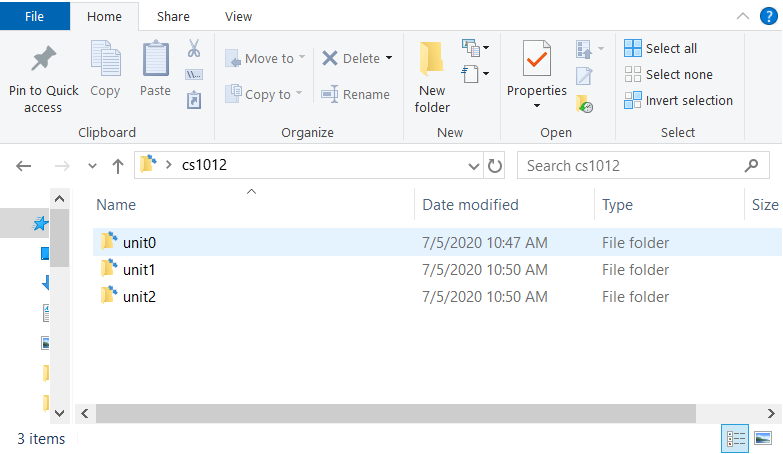
Now that you have a unit0 folder, repeat the process (steps 7 and 8) for two more folders called "unit1" and "unit2".
Step 10.
Double click on unit0, and it will bring us inside that folder, where we want to create another new folder, shown in the next step.
Step 11.
Create a folder called module0 (again with no spaces).

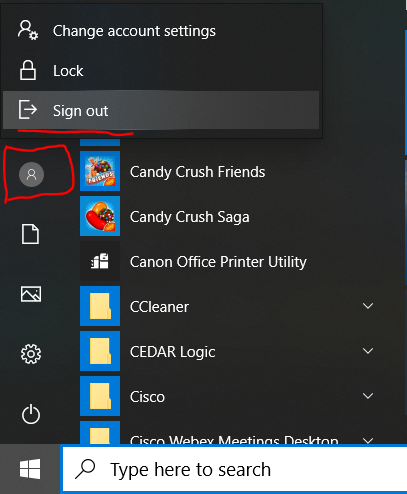
Step 12.
Once that's all set, go down to the bottom left corner of your computer and click on that "Windows" icon. Then, click on the icon of your user (circled -- really more like "squared" in red). Then, click on sign out to log out. Then, log back in and let's find the folders we've just made again!
Step 13.
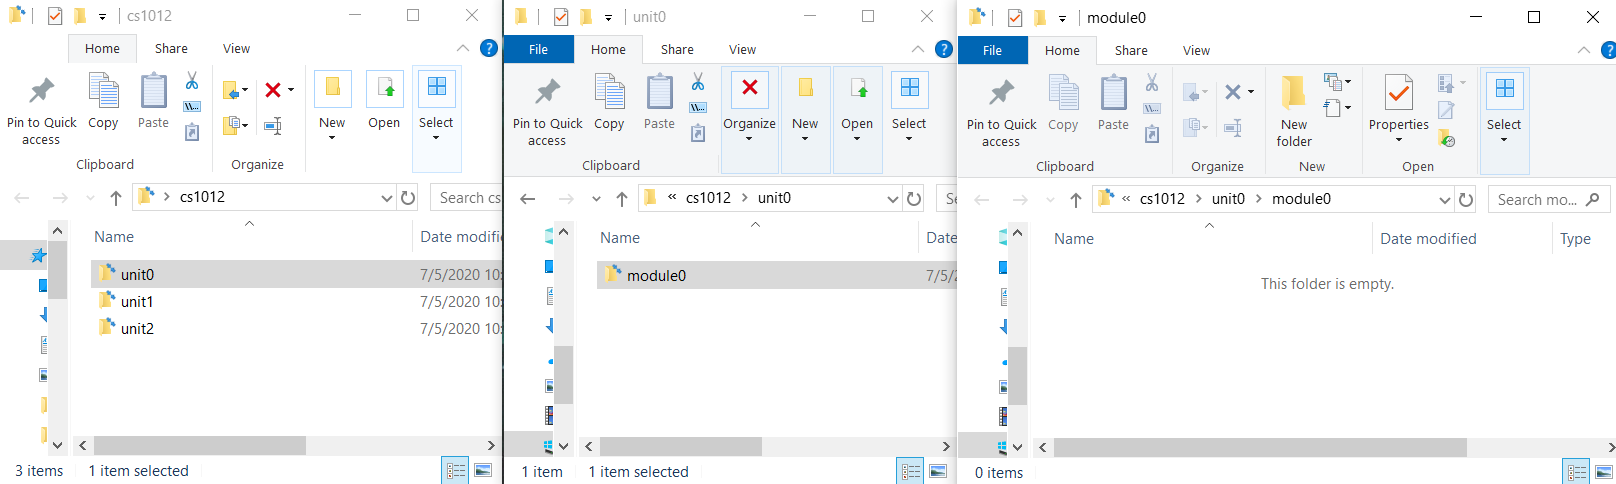
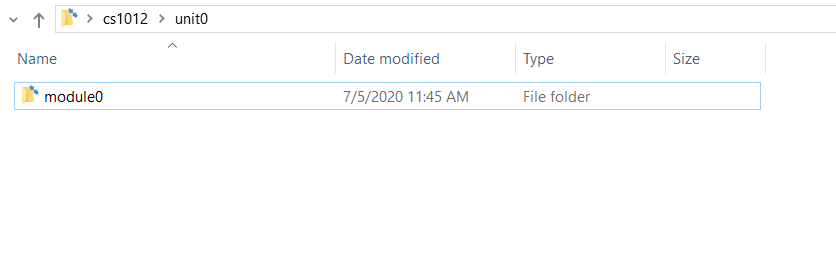
Now that you're logged back in, let's start back at the desktop. Double click on the cs1012 folder.
Step 14.
Now, let's get back to module0. In the image above there are 3 separate windows to show as steps. First, double click on the "unit0" folder, which will bring you inside where you'll see module0. Click on "module0", and you'll then see "This folder is empty". Congratulations! You're back! And don't worry, we'll find something to put in module0 soon!
Windows Users: file downloads
- Step 1.
To save a file (also known as downloading a file) from a link from the
module pages, find the link you want to save. Here is an example
link from module0 exercise2 on learning "Computerese".
(Note: this is an image we're showing, so don't
click. It is intended to show what it would look like on
your computer.)

- Step 2.
Right click on the link itself, and select "save link as". This will begin saving the file (downloading it) to your computer.

- Step 3.
Now, you can decide what to call the file and where to save it. The default options are usually to your desktop or downloads folders, but you can navigate directly to one of your module folders and have the file saved there!

Windows Users: find a file
- Step 1.
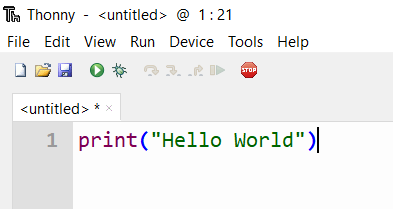
To save a file you're working on, you can press the control key (abbreviated as "ctrl") and the "s" key at the same time, or, you can press the actual save button that exists in most text editors. Prior to saving, you'll notice that the file has some default name, like "untitled" (I'm using Thonny, but the same occurs in Spyder).
- Step 2.
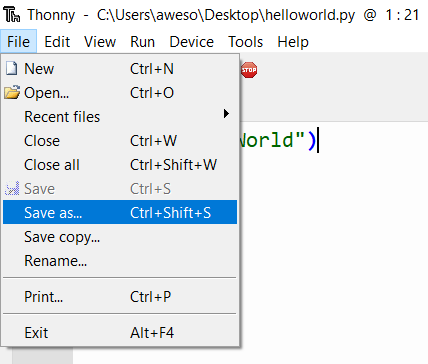
The most universal way to save a file is as shown above, via going to "File" and then "Save". This will allow you to not only save the file but name it for the first time. You now have the opportunity to name the file, and select where you want it to be saved. For this demo, I chose my desktop, but usually you will want to save it directly to the module folder it is a part of.

- Step 3.
You'll see that the file now no longer says "untitled", and instead shows "helloworld.py", and the location of where the file was saved. (My desktop in this case)

- Step 4.
To move a file from your desktop into a module folder, start by navigating to a module (like module0), which was shown as the last step in the set of steps for creating the folders you need! Then, click on the python file (if you're using thonny, your python files will likely have an icon like what you see here. If you're using spyder, they will have a different icon) and drag it into the module0 folder.
- Step 5.
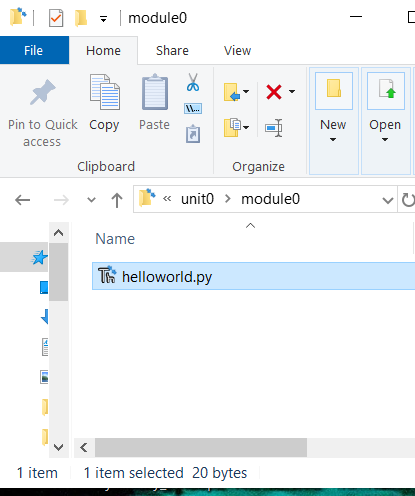
You'll see that the file now is in the module0 folder instead of being shown on your desktop.
- Step 6.
Once you've saved a file (say to your desktop), you can still pick another location for it (say to a module folder) to be saved via the "save as" option -- Note! Save as creates a copy of the file you're working on, but if you make a change to one version of the file, the other version is not updated with the changes. It's a better idea to move a file to the new location you want (as shown in step 5) than it is to use save as so that you don't end up with multiple versions of a file.
Windows Users: Make a pdf
- Step 1.
In whatever program you use to write your answers to modules (Notepad, Microsoft Word, Google Docs, etc..), once you've completed writing the answers to a module, we want to convert it to a .pdf file for submission (note, pdf files cannot be edited easily once created, so if you make changes to your text file after creating your pdf, you'll need to repeat this process to create a new pdf with the updated changes you made to your text file.
- Step 2.
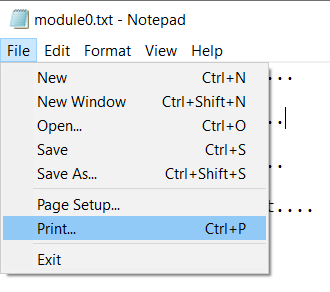
In Notepad, click on File, and then Print.
- Step 3.
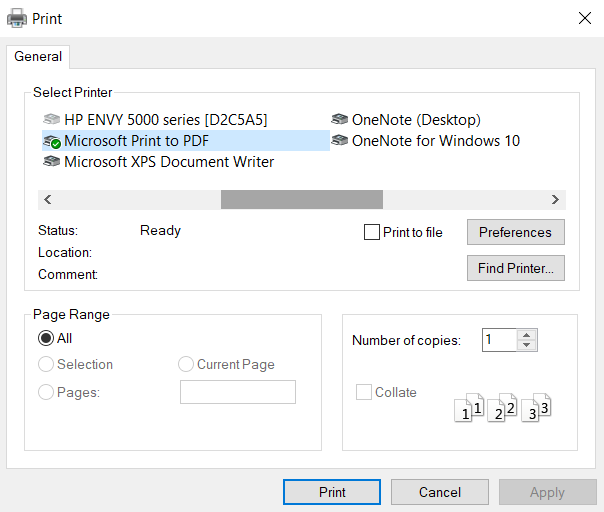
You will then see a pop up similar to what you just saw above. You will want to select whatever option mentions "convert to pdf" or "print to pdf". In this case it's called "Microsoft Print to PDF". Rather than this printing out your document, it will create a .pdf file for you.
- Step 4.
Press okay, and then give you pdf file a name (it will always be moduleX) where X is the number of the current module. In this case, I've named it module0. You do not need to call it "module0.pdf", Windows will add the ".pdf" for you. In fact, if you do type it, you might find your file is created as "module0.pdf.pdf". (Fortunately if that happens you can rename the file!)

- Step 5.
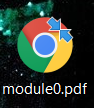
You will now see the pdf file created in whatever folder it was saved to -- in this case I saved mine to my desktop. PDF files usually open in an internet browser. Since my default browser is Google Chrome, my pdf file has a chrome icon.
- Step 6.
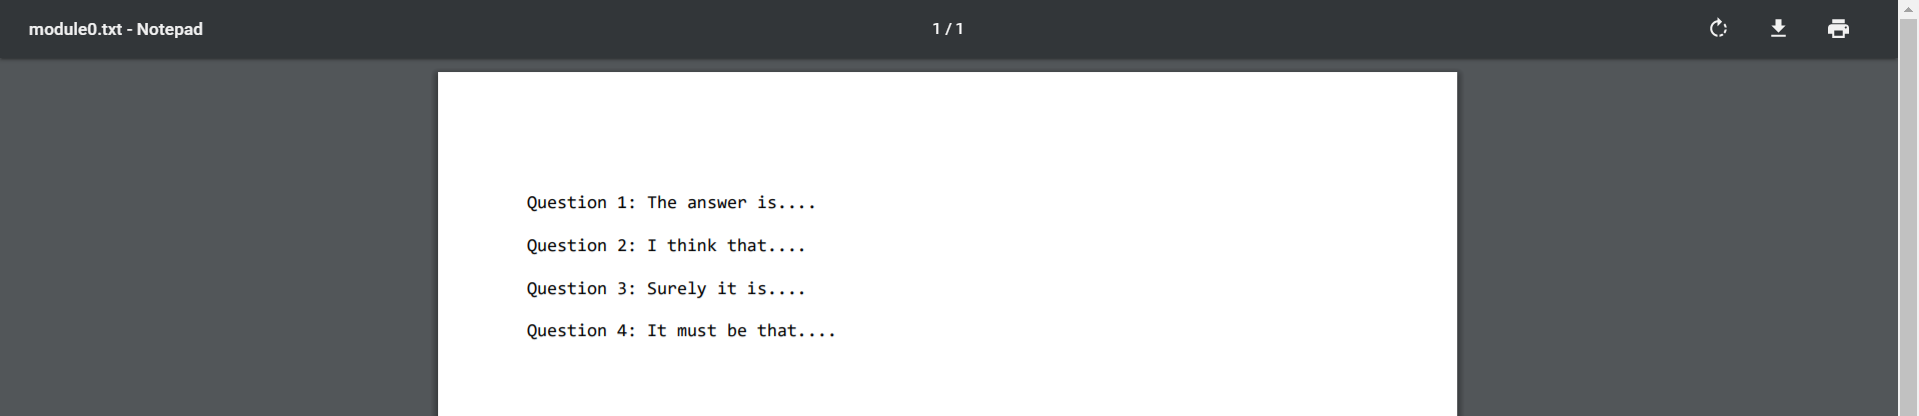
Double click on the pdf file, and it will open in your default internet browser. Although the pdf creation process is pretty accurate, it's always a good idea to open your pdf file and read it through to make sure everything looks the way you expect.
Windows Users: Make a zip
- Step 1.
Navigate to the folder you want to create a zip file of (note, a zip file is a 'compressed' folder of some files or folders. It allows you to package your files as a single unit as if you were sending a folder itself). The navigation part itself is shown in the last step of creating the folders you need for this class.
- Step 2.
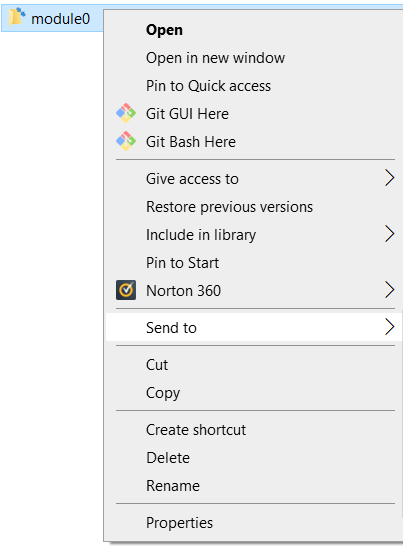
2. Click once on the folder you want to zip (if you click twice, you'll end up inside that folder). Then, right click on that folder and go to the "send to" option.
- Step 3.
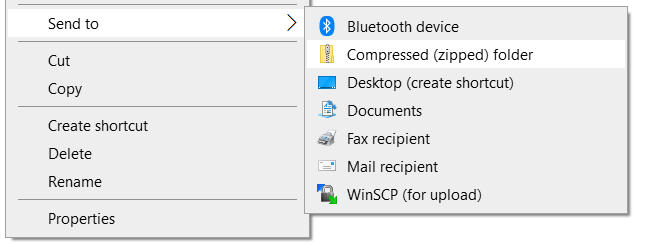
From "send to", select "Compressed (zipped) folder."
- Step 4.
You will now see a new zip file with the same name as the folder you zipped. In theory you can rename it, but you shouldn't have to since it will take the name of the folder you zipped. If you need to rename it for any reason, you can rename it the same way we've renamed folders.

Back to Module 0
© 2017, Rahul Simha