Module 9: AWT, Part I
Introduction
The AWT (Abstract Window Toolkit) is
a large collection of classes geared towards letting the programmer
build GUI's (Graphical User Interfaces).
What can you do with the AWT library?
- You can bring up windows that are re-sizable, closeable
and colorable.
- You can place inside a window a variety of GUI widgets
such as buttons, lists, checkboxes, text areas, pop-up
menus, menu-bars and canvases.
- You can handle events related to widgets (such as what to
do when a particular button is pressed).
- You can, to a limited extent, control the placement of widgets
inside windows.
- You can draw lines and (elementary) geometric figures, and
display GIF or JPEG images.
- You can create multiple, "coordinated" windows and cut-and-paste
between them.
What can't you do with the AWT library?
- AWT graphics is low-level (pixel-level) - thus, you do not
have primitives for complex graphics, such as 3D graphics.
(Java does have other class libraries for this purpose).
- AWT has no text formatting at all - you have to worry about
where the current line will end, for example.
- AWT allows limited control over the placement of widgets.
- AWT does not come with a drag-and-drop customization tool.
- AWT does not let you design the "look-and-feel" of the windows
(to maintain portability).
- For portability, AWT has taken the lowest-common-denominator
approach: the smallest set of features that will run anywhere.
Typical classes you can expect to use include:
- Frame: to create a
top-level window.
- Canvas: to draw in or to display images in.
- Panel: a sort-of "sub-window" in which you can
place groups of buttons and other widgets.
- TextField and TextArea: to display and read-in
text.
- Dialog and FileDialog: to obtain specific
event-driven information in a separate top-level window.
- Various standard widgets: Checkbox, List
Button, Label, Scrollbar and Scrollpane.
- Various layout managers: FlowLayout, BorderLayout,
CardLayout, GridLayout and GridBagLayout.
- Menu-related widgets: MenuBar, MenuItem and
PopupMenu.
Components and Containers:
- Consider a button: a button can't really contain another
widget like another button or a canvas.
- Thus, a button is not a
container.
- A button is a component.
- On the other hand, a panel is expressly designed to
contain other widgets like buttons.
- Some widgets are both simultaneously a container as well
as a component:
- A panel is a component when it is placed inside a
container (like a frame or another higher-level panel).
- A panel is a container when other widgets (like buttons)
are placed inside of it.
- Looking at the library, you will notice (abstract)
classes corresponding to Component and Container:
- Both are abstract to allow common (non-abstract)
methods to be shared across various components (or containers).
- A Container inherits from Component because it can be one
component inside a larger widget.
The entire AWT library is divided into four sub-packages:
- Package java.awt: widget classes.
- Package java.awt.event: classes for dealing with
events (like button-pushes or mouse-clicks).
- Package java.awt.image: classes for advanced
image manipulation.
- Package java.awt.datatransfer: classes for
handling cut-and-paste.
Bringing up a window
It's almost impossible to figure out how to bring up a window
by looking at the library.
To get started, the following facts will be useful:
- A top-level window is a window that is on-par with
other windows fired up by the operating system, such as
a browser's window.
- AWT has three top-level windows: Frame, Dialog
and FileDialog (a special kind of Dialog).
- Although it may appear that Window is a top-level
window, it really is not.
- Note that Frame inherits from Window, which
inherits from Container, which inherits from
Component.
- Thus, many of Frame's important methods
are methods defined in Component or Container.
- For example, two frequently-used methods are in
Container. They are: setVisible() and setSize().
Let us create a simple blank window that does nothing:
- At first, it might appear that the following code is
sufficient:
import java.awt.*;

public class TestAwt1 {
  public static void main (String[] argv)
  {
    Frame f = new Frame ();
  }
}
The code compiles, but on execution nothing shows up and the
terminal hangs.
- Two things need to be done:
- We need to set a size (the default size is (width=0, height=0)).
- We need to ask a top-level window to "show" itself,
by calling the setVisible() method.
- Next, let us try:
(
import java.awt.*;

public class TestAwt1 {
  public static void main (String[] argv)
  {
    Frame f = new Frame ();
    f.setSize (200, 100);
    f.setVisible (true);
  }
}
This does produce a window:
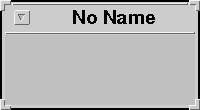
(On SUN Solaris running OpenWin)
Note:
- The frame has a title-bar.
- A "no-name" title is generated.
- The window is re-sizable:
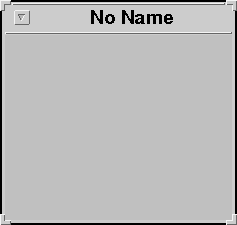
- Some window controls native to the operating system are available:
(In Openwin: you can iconify, but not quit).
- The screen from which the interpreter was called hangs.
- To quit, type ctrl-c at the screen (not window)
to kill the interpreter process.
Next, let's create a slightly improved window:
(source file)
import java.awt.*;

public class TestAwt2 {

  public static void main (String[] argv)
  {
    // Create a Frame instance.
    Frame f = new Frame ();

    // Set the size.
    f.setSize (200, 100);

    // Install a title for the titlebar.
    f.setTitle ("A Test Window");

    // A background color.
    f.setBackground (Color.cyan);

    // Display.
    f.setVisible (true);
  }

}
The result:
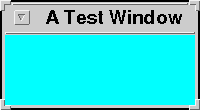
Note:
- Some books will use show() instead of setVisible()
but show() is currently
deprecated (in AWT).
- On some operating systems, the window may not be automatically
re-sizable. In this case, simply add the line:
f.setResizable ();
- The size of the window is described in pixels:
- Thus, f.setSize (200,100) requests a window
200 pixels wide and 100 pixels in height.
- Since the actual screen resolution will vary from terminal
to terminal, the actual window size will vary across systems.
- If the Java environment is implemented properly on your
system, it is possible to obtain screen resolution with
the following code:
    // Get a Toolkit instance.
    Toolkit tk = Toolkit.getDefaultToolkit ();

    // Get resolution in pixels per inch.
    int pixels_per_inch = tk.getScreenResolution ();

    // Screen dimensions can also be obtained in a Dimension instance.
    Dimension screen_size = tk.getScreenSize ();

    // Print out results.
    System.out.println ("Resolution: " + pixels_per_inch);
    System.out.println ("Size (pixels): Height=" + screen_size.height +
			", Width=" + screen_size.width);
In-Class Exercise 9.1:
Use the above code in the following
template
to print out the screen size in inches. Next,
bring up a window that is 3 inches wide and 2 inches in height
and place the window approximately in the center of the screen.
(Use the setLocation method of Component).
Simple drawing and writing
We will now look at some of the basic graphics (drawing and
lettering) offered in AWT:
- Consider the appropriate widget for drawing:
- At first, it seems like a Canvas object will be
needed.
- However, you can draw directly on a Frame.
- Later, when we learn to place a canvas inside a frame,
we will draw on canvases instead.
- All drawing occurs on a graphics context:
- A graphics context is an instance of class Graphics.
- However, you cannot instantiate this class yourself.
- A component (like Frame) does that for you.
- Thus, to draw on a Frame, you need to get a
Graphics instance from the frame.
- The way this works is, you get the Graphics
instance via the paint() or update() method
of Frame.
- The all-important technique of overriding paint()
(and, sometimes, update()):
- Now, AWT does not maintain "bit-mapped memory". That is,
if a window is covered and later uncovered, AWT does not
re-draw the contents.
- Thus, when re-drawing is needed, you have to do it.
- AWT tells you when drawing is needed by calling the
paint() method.
- Thus, you need to override the paint() method in
Frame to do your thing.
- (Important): Therefore, you need to extend
Frame to override
the paint() method.
- This method is given a Graphics instance as
parameter.
Confusing? Let's look at a simple example:
// Extend Frame in order to override paint()
class NewFrame extends Frame {

  // Override paint():
  public void paint (Graphics g)
  {
    // drawString() is a Graphics method.
    // Draw the string "Hello World" at location 100,100
    g.drawString ("Hello World!", 100, 100);
  }

}

public class TestAwt4 {

  public static void main (String[] argv)
  {
    // Create an instance of NewFrame
    NewFrame nf = new NewFrame ();

    // Set the title and other parameters.
    nf.setTitle ("Hello World Test");
    nf.setResizable (true);
    nf.setBackground (Color.cyan);
    nf.setSize (500, 300);

    // Show the frame.
    nf.setVisible (true);
  }

}
Here is the result:
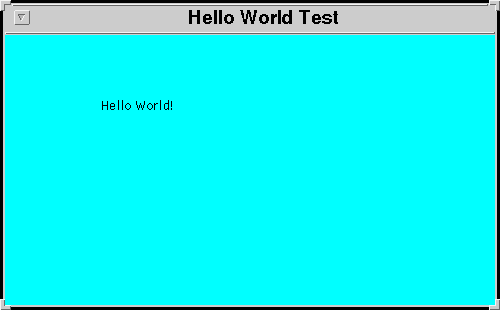
An explanation:
- To write or draw in a frame, we need to override the
paint() method in Frame.
- To override means we have to inherit from Frame.
- Above, the class NewFrame extends Frame:
class NewFrame extends Frame {

  public void paint (Graphics g)
  {
    // drawString() is a Graphics method.
    // Draw the string "Hello World" at location 100,100
    g.drawString ("Hello World!", 100, 100);
  }

}
- Note that paint() is passed a Graphics
context.
- Only a graphics context has the means for drawing and writing.
- Here are some methods in Graphics, for example:
- For writing: drawString(), setFont().
- For drawing empty shapes: drawRect(), drawOval, drawPolygon(),
drawPolyline(), drawArc().
- For drawing filled shapes: fillRect(), fillOval(), fillPolygon(),
fillArc().
- For drawing a line: drawLine()
- For clipping and translating: setClip(), translate().
- All measurements are in pixels:
- The frame size is 500 x 300.
- The drawString method draws the specified string
at a location specified from the top-left corner.
(The origin, for undiscernible reasons, is at the topleft corner).
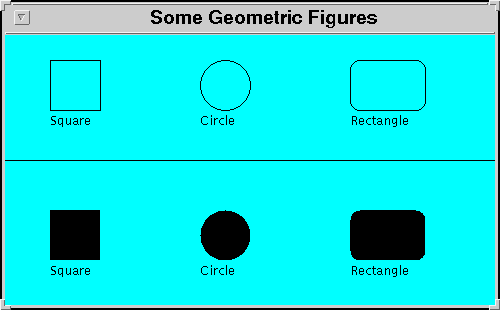
Next, let us draw some geometric figures:
- We will draw un-filled and filled versions of a
square, a circle and a rectangle.
- All the drawing methods are in Graphics.
- We will use methods drawRect(), drawOval()
and drawRoundRect().
- drawRect (int topleftx, int toplefty, int width, int height):
- The first two integers specify the topleft corner.
- The next two are the desired width and height of the rectangle.
- drawOval (int topleftx, int toplefty, int width, int height):
- The first two integers specify the topleft corner.
- The next two are the desired width and height of the
enclosing rectangle.
- drawRoundRect (int topleftx, int toplefty, int width, int height,
int arc_width, int arc_height):
- The first four numbers specify the rectangle.
- The last two specify "roundedness".
- The larger the values, the more rounded the result.
- How the corners are constructed:
- An imaginary oval is constructed in a rectangle of dimensions
arc_width and arc_height.
- The oval is broken into four quadrants.
- Each arc is used as a corner of the target rectangle.
- The drawLine() method is used to draw lines:
- Unfortunately, the line thickness is fixed at one pixel.
- To draw thicker lines, you have to "pack" one-pixel lines
together yourself.
(If the lines are axis-parallel, you can use filled rectangles).
For example, consider the following code:
(source file)
class NewFrame extends Frame {

  // Override paint():
  public void paint (Graphics g)
  {
    // Draw a Square:
    g.drawRect (50,50,50,50);
    g.drawString ("Square", 50, 115);

    // Circle:
    g.drawOval (200,50,50,50);
    g.drawString ("Circle", 200, 115);

    // Rounded rectangle:
    g.drawRoundRect (350,50,75,50,20,20);
    g.drawString ("Rectangle", 350, 115);

    // Draw a line across the middle:
    g.drawLine (0,150,500,150);

    // Now draw some filled shapes:

    // Square:
    g.fillRect (50,200,50,50);
    g.drawString ("Square", 50, 265);

    // Circle:
    g.fillOval (200,200,50,50);
    g.drawString ("Circle", 200, 265);

    // Rounded rectangle:
    g.fillRoundRect (350,200,75,50,20,20);
    g.drawString ("Rectangle", 350, 265);
  }

}

public class TestAwt5 {

  public static void main (String[] argv)
  {
    // Create an instance of NewFrame
    NewFrame nf = new NewFrame ();

    // Set the title and other parameters.
    nf.setTitle ("Some Geometric Figures");
    nf.setResizable (true);
    nf.setBackground (Color.cyan);
    nf.setSize (500, 300);

    // Show the frame.
    nf.setVisible (true);
  }

}
The result produced is:
We can improve the code slightly by placing all the
frame-related code inside NewFrame itself:
(source file)
import java.awt.*;

class NewFrame extends Frame {

  // Constructors.
  public NewFrame (int width, int height)
  {
    // Set the title and other parameters.
    this.setTitle ("Some Geometric Figures");
    this.setResizable (true);
    this.setBackground (Color.cyan);
    this.setSize (width, height);

    // Show the frame.
    this.setVisible (true);
  }

  // No-parameter constructor - use a default size.
  public NewFrame ()
  {
    this (500, 300);
  }

  // Override paint():
  public void paint (Graphics g)
  {
    // Draw a Square:
    g.drawRect (50,50,50,50);
    g.drawString ("Square", 50, 115);

    // Circle:
    g.drawOval (200,50,50,50);
    g.drawString ("Circle", 200, 115);

    // Rounded rectangle:
    g.drawRoundRect (350,50,75,50,20,20);
    g.drawString ("Rectangle", 350, 115);

    // Draw a line across the middle:
    g.drawLine (0,150,500,150);

    // Now draw some filled shapes:

    // Square:
    g.fillRect (50,200,50,50);
    g.drawString ("Square", 50, 265);

    // Circle:
    g.fillOval (200,200,50,50);
    g.drawString ("Circle", 200, 265);

    // Rounded rectangle:
    g.fillRoundRect (350,200,75,50,20,20);
    g.drawString ("Rectangle", 350, 265);
  }

}

public class TestAwt6 {

  public static void main (String[] argv)
  {
    NewFrame nf = new NewFrame (500, 300);
  }

}
Note:
- We used a constructor to set Frame attributes.
- Since methods in Frame need to be called for
the particular instance, we use this for clarity.
- A no-parameter constructor creates a default size.
In-Class Exercise 9.2:
Use the following template
to draw a standard 8x8 chessboard. Let the size of the chessboard
be determined by minimum of the two dimensions of the frame.
Place the topleft corner of the chessboard at the topleft corner
of the frame.
Frame insets
In the above chessboard exercise you may have noticed two
oddities about AWT:
- Unfortunately,
AWT considers the drawing surface to start at the topleft corner
of the frame (which includes the titlebar and border).
- A filled rectangle is slightly smaller than an empty one of
the same size (one pixel smaller on two sides).
To fix the latter problem, you can draw a line around the periphery
of the chessboard.
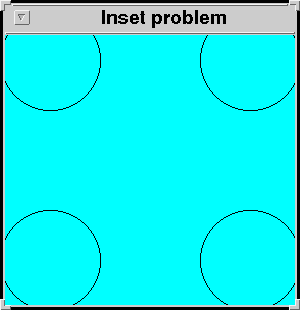
The problem of handling insets is more involved:
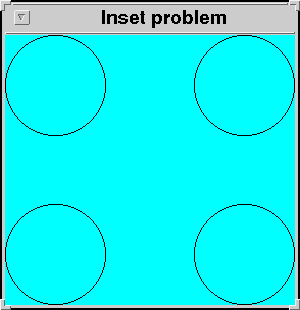
- First, to highlight the problem, let us draw a few circles
that are meant to be as close to corners as possible.
- Here's what we want to draw:
- Consider this code:
(source file)
import java.awt.*;

class NewFrame extends Frame {

  // Constructors.
  public NewFrame (int width, int height)
  {
    // Set the title and other parameters.
    this.setTitle ("Inset problem");
    this.setResizable (true);
    this.setBackground (Color.cyan);
    this.setSize (width, height);

    // Show the frame.
    this.setVisible (true);
  }

  // No-parameter constructor - use a default size.
  public NewFrame ()
  {
    this (500, 300);
  }

  // Override paint():
  public void paint (Graphics g)
  {
    // Topleft at 0,0:
    g.drawOval (0,0,     100,100);

    // Topleft at (0, 300-100):
    g.drawOval (0,200,   100,100);

    // Topleft at (300-100, 0):
    g.drawOval (200,0,   100,100);

    // Topleft at (300-100, 300-100):
    g.drawOval (200,200, 100,100);
  }

}

public class TestAwt7 {

  public static void main (String[] argv)
  {
    NewFrame nf = new NewFrame (300, 300);
  }

}
- Here is what we get:
- AWT provides a way to obtain the "drawable area" via the
getInsets() method:
- Consider now the following code (in paint()):
  public void paint (Graphics g)
  {
    Insets I = this.getInsets ();

    // Draw circles of diameter 100 at each corner.

    // Topleft at 0,0:
    g.drawOval (0+I.left, 0+I.top, 100,100);

    // Topleft at (0, height-100):
    g.drawOval (0+I.left, height-I.bottom-100, 100,100);

    // Topleft at (width-100, 0):
    g.drawOval (width-I.right-100, 0+I.top,  100,100);

    // Topleft at (width-100, width-100):
    g.drawOval (width-I.right-100, height-I.bottom-100, 100,100);
  }
- The result produced is:
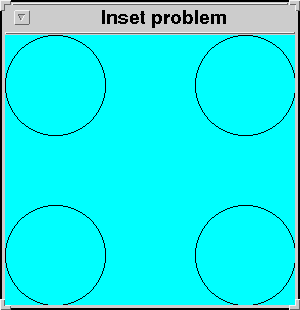
- Notice that one pixel is hidden along the right and bottom.
- Thus, one additional pixel needs to be subtracted from the
bottom and right insets:
(source file)
  public void paint (Graphics g)
  {
    Insets I = this.getInsets ();

    // Draw circles of diameter 100 at each corner.

    // Topleft at 0,0:
    g.drawOval (0+I.left, 0+I.top, 100,100);

    // Topleft at (0, height-100):
    g.drawOval (0+I.left, height-I.bottom-1-100, 100,100);

    // Topleft at (width-100, 0):
    g.drawOval (width-I.right-1-100, 0+I.top,  100,100);

    // Topleft at (width-100, width-100):
    g.drawOval (width-I.right-1-100, height-I.bottom-1-100, 100,100);
Finally, let us clean up the code by placing the inset
computation in the constructor:
(source file)
class NewFrame extends Frame {

  int width, height;
  int originx, originy;
  int draw_width, draw_height;

  // Constructors.
  public NewFrame (int width, int height)
  {
    // Set the title and other parameters.
    this.setTitle ("Inset problem");
    this.setResizable (true);
    this.setBackground (Color.cyan);
    this.setSize (width, height);
    this.width = width;
    this.height = height;

    // Show the frame.
    this.setVisible (true);

    // Compute insets.
    Insets I = this.getInsets ();
    originx = 0+I.left;
    originy = 0+I.top;
    draw_width = width - (I.right + 1);
    draw_height = height - (I.bottom + 1);
  }

  // No-parameter constructor - use a default size.
  public NewFrame ()
  {
    this (500, 300);
  }

  // Override paint():
  public void paint (Graphics g)
  {
    // Draw circles of diameter 100 at each corner.

    // Topleft at 0,0:
    g.drawOval (originx, originy, 100,100);

    // Topleft at (0, height-100):
    g.drawOval (originx, draw_height-100, 100,100);

    // Topleft at (width-100, 0):
    g.drawOval (draw_width-100, originy,  100,100);

    // Topleft at (width-100, width-100):
    g.drawOval (draw_width-100, draw_height-100, 100,100);
  }

}
Note:
- Important: you must call getInsets() only
after calling setVisible().
(Because the native Window must be created first).
- You might want to (as shown above) place
the inset computation in the constructor to avoid the call to
getInsets() every time paint() is called
(which might be quite often in an animation).
- Generally, the insets tend to stay constant for a system.
- However, it is possible that some systems will want
the insets to change with the size of the window (smaller
insets for smaller windows).
- In this case, it is better to leave the inset calculation
inside paint().
One last point:
In-Class Exercise 9.3:
Modify your Ex 9.3 code or use this
template to solve the inset problem for the chessboard.
In addition, use the getSize() method to dynamically
compute the size in paint(). This way, if the window
is re-sized, the chessboard will fit the new window.
Writing with fonts
AWT's support for text is somewhat limited:
- Only a few fonts are supported at this time.
- No text formatting or text layout help is provided.
- You can install your own fonts at the risk of losing portability.
The following code tells you what fonts are supported:
    String[] fontlist = Toolkit.getDefaultToolkit().getFontList ();
    for (int i=0; i < fontlist.length; i++)
      System.out.println (fontlist[i]);
Note:
About fonts:
- AWT's font functionality is found in the
classes Font and FontMetrics.
- A font is specified by a type (or name),
a size and a style.
- Font names:
- Java 1.0 supports the following font names:
TimesRoman, Helvetica, Courier and ZapfDingbats.
- These names are deprecated in Java 1.1.
- Instead, the current font names are:
Serif, SansSerif, Monospaced, Dialog and DialogInput.
- Font styles:
- A font style is the particular thickness and slant
used for emphasis.
- The constants Font.PLAIN, Font.ITALIC
and Font.BOLD are used to specify styles.
- AWT supports 4 styles:
- Plain:
- This is the regular appearance of the font.
- To specify, use Font.PLAIN.
- Italic:
- This is a slanted version for emphasis.
- To specify, use Font.ITALIC.
- Bold-plain:
- This is a boldface version of the plain style.
- To specify, use Font.PLAIN | Font.BOLD.
(Logical OR).
- Bold-italic:
- This is a boldface version of the italic style.
- To specify, use Font.ITALIC | Font.BOLD.
- Font sizes:
- A font's size is specified using the standard "printer's point"
measure: one "point" is about 1/72 inches.
- AWT does not guarantee that your size specification will be
implemented exactly - only a "best attempt" is made.
- The FontMetrics class provides more information
about a font's sizes.
- Note: a font size is not specified in pixels.
- To use a font, you need to:
- Create an instance of Font, passing the
name, style and size to the constructor.
- To specify a style, use the constants in class Font.
- Pass the Font instance to the Graphics
context using the setFont() method.
Consider this example, which prints out Serif
and SansSerif strings in two sizes and all the available
styles:
(source file)
import java.awt.*;

class NewFrame extends Frame {

  // Constructors.
  public NewFrame (int width, int height)
  {
    // Set the title and other parameters.
    this.setTitle ("Fonts");
    this.setResizable (true);
    this.setBackground (Color.cyan);
    this.setSize (width, height);

    // Show the frame.
    this.setVisible (true);
  }

  // No-parameter constructor - use a default size.
  public NewFrame ()
  {
    this (500, 300);
  }

  // Override paint():
  public void paint (Graphics g)
  {
    // Create 10-point Serif fonts in all styles:
    Font f1 = new Font ("Serif", Font.PLAIN, 10);
    g.setFont (f1);
    g.drawString ("Serif-Plain-10pt", 30, 60);

    f1 = new Font ("Serif", Font.ITALIC, 10);
    g.setFont (f1);
    g.drawString ("Serif-Italic-10pt", 30, 90);

    f1 = new Font ("Serif", Font.PLAIN | Font.BOLD, 10);
    g.setFont (f1);
    g.drawString ("Serif-Plain-Bold-10pt", 30, 120);

    f1 = new Font ("Serif", Font.ITALIC | Font.BOLD, 10);
    g.setFont (f1);
    g.drawString ("Serif-Italic-Bold-10pt", 30, 150);

    // Create 20-point SansSerif fonts in all styles:
    f1 = new Font ("SansSerif", Font.PLAIN, 20);
    g.setFont (f1);
    g.drawString ("SansSerif-Plain-20pt", 140, 60);

    f1 = new Font ("SansSerif", Font.ITALIC, 20);
    g.setFont (f1);
    g.drawString ("SansSerif-Italic-20pt", 140, 90);

    f1 = new Font ("SansSerif", Font.PLAIN | Font.BOLD, 20);
    g.setFont (f1);
    g.drawString ("SansSerif-Plain-Bold-20pt", 140, 120 );

    f1 = new Font ("SansSerif", Font.ITALIC | Font.BOLD, 20);
    g.setFont (f1);
    g.drawString ("SansSerif-Italic-Bold-20pt", 140, 150);
  }

}

public class TestAwt11 {

  public static void main (String[] argv)
  {
    NewFrame nf = new NewFrame (450,200);
  }

}
The result produced is:
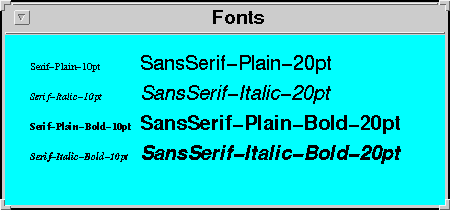
Note:
- The font name is passed as a string:
Font f1 = new Font ("Serif", Font.PLAIN, 10);
- The font style is an OR'ed combination of constants, e.g.,
f1 = new Font ("SansSerif", Font.ITALIC | Font.BOLD, 20);
- To use a font, you first "set" the font using the setFont()
method in the graphics context.
- The drawString method of Graphics will then
draw the specified fonts at a given location.
g.drawString ("Hello World!", 30, 60);
- The lowest point of a non-descending letter like "h" is
used for the y-value.
- You, the programmer, are responsible for laying out the
strings (typesetting):
- you need to compute line lengths, inter-word spacing, etc.
Typesetting:
- A font has several measurements (characteristics)
useful in typesetting:
- Baseline: An imaginary line on which the characters
in a line are placed.
- usually, the lowest point of a non-descending character like "h".
- Ascent: the height of a non-descending character
above the baseline.
- Descent: the distance a descender like "y"
dips below the baseline.
- Leading (pronounced "ledding"): the distance between the
descent of one line and the ascent of the next line.
(Space between lines, essentially).
- Height: The sum of the ascent, descent
and leading.
- Note: the font characteristics depend on the letters in the text.
- An accent is not counted in the ascent.
- A FontMetrics instance provides the characteristics
for a particular font, style and size.
- A FontMetrics instance is usually obtained as
follows:
  public void paint (Graphics g)
  {
    // Create a font.
    Font f = new Font ("Serif", Font.PLAIN | Font.BOLD, fontsize);

    // Set the font in the graphics instance.
    g.setFont (f);

    // Get a FontMetrics instance from the graphics instance.
    FontMetrics fm = g.getFontMetrics();
  }
- The class FontMetrics in java.awt has
several methods:
  public abstract FontMetrics implements Serializable {

    //...

    // Some methods that return a font characteristic.
    public int getAscent ();
    public int getDescent ();
    public int getLeading ();
    public int getHeight ();
    public int maxAscent ();
    public int maxDescent ();

    // Get the resulting width of a string.
    public int stringWidth (String s);

    //...

  }
- If accents are being used, it may be advisable to use
the sum of maxAscent, maxDescent and leading.
We will consider an example in which:
- We are given a piece of text as an array of String's,
and we want to write out the words so that words are not broken up.
- We will allow the font size to be specified.
- We will use the stringWidth() method in FontMetrics
to get the size of a string in pixels.
Here is code:
(source file)
import java.awt.*;

class NewFrame extends Frame {

  String[] words; // List of words to display.
  int fontsize;   // Size of font.

  // Constructor.
  public NewFrame (int width, int height, String[] words, int fontsize)
  {
    // Retain data and font size.
    this.words = words;
    this.fontsize = fontsize;

    // Set the title and other frame parameters.
    this.setTitle ("Font metrics");
    this.setResizable (true);
    this.setBackground (Color.cyan);
    this.setSize (width, height);

    // Show the frame.
    this.setVisible (true);
  }

  // Override paint():
  public void paint (Graphics g)
  {
    // Create a Serif font in the given font size.
    Font f = new Font ("Serif", Font.PLAIN | Font.BOLD, fontsize);
    g.setFont (f);

    // Get a FontMetrics instance from the graphics context.
    FontMetrics fm = g.getFontMetrics();

    // Get the height (height of font plus separator).
    int fontheight = fm.getHeight ();

    // Size of frame plus insets.
    Dimension D = this.getSize ();
    Insets I = this.getInsets ();

    // Visible drawing area
    int max_width = D.width - I.left - I.right - 1;
    int max_height = D.height - I.top - I.bottom - 1;

    // Start at topleft.
    int startx = 0 + I.left;

    // Must add font height since bottom left corner
    // of font is used as starting point.
    int y = 0 + I.top + fontheight;

    int x = startx;
    for (int i=0; i < words.length; i++) {

      // Obtain pixel-length of string (with blank)
      int len = fm.stringWidth (" " + words[i]);

      if (x + len < max_width) {
        // If it fits within the current line, draw it
	g.drawString (" " + words[i], x, y);
	x += len;
      }
      else {
	// Go to next line.
	x = startx;
	y += fontheight;
	g.drawString (" " + words[i], x, y);
	x += len;
      }
    }

  } // "paint"

} // End of class "NewFrame"

public class TestAwt12 {

  public static void main (String[] argv)
  {
    String[] testwords = {
      "There", "once", "was", "a", "poet", "named", "Heinz",
      "All", "of", "whose", "poems", "had", "just", "two", "lines."
    };
    NewFrame nf = new NewFrame (600,200, testwords, 35);
  }

}
This prints out the following:
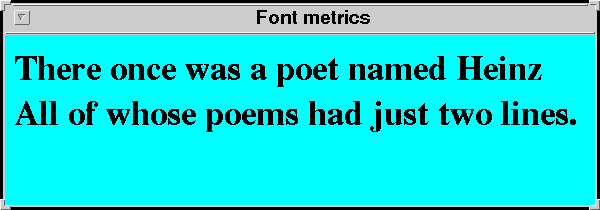
Note:
- We have used the method getSize() in Component
(and therefore in Frame) to get the window size:
(The window size may be changed.)
Dimension D = this.getSize ();
- We have used getInsets to identify the drawable area:
    Insets I = this.getInsets ();
    int max_width = D.width - I.left - I.right - 1;
    int max_height = D.height - I.top - I.bottom - 1;
- The x-value is the leftmost drawable location:
int startx = 0 + I.left;
- However, the first baseline is well-below the
the top of the drawable area.
- Here, we add the font's height (adding the ascent is actually enough):
int y = 0 + I.top + fontheight;
- The list of words and desired font size
is passed to the constructor:
NewFrame nf = new NewFrame (600,200, testwords, 35);
In-Class Exercise 9.4:
Use the following
template to create a frame in which you write the largest
possible "Hello World!" that will fit into the drawable area.
Start with a font size of 10 and increase the size in increments
of 10 until you find the largest possible font that will fit into
the drawable area.
Allow for the situation where the window may be resized.
Images
Java provides some support for loading, manipulating and
displaying images in a window:
- Simple features include:
- Loading a JPEG, GIF or animated GIF image from a file or URL.
- Displaying the image in a Frame using the
drawImage method in Graphics.
- Tracking the "wait" during image upload.
- Advanced features include:
- Creating a buffer for images.
- Manipulating images: shrinking, rotating.
- Defining and using image filters.
- The classes for most simple features are in java.awt
whereas the more complicated stuff is in java.awt.image.
In this module, we will only consider simple image features.
About image formats
- Images consist of pixel values: each pixel is determined
by its "RGB" values, typically 8-bits for each value.
- Images are typically stored in compressed format.
- GIF (Graphical Interchange Format) is one such format:
- GIF (created by CompuServe) uses the lossless Lempel-Ziv-Welch
(LZW) algorithm.
- GIF is probably the most popular format.
- However, there is a patent controversy surrounding GIF.
(Unisys holds the LZW patent).
- JPEG (Joint Photographic Experts Group) is another format:
- JPEG uses lossy compression based on a number of
image-processing techniques such as transforms (DCT)
and quantization.
- JPEG is free.
- JPEG is really an algorithm spec rather than a file spec.
- PNG (Portable Network Graphics) format:
- Lossless format, like GIF.
- Slightly better compression than GIF.
- Free of patent issues.
- Support for transparency and progressive display.
- Java handles GIF, JPEG and PNG formats and decides based on the
extensions .gif, .jpeg or .jpg,
and .png.
The following classes will be useful:
- Image:
- An Image instance is used to store and maintain
pixels from an image.
- The full set of pixels is not necessary -- any subset will do.
- Image does not provide access to the raw pixels.
- To actually get at the pixels, you need to use PixelGrabber.
- Toolkit:
- MediaTracker:
- The getImage() method above is written to return
immediately.
- Thus, as the image loads, it starts filling up the window,
typically, top-down.
- If you want to wait until the entire image has loaded,
use a MediaTracker instance.
- Graphics:
- As with any rendering, the Graphics instance
passed to the paint() method is used.
- The method drawImage() (and its variants) is
is used to display an image.
- ImageObserver:
- ImageObserver is really an interface in java.awt.
- It has just one method.
- The method is used by a image-rendering process to
report on progress, on errors etc.
- An instance must be passed to drawImage().
- The class Component (and therefore Frame)
implements this interface.
- Thus, the Frame instance itself is usually passed
via this.
Let's look at a simple example:
(source file)
import java.awt.*;

class NewFrame extends Frame {

  // Constructor.
  public NewFrame (int width, int height)
  {
    // Set the title and other frame parameters.
    this.setTitle ("Bugs");
    this.setResizable (true);
    this.setBackground (Color.cyan);
    this.setSize (width, height);

    // Show the frame.
    this.setVisible (true);
  }

  // Override paint():
  public void paint (Graphics g)
  {
    // Get a Toolkit instance.
    Toolkit tk = Toolkit.getDefaultToolkit ();

    // Provide a filename to the getImage() method.
    Image img = tk.getImage ("bugs.gif");

    // Use the drawImage method.
    g.drawImage (img, 0, 0, this);
    // Note: we pass "this" as a parameter.
  }

} // End of class "NewFrame"

public class TestAwt13 {

  public static void main (String[] argv)
  {
    NewFrame nf = new NewFrame (300, 200);
  }

}
The result produced is:
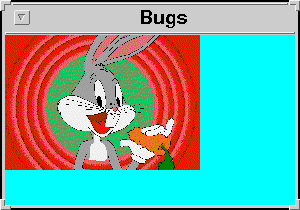
Note:
In the next example, we will fetch an image from a URL:
(source file)
import java.awt.*;
import java.net.*;  // For class URL.

class NewFrame extends Frame {

  // Constructor.
  public NewFrame (int width, int height)
  {
    // Set the title and other frame parameters.
    this.setTitle ("Gif image");
    this.setResizable (true);
    this.setBackground (Color.cyan);
    this.setSize (width, height);

    // Show the frame.
    this.setVisible (true);
  }

  // Override paint():
  public void paint (Graphics g)
  {
    Toolkit tk = Toolkit.getDefaultToolkit ();

    // try-catch needed since URL constructor throws an exception.
    try {
      // URL is in java.net.
      URL u = new URL ("http://www.seas.gwu.edu/~simha/canyon.jpg");

      // Load the image using the second form of getImage().
      Image img = tk.getImage (u);

      // Display image.
      g.drawImage (img, 0, 0, this);
    }
    catch (MalformedURLException e) {
      System.out.println (e);
    }
  } // "paint"

} // End of class "NewFrame"

public class TestAwt14 {

  public static void main (String[] argv)
  {
    NewFrame nf = new NewFrame (600, 300);
  }

}
The result is:
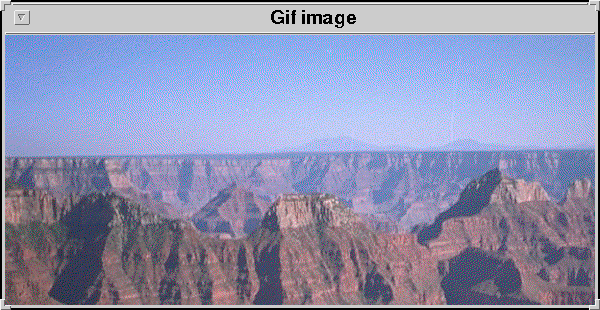
Note:
The getImage() method of Toolkit has
a form that takes in a URL instance.
If you try it out, you will notice that it takes
time for the image to load.
The image is loaded slowly (top-down).
In-Class Exercise 9.5:
Use the following
template to create a frame in which you
load the image at URL
http://www.seas.gwu.edu/~simha/mystery_person.jpg.
and then fit the image so that it fits exactly into the
drawable area. To do this:
- use the method getSize() in Frame to get
a Dimension instance which contains the width
and height of the frame.
- use the method getInsets() in Frame to
obtain the insets.
- use another version of drawImage() that allows
you to specify the desired width and height for the image:
  public boolean drawImage (Image img, int x, int y, int width,
                            int height, ImageObserver I);
Can you identify the person in the picture?
Next, we will use a MediaTracker instance to
complete loading before display:
(source file)
  public void paint (Graphics g)
  {
    Toolkit tk = Toolkit.getDefaultToolkit ();

    try {
      URL u = new URL ("http://www.seas.gwu.edu/~simha/canyon.jpg");
      Image img = tk.getImage (u);

      // Create an instance of MediaTracker and
      // pass a Frame instance as parameter (via "this").
      MediaTracker mt = new MediaTracker (this);

      // Add the image instance to the tracker.
      mt.addImage (img, 1);

      // We will use a "wait" (clock) cursor while the
      // image is loading.
      this.setCursor (Cursor.getPredefinedCursor (Cursor.WAIT_CURSOR));

      // Ask the MediaTracker to wait.
      try {
	mt.waitForID (1);
      }
      catch (InterruptedException e) {
	System.out.println (e);
      }
      // Now the image has been loaded.

      // Return to default cursor.
      this.setCursor (Cursor.getPredefinedCursor (Cursor.DEFAULT_CURSOR));

      // Draw the complete image.
      g.drawImage (img, 0, 0, this);
    }
    catch (MalformedURLException e) {
      System.out.println (e);
    }
  } // "paint"
In-Class Exercise 9.6:
Use the following
template to create a frame in which you
load the four images guy1.gif, guy2.gif, guy3.gif
and guy4.gif at URL
http://www.seas.gwu.edu/~simha/.
(Thus, the URL for guy1.gif is
http://www.seas.gwu.edu/~simha/guy1.gif).
This time, instead of fitting the images to the frame, fit
the frame to hold all images in a row so that the frame width
at least the sum of the image widths and the frame height is
at least as large the the maximum height of the images.
The following methods will be useful:
- Use MediaTracker to wait for all images to be loaded.
- Class Image has methods getWidth() and
getHeight() to obtain the width and height of an image
(after its loaded).
- Both the above methods need to be given an ImageObserver
instance as a parameter.
- Use getInsets() as before to get the insets.
- Use setSize(int w, int h) to set the size of the frame.
- Finally, use drawImage() to draw the images at the
right places.
Interaction: buttons
Thus far, we have only drawn or painted on a window.
To allow a user to interact, we need to receive user input
in the form of mouse-clicks or keyboard characaters.
We will first consider a simple "quit" button as an example:
(source file)
import java.awt.*;

class NewFrame extends Frame {

  // Constructor.
  public NewFrame (int width, int height)
  {
    // Set the title and other frame parameters.
    this.setTitle ("Button example");
    this.setResizable (true);
    this.setBackground (Color.cyan);
    this.setSize (width, height);

    // Create a Button instance and pass the button
    // label as a parameter to the constructor.
    Button b = new Button ("Quit");

    // Set the layout manager for our Frame.
    this.setLayout (new BorderLayout());

    // Add the button to the frame.
    this.add (b);

    // Show the frame.
    this.setVisible (true);
  }

} // End of class "NewFrame"


public class TestAwt16 {

  public static void main (String[] argv)
  {
    NewFrame nf = new NewFrame (300, 200);
  }

}
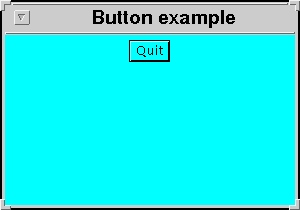
The result produced is:
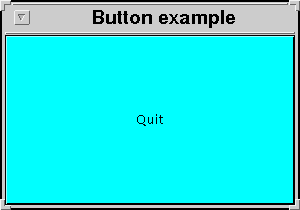
Note:
- The button occupies the entire visible area of the frame.
(This is a result of the layout method used).
- This button does flash when clicked, but nothing happens.
(We haven't created a button-pressed event-handler yet).
- Class Button is used to create a button instance:
- Here is (part of) the definition of Button:
  public class Button extends Component {

    // Constructors.
    public Button ();
    public Button (String label);

    // Methods.
    public synchronized void addActionListener (ActionListener a);
    public String getLabel ();
    public synchronized void setLabel (String label);

    // ...
  }
- The label inside a button is passed as a String
to the Button constructor:
Button b = new Button ("Quit");
- Since Button extends Component, it
inherits a whole bunch of methods, e.g.,
- setBackground (Color c) - set the background color
of the button.
- setForeground (Color c) - set the font color.
- setFont (Font) - set the font used.
- Each container, like a Frame uses a
layout manager to arrange components for display:
- Layout managers don't let you control exact locations,
but give you some options in controlling the layout.
- Layout managers also ignore sizes of components
- There are five layout managers:
- BorderLayout: this manager tries to place components
either in one of five locations: North, South, East, West
or Center (default).
- FlowLayout: this manager places components left to right
and row-by-row (in standard scan order).
- CardLayout: this manager displays only one component at
a time, like a rolodex.
- GridLayout: this manager places components in a grid.
- GridBagLayout: this manager uses a grid-like approach
that allows for different row and column sizes.
- Each layout manager is a class in java.awt.
- We will cover layout managers later.
- The setLayout() method is used to choose the layout manager.
- The default layout manager for a Frame is
BorderLayout, so the setLayout() call was not really
necessary, but was used here to highlight the layout manager.
- The add method is used to add a component:
- Finally, the code for creating and adding a button is inside
the constructor of NewFrame:
- An alternative would have been to place the code in paint():
(source file)
  public void paint (Graphics g)
  {
    // Create a Button instance and pass the button
    // label as a parameter to the constructor.
    Button b = new Button ("Quit");

    // Set the layout manager for our Frame.
    this.setLayout (new BorderLayout());

    // Add the button to the frame.
    this.add (b);

    // Call validate to re-compute what's
    // inside a container.
    this.validate();
  }
- This works, but creates new Button and BorderLayout
instances each time paint() is called - it is very
inefficient!
- An alternative (also not desirable) is to place the button
outside the frame, e.g.,
(source file)
public class TestAwt18 {

  public static void main (String[] argv)
  {
    NewFrame nf = new NewFrame (300, 200);

    // Create a Button instance and pass the button
    // label as a parameter to the constructor.
    Button b = new Button ("Quit");

    // Set the layout manager for the frame.
    nf.setLayout (new BorderLayout());

    // Add the button to the frame.
    nf.add (b);

    // Call validate to reset:
    nf.validate();
  }

}
- Note that we used the validate() method of Container
(inherited by NewFrame that is needed to "reset" the
interior, so that the button can be displayed.
Next, let us try making small changes in the layout:
- First, we will explicitly ask BorderLayout to
place the button in the "South" area of the window:
(source file)
  // Constructor.
  public NewFrame (int width, int height)
  {
    // Set the title and other frame parameters.
    this.setTitle ("Button example");
    this.setResizable (true);
    this.setBackground (Color.cyan);
    this.setSize (width, height);

    // Create a new button.
    Button b = new Button ("Quit");

    // BorderLayout is already the manager so
    // we leave the setLayout commented out.
    // this.setLayout (new BorderLayout());

    // Add the button to the frame.
    this.add (b, BorderLayout.SOUTH);

    // Show the frame.
    this.setVisible (true);
  }
This produces:
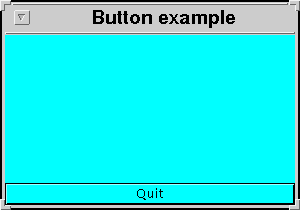
Note:
- This time, the button has a "normal" height, but is stretched
to occupy all available width.
- A different version of add is used: a constant
is passed as parameter to indicate "South".
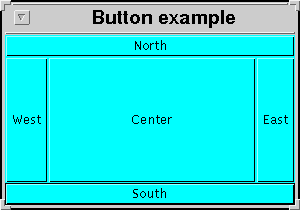
- To see where BorderLayout places items, let's
insert five buttons with this code:
(source file)
    this.add (new Button ("South"), BorderLayout.SOUTH);
    this.add (new Button ("North"), BorderLayout.NORTH);
    this.add (new Button ("East"), BorderLayout.EAST);
    this.add (new Button ("West"), BorderLayout.WEST);
    this.add (new Button ("Center"), BorderLayout.CENTER);
- Here is the result:
- Next, let's use FlowLayout:
Next, we will make two improvements:
- We will add code to change the button's colors and font.
- We will add an event-listener that handles the
case when the button is pressed.
Here is the code:
(source file)
import java.awt.*;
import java.awt.event.*; // Needed for ActionListener.

class NewFrame extends Frame implements ActionListener {

  // Constructor.
  public NewFrame (int width, int height)
  {
    // Set the title and other frame parameters.
    this.setTitle ("Button example");
    this.setResizable (true);
    this.setBackground (Color.cyan);
    this.setSize (width, height);

    // Create a new button.
    Button b = new Button ("Quit");

    // Set the background color of the button.
    b.setBackground (Color.red);

    // Set the font of the button label.
    b.setFont (new Font ("Serif", Font.PLAIN | Font.BOLD, 15));

    // Add an ActionListener to the button.
    b.addActionListener (this);

    // BorderLayout is already the manager so
    // we leave the setLayout commented out.
    // this.setLayout (new BorderLayout());

    // Add the button to the south of the frame.
    this.add (b, BorderLayout.SOUTH);

    // Show the frame.
    this.setVisible (true);
  }

  // This method is required to implement the
  // ActionListener interface.
  public void actionPerformed (ActionEvent a)
  {
    // Button must have been pressed - so really quit.
    System.exit (0);
  }

} // End of class "NewFrame"


public class TestAwt22 {

  public static void main (String[] argv)
  {
    NewFrame nf = new NewFrame (300, 200);
  }

}
Here is the result:
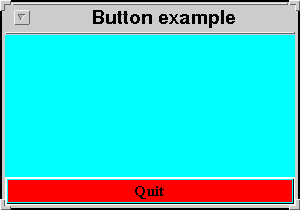
Note:
In-Class Exercise 9.7:
In this example, you will create a frame with some truly awful
color combinations.
Use the following
template to create a frame in which you post
four buttons using the FlowLayout manager:
- Quit - quit when this button is pressed.
- Orange - write "Hello World" at location (100,100) in orange
color when this button is pressed.
- Pink - write "Hello World" at location (100,100) in pink
color when this button is pressed.
- Yellow - write "Hello World" at location (100,100) in yellow
color when this button is pressed.
Thus, you need to add lines to actionPerformed() to set
a color. Then, you need to call repaint() at the end of
actionPerformed. Finally, you need to implement
the method paint (as we have done before) to actually
draw the string "Hello World!" in the desired color. Note
that the signature of paint must be:
public void paint (Graphics g);
Interaction: mouse clicks
We will now write a simple program to perform some drawing
based on mouse-clicks:
- Whenever the user clicks the mouse inside the frame, a line
is drawn from the last click-place to the current click place.
- The starting point for the first segment will be (0,0).
- The frame will have a quit button.
To "listen" for mouse-clicks, we need an object that implements
the MouseListener interface:
Here is the code:
(source file)
class NewFrame extends Frame
  implements ActionListener, MouseListener {

  // Constructor.
  public NewFrame (int width, int height)
  {
    // Set the title and other frame parameters.
    this.setTitle ("Button example");
    this.setResizable (true);
    this.setBackground (Color.cyan);
    this.setSize (width, height);

    // Create a quit button.
    Button b = new Button ("Quit");
    b.setBackground (Color.red);
    b.setFont (new Font ("Serif", Font.PLAIN | Font.BOLD, 15));
    b.addActionListener (this);
    // this.setLayout (new BorderLayout());
    this.add (b, BorderLayout.SOUTH);

    // Add mouse-listening to the frame itself.
    this.addMouseListener (this);

    // Show the frame.
    this.setVisible (true);
  }

  // This method is required to implement the
  // ActionListener interface.
  public void actionPerformed (ActionEvent a)
  {
    // Button must have been pressed - so really quit.
    System.exit (0);
  }

  int current_x=0, current_y=0;

  // These methods are required to implement
  // the MouseListener interface.
  public void mouseClicked (MouseEvent m)
  {
    System.out.println ("mouseClicked event: " + m.paramString());
    int x = m.getX();
    int y = m.getY();
    Graphics g = this.getGraphics();
    g.drawLine (current_x, current_y, x, y);
    current_x = x;
    current_y = y;
  }

  // We need to implement these methods, but
  // don't actually have to do anything inside.
  public void mouseEntered (MouseEvent m) {}
  public void mouseExited (MouseEvent m) {}
  public void mousePressed (MouseEvent m) {}
  public void mouseReleased (MouseEvent m) {}

} // End of class "NewFrame"
The result (after a few random mouse clicks):
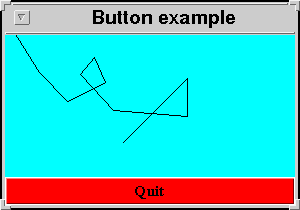
Note:
- To handle mouse events (clicking, dragging, entering etc),
a "mouse listener" needs to be passed to the widget that
"sees" the events:
- The mouse events take place in the frame.
- Thus, we need to pass a "mouse listener" to the frame:
this.add ( /* mouse listener */ );
- In our example, the frame itself implements MouseListener.
- Therefore, we pass the frame itself:
    // Add mouse-listening to the frame itself.
    this.addMouseListener (this);
- The MouseListener interface was implemented
by overriding all the abstract methods in the interface.
- The only one we were really interested in was
mouseClicked().
- For the others, we provided empty bodies:
  public void mouseEntered (MouseEvent m) {}
  public void mouseExited (MouseEvent m) {}
  public void mousePressed (MouseEvent m) {}
  public void mouseReleased (MouseEvent m) {}
- The method MouseClicked is called whenever the
mouse is clicked within the frame:
- The parameter MouseEvent carries information,
e.g., the pixel coordinates of the place the mouse was clicked.
- Observe that it is possible to draw in methods
other than paint:
Panels and canvases
AWT provides several widgets for GUI's. We will look at two
of these now:
- Panel:
- A Panel is used to "contain" other components.
- Example: you may want to organize a collection of buttons
into one unit.
- Another use: you can use a different layout manager within
a panel.
- Canvas:
- A canvas is used for drawing or displaying an image.
- Since a canvas does not have a border, you don't have
to worry about insets at all.
- Drawing can be localized to the canvas and does not interfere with
other components in a frame.
In our example, we will:
- create a white canvas for drawing (with blue lines);
- use the quit button in the previous example;
- create a start button that must be pressed to start drawing;
- create a clear button that resets the canvas;
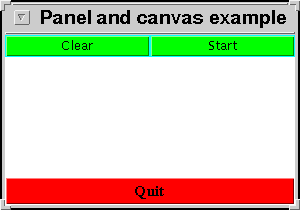
Here is what we want the frame to look like:
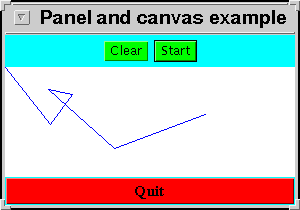
The code:
(source file)
import java.awt.*;
import java.awt.event.*; // Needed for ActionListener.

class NewFrame extends Frame
  implements ActionListener, MouseListener {

  // Data.
  Button quitb, clearb, startb;
  Canvas c;
  Panel p;
  boolean start = false;

  // Constructor.
  public NewFrame (int width, int height)
  {
    // Set the title and other frame parameters.
    this.setTitle ("Panel and canvas example");
    this.setResizable (true);
    this.setBackground (Color.cyan);
    this.setSize (width, height);

    // Create a quit button.
    quitb = new Button ("Quit");
    quitb.setBackground (Color.red);
    quitb.setFont (new Font ("Serif", Font.PLAIN | Font.BOLD, 15));
    quitb.addActionListener (this);
    // this.setLayout (new BorderLayout());
    this.add (quitb, BorderLayout.SOUTH);

    // Create a white canvas.
    c = new Canvas ();
    c.setBackground (Color.white);
    c.setForeground (Color.blue);
    c.addMouseListener (this);

    // Add canvas to frame in the center.
    this.add (c, BorderLayout.CENTER);

    // Create a Panel
    p = new Panel ();
    p.setLayout (new FlowLayout());

    // Create a clear button.
    clearb = new Button ("Clear");
    clearb.addActionListener (this);
    clearb.setBackground (Color.green);

    // Add clear button to panel.
    p.add (clearb);

    // Create a start button.
    startb = new Button ("Start");
    startb.addActionListener (this);
    startb.setBackground (Color.green);

    // Add start button to panel.
    p.add (startb);

    // Now add the panel to the frame.
    this.add (p, BorderLayout.NORTH);

    // Show the frame.
    this.setVisible (true);
  }

  // This method is required to implement the
  // ActionListener interface.
  public void actionPerformed (ActionEvent a)
  {
    String s = a.getActionCommand();
    if (s.equalsIgnoreCase ("Quit"))
      System.exit(0);
    else if (s.equalsIgnoreCase ("Clear")) {
      // Note: must call repaint() of canvas
      // to reset the background.
      c.setBackground (Color.white);
      c.repaint ();
      current_x = current_y = 0;
    }
    else if (s.equalsIgnoreCase ("Start"))
      start = true;
  }

  int current_x=0, current_y=0;

  // These methods are required to implement
  // the MouseListener interface.
  public void mouseClicked (MouseEvent m)
  {
    if (!start) // User must click start once to draw.
      return;
    int x = m.getX();
    int y = m.getY();
    Graphics g = c.getGraphics();
    g.drawLine (current_x, current_y, x, y);
    current_x = x;
    current_y = y;
  }

  // We need to implement these methods, but
  // don't actually have to do anything inside.
  public void mouseEntered (MouseEvent m) {}
  public void mouseExited (MouseEvent m) {}
  public void mousePressed (MouseEvent m) {}
  public void mouseReleased (MouseEvent m) {}

} // End of class "NewFrame"


public class TestAwt24 {

  public static void main (String[] argv)
  {
    NewFrame nf = new NewFrame (300, 200);
  }

}
Note:
- The frame continues to use a BorderLayout:
- The canvas is placed in the center (BorderLayout.CENTER).
- The quit button is placed SOUTH.
- The panel (containing the other two buttons) is placed NORTH.
- Since the frame implements the listeners, the frame
itself is passed via this to the add-listener methods:
    quitb.addActionListener (this);
    c.addMouseListener (this);
- Since we want only the canvas to react to mouse-clicks, we
set only its mouse-listener (to this).
c.addMouseListener (this);
- We used a FlowLayout for the
Panel:
- Observe that every button-press (for any button)
results in a call to the
same method: actionPerformed() in the frame:
- To clear the canvas' background, we set the background color
and repaint the canvas:
      c.setBackground (Color.white);
      c.repaint ();
- To draw on the canvas, we must use the graphics context
of the canvas:
    Graphics g = c.getGraphics();
    g.drawLine (current_x, current_y, x, y);
In-Class Exercise 9.8:
Use the following template
to modify the above drawing canvas so that a user may select
a line color from among orange, pink and yellow. Place buttons
with those names (as you did in Exercise 9.7) and when a
color button is clicked, change the canvas' Foreground
color.
The methods paint(), repaint()
and update()
The class Component defines methods called
paint(), repaint() and update().
The way these methods interact can sometimes create strange
results.
First, consider what the methods are intended for:
- paint():
- paint() is where you place code for drawing, writing
etc.
- Initial placement of buttons and other widgets should not
be done in paint().
- Whenever a rendering is thought to be "damaged" (e.g,
partially covered by another window), paint() is called
to re-draw the scene.
- Note: AWT maintains information about the size of the "drawn"
area, so that if a portion of the window outside this
area is covered and un-covered,
paint() may not be called.
- Thus, if buttons are created in paint, new buttons
will be created each time
paint()
is called. This is why you shouldn't create buttons in
paint().
- Note: paint() is given a Graphics context
as a parameter.
- update():
- update is called when the window is re-sized.
- The default implementation of update():
- first clears the background;
- then calls paint().
- repaint():
- The repaint() is intended to allow various
methods to call for a re-rendering of the component.
- No graphics context is needed for repaint().
- A call to repaint() calls update().
Here's an example of a weird effect:
- The code below responds to mouse-clicks and draws line
segments.
- After each mouse click, repaint() is called.
(A mistake).
The code: (source file)
class NewFrame extends Frame
  implements ActionListener, MouseListener {

  // Constructor.
  public NewFrame (int width, int height)
  {
    // Set the title and other frame parameters.
    this.setTitle ("Paint and Update");
    this.setResizable (true);
    this.setBackground (Color.cyan);
    this.setSize (width, height);

    // Create a quit button.
    Button b = new Button ("Quit");
    b.setBackground (Color.red);
    b.setFont (new Font ("Serif", Font.PLAIN | Font.BOLD, 15));
    b.addActionListener (this);
    // this.setLayout (new BorderLayout());
    this.add (b, BorderLayout.SOUTH);

    // Add mouse-listening to the frame itself.
    this.addMouseListener (this);

    // Show the frame.
    this.setVisible (true);
  }

  public void actionPerformed (ActionEvent a)
  {
    System.exit (0); // Quit button pressed.
  }

  int current_x=0, current_y=0;
  int new_x, new_y;

  // These methods are required to implement
  // the MouseListener interface.
  public void mouseClicked (MouseEvent m)
  {
    new_x = m.getX();
    new_y = m.getY();

    // Call repaint to reflect new line.
    repaint();
  }

  public void mouseEntered (MouseEvent m) {}
  public void mouseExited (MouseEvent m) {}
  public void mousePressed (MouseEvent m) {}
  public void mouseReleased (MouseEvent m) {}

  public void paint (Graphics g)
  {
    System.out.println ("Paint: cx=" + current_x + ",cy=" + current_y
			+ ", nx=" + new_x + ",ny=" + new_y);
    g.drawLine (current_x, current_y, new_x, new_y);
    current_x = new_x;
    current_y = new_y;
  }

} // End of class "NewFrame"
Note:
- The call to repaint ends up calling update.
- But update clears the screen before calling paint().
- Thus, only the most recent line segment will be visible.
This problem can be fixed by calling paint instead
of repaint:
  public void mouseClicked (MouseEvent m)
  {
    new_x = m.getX();
    new_y = m.getY();

    // Instead of calling repaint(),
    // call paint() directly, with the
    // correct graphics context.
    Graphics g = this.getGraphics();
    paint (g);
  }
Note:
- Note that a Graphics instance needs to be
passed to paint.
- The getGraphics() is used to retrieve the instance.
- Now the problem is eliminated.
- However, this code still has a problem: every time
the frame is re-sized, the background is cleared (overwritten).
- This is because update is called and update
clears the background.
To solve the above problem, we simply override update()
and make sure the background is not cleared:
(source file)
  // Override update() and make sure the
  // background is not cleared.
  public void update (Graphics g)
  {
    paint (g);
  }
Note:
- Since repaint() calls update() and
we have made update "safe", we can now go back to calling
repaint() in mouseClicked().
- Generally, many programs that perform animations will want
to avoid flicker by redefining update as above.
Applets - a first look
Applets are Java's mechanism for executing code inside a
browser.
An applet is created by extending the class Applet
in the package java.applet.
As an example, let us create an applet version of the
mouse-click drawing code we created in a frame:
Here is the applet code, in TestApplet.java:
(source file)
import java.awt.*;
import java.awt.event.*;
import java.applet.*;      // Must import the Applet class in here.

public class TestApplet extends Applet
  implements ActionListener, MouseListener {

  // Data.
  Button quitb, clearb, startb;
  Canvas c;
  Panel p;
  boolean start = false;

  // Constructor.
  public void init()
  {
    // Title and size cannot be set in an applet.
    this.setBackground (Color.cyan);

    // Create a quit button.
    quitb = new Button ("Quit");
    quitb.setBackground (Color.red);
    quitb.setFont (new Font ("Serif", Font.PLAIN | Font.BOLD, 15));
    quitb.addActionListener (this);

    // Default for an applet is FlowLayout.
    this.setLayout (new BorderLayout());
    this.add (quitb, BorderLayout.SOUTH);

    // Create a white canvas.
    c = new Canvas ();
    c.setBackground (Color.white);
    c.setForeground (Color.blue);
    c.addMouseListener (this);

    // Add canvas to frame in the center.
    this.add (c, BorderLayout.CENTER);

    // Create a Panel
    p = new Panel ();
    p.setLayout (new FlowLayout());

    // Create a clear button.
    clearb = new Button ("Clear");
    clearb.addActionListener (this);
    clearb.setBackground (Color.green);

    // Create a start button.
    startb = new Button ("Start");
    startb.addActionListener (this);
    startb.setBackground (Color.green);

    // Add start and clear buttons to panel.
    p.add (clearb);
    p.add (startb);

    // Now add the panel to the frame.
    this.add (p, BorderLayout.NORTH);

    // Show the frame.
    this.setVisible (true);
  }

  // This method is required to implement the
  // ActionListener interface.
  public void actionPerformed (ActionEvent a)
  {
    String s = a.getActionCommand();
    if (s.equalsIgnoreCase ("Quit"))
      System.exit(0);
    else if (s.equalsIgnoreCase ("Clear")) {
      // Note: must call repaint() of canvas
      // to reset the background.
      c.setBackground (Color.white);
      c.repaint ();
      current_x = current_y = 0;
    }
    else if (s.equalsIgnoreCase ("Start"))
      start = true;
  }

  int current_x=0, current_y=0;

  // These methods are required to implement
  // the MouseListener interface.
  public void mouseClicked (MouseEvent m)
  {
    if (!start) // User must click start once to draw.
      return;
    int x = m.getX();
    int y = m.getY();
    Graphics g = c.getGraphics();
    g.drawLine (current_x, current_y, x, y);
    current_x = x;
    current_y = y;
  }

  public void mouseEntered (MouseEvent m) {}
  public void mouseExited (MouseEvent m) {}
  public void mousePressed (MouseEvent m) {}
  public void mouseReleased (MouseEvent m) {}

} // End of class "TestApplet"
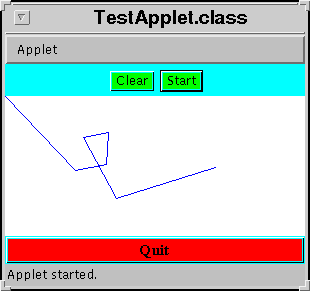
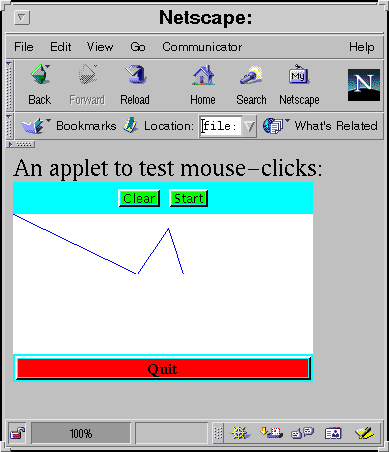
To execute the applet, there are several options:


