
Before you can develop Java applications, you'll need
to download the Java Development Kit (JDK) that allows you to compile
and run your Java Programs.
The JDK is really a collection of software programs, some of which
you might never use and some of which you might use later.
The following instructions are based on instructions given at SUN's
Java site.
Installing the JDK
There are many versions of JDK for different Java versions, you are advised to use the most recent version of JDK which can be obtained from SUN's official Java site, http://java.sun.com/. If you look around this homepage at SUN, you will likely spot a link to "downloads" or "popular downloads". Here is where you will want to down the latest JDK (or J2SE, as it's sometimes called). The most current version at the time of this writing is the Java 2 SDK v1.4 (or J2SE v1.4.2), which contains all the tools you will need for this tutorial.
Here is a screen shot of what the Javasoft download site might look like. Make sure to take time to download the online documentation as well.
The installation process is fairly straightforward, but you should consult the documentation if you encounter problems. And here is an example of a Save Dialog generated by my web browser when downloading ...
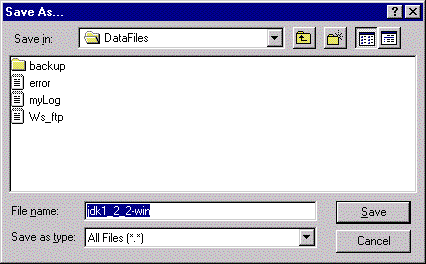
To keep your hard disk organized, install the JDK in a top level folder like "C:\Java\JDK_VERSION" to avoid conflict with future Java downloads. For example ...
Under Windows, you set environmental
variables by modifying
the autoexec.bat file, located in the root directory of your hard-drive.
This batch file is executed on startup; modifications to this file will
not take effect until you reboot. Remember to reboot!,
Modifying autoexec.bat Before starting the modification, copy your
current autoexec.bat to another file called, say, autoexec.premodify.
This way, if anything goes wrong,
you can always return to how things were before you started making changes.
You'll need to edit the autoexec.bat file with a simple text
editor. Open it up, and add a path statement pointing to the /bin/ directory
under your JDK installation directory.
Use a simple text editor, like NotePad (i.e., get into NotePad and
"open" the file autoexec.bat) or the DOS command 'edit'.
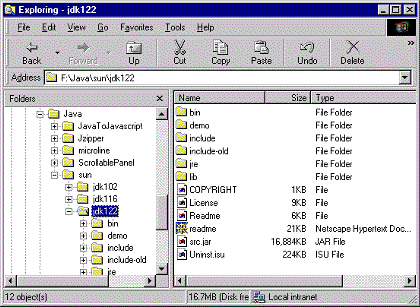
For example, if I had installed my JDK to
C:\java\, I'd
want to point the PATH variable to C:\java\bin\. However, you must also
be careful not to overwrite existing PATH statements set for other software
packages. To prevent this, use the following statement (modifying directory
for your installation location).
Next, you need to set the classpath to include the current
directory. The classpath helps JDK locate Java software (class files) that
are installed on your machine. Although some versions of JDK don't require this,
it's best to set this environmental variable properly.
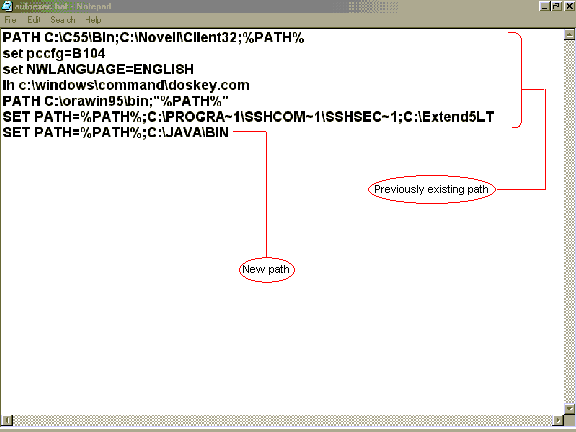
C:> edit autoexec.bat
set path=%path%;c:\java\bin\
set classpath=%classpath%;.\
A snapshot of a sample autoexec.bat is shown below:
Once this is all completed,
reboot and you'll be ready to start writing
your first Java program.