Installing and Using Git Bash


1.0    What is GitBash and who is this for?

 
The purpose of this page:

What you will need to do:


2.0    The first time: installation

 
  1. Download and install Git Bash from the Git's official download's page.

  2. Upon completion of the installation, you should be able to search for the Git Bash program by starting to type "git" down in the Windows Search Bar at the bottom left of the screen, which will open a new shell ready for your use:

  3. Git Bash comes preconfigured so that you do not need to do much in the way of further set up.


3.0    Subsequent uses (after installation)


Assuming the installation worked above, this section is for how to use GitBash regularly, each time you open your laptop for working on assignments.

  1. Now that you've installed GitBash, you do NOT need to visit the GitBash website nor download it again.

  2. To open the GitBash program, start by searching for the Git Bash program in the Windows Search Bar as done the first time after the initial installation:

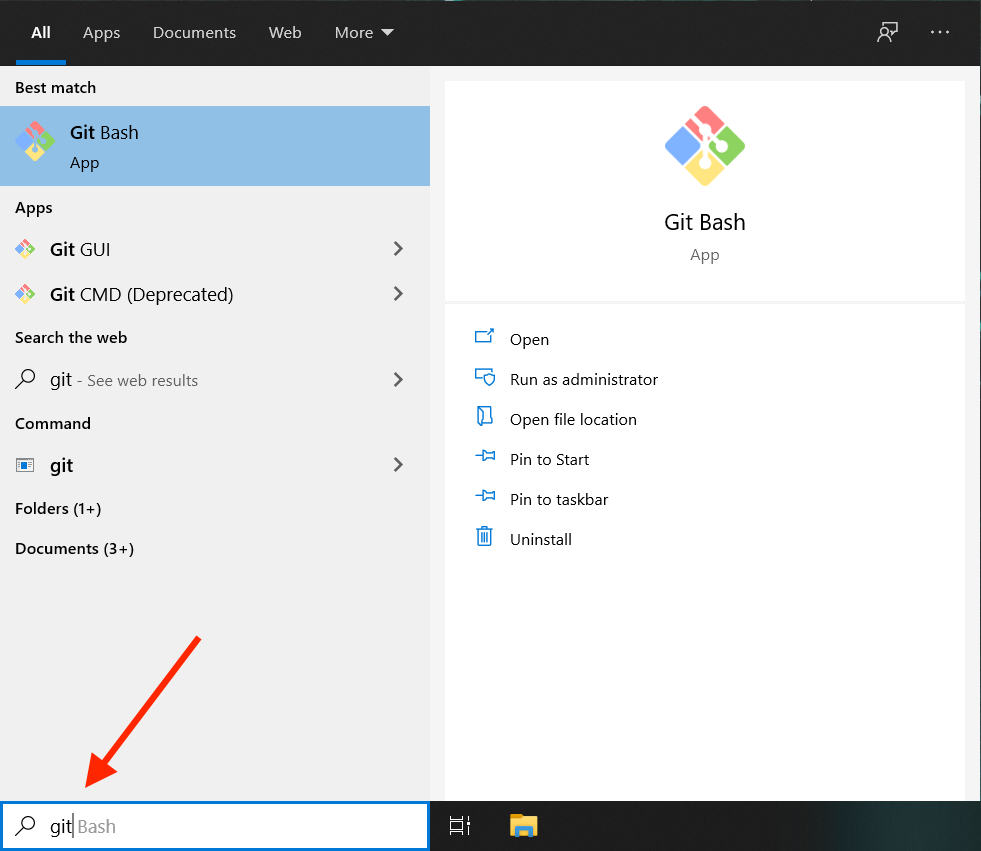
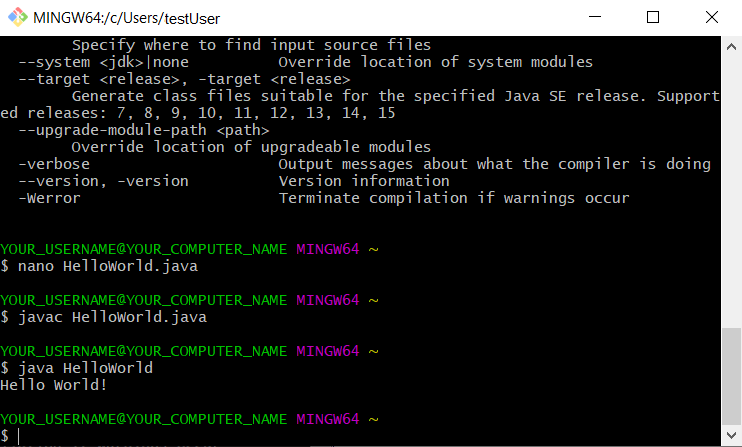
    Selecting "Git Bash" above will open what's called a new shell.

    Shell is jargon for this type of software where you type in text commands. This is also called a commandline or terminal interface.

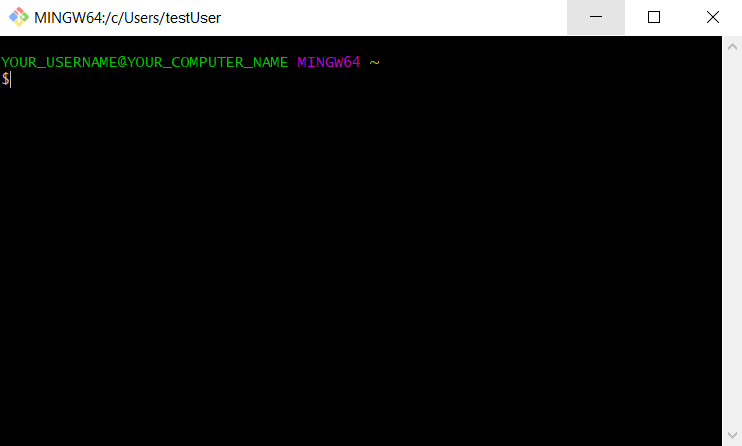
    The line that first displays is called your "shell prompt," which lets you know that the shell is ready for you to type commands. Each shell prompt is customized by Git for each user, but we tweaked ours to show you approximately what yours might look like (Yours can, and will likely, be different to some extent. Any differences do not matter):

    The window above is what you should have ready when you start any programming exercise.

  3. Later, you will learn to navigate into folders using the cd command.
    • This navigation is important because different exercises and assignments will need to be in different folders.
    • You can do "folder" organizing with Windows Explorer, but to work with a program, you have make GitBash go to the right folder (using the cd) command typed in above.

4.0    Next steps: trying out a Java program


  • You can and should verify that you have access to the Java compiler by typing javac at the command-line (followed by return, or the Enter key). You should get something like:

  • If javac was not found, you might not have Java installed. In this case:
    • Use a browser to search for "install jdk"
    • This takes you to the Oracle website for Java SE downloads.
    • You may need to sign up for a (free) account.
    • Then, download the JDK that's compatible with your Windows laptop.
    • After downloading, go through the install process.
    • After that's complete, come back and open a new git-bash.
    We'll assume that you have a JDK (Java Development Kit) installed from here on.

  • Now type pico HelloWorld.java at the command-line to bring you into the pico editor.

  • If pico HelloWorld.java did not work, type nano HelloWorld.java, - they're the same editor.

  • Then, type in your HelloWorld program:
    Type ctrl-X to save.

  • Finally, compile and execute:

  • Now let's repeat this but after making a directory:
    • Delete your earlier GitBash window and open it again.
    • Type cd Desktop to put you in the Desktop.
    • Type mkdir test to create a folder called test.
    • Type cd test to enter that directory. (Remember for later: cd .. to go back up to the parent directory).
    • Now type pico HelloWorld.java to type up your HelloWorld program.
    • Try out the compile and execution commands as shown above.


5.0    Finding the home folder and making a zip of a folder


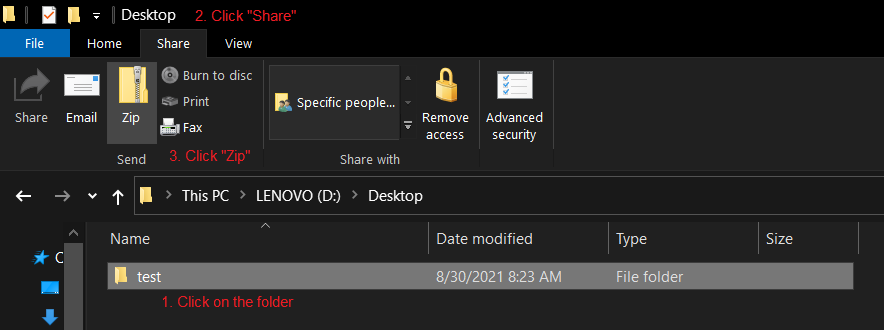
Can one navigate to gitbash-created folders using Windows Explorer, does one need to? The answer is yes and yes. It's useful when you want to make a zip of your module folders.

  • Step 1: Down near the search bar on a windows computer is the "file explorer" icon. You can click this to open up file explorer (there are other ways, such as typing "file explorer" into the search bar, but that is not necessary).

  • Step 2: Then, on the left, there is a menu of icons. You may need to scroll down some to find the correct icon. Click on the one that says "Windows." That is usually written as "Windows (C:)" like in the image, but it may be "Windows (D:)" or another alphabet letter if you have some customized setup on your computer.

  • Step 3: One of the folders inside your "Windows" (also called "C:") folder is the "Users" folder. Double click on it to go inside the folder.

  • Step 4: You should see a folder that corresponds to your username. Our username is "testUser" on this computer, so that's the one we use. Double click on the folder with your username (Here, we're using "testuser" as a demonstration. On your laptop, it'll have your username.)

  • Step 5: You should now see a set of folders for "Desktop," "Documents," "Downloads," etc. Where you are now, in the directory (folder) just above your Desktop folder, is your "home directory."

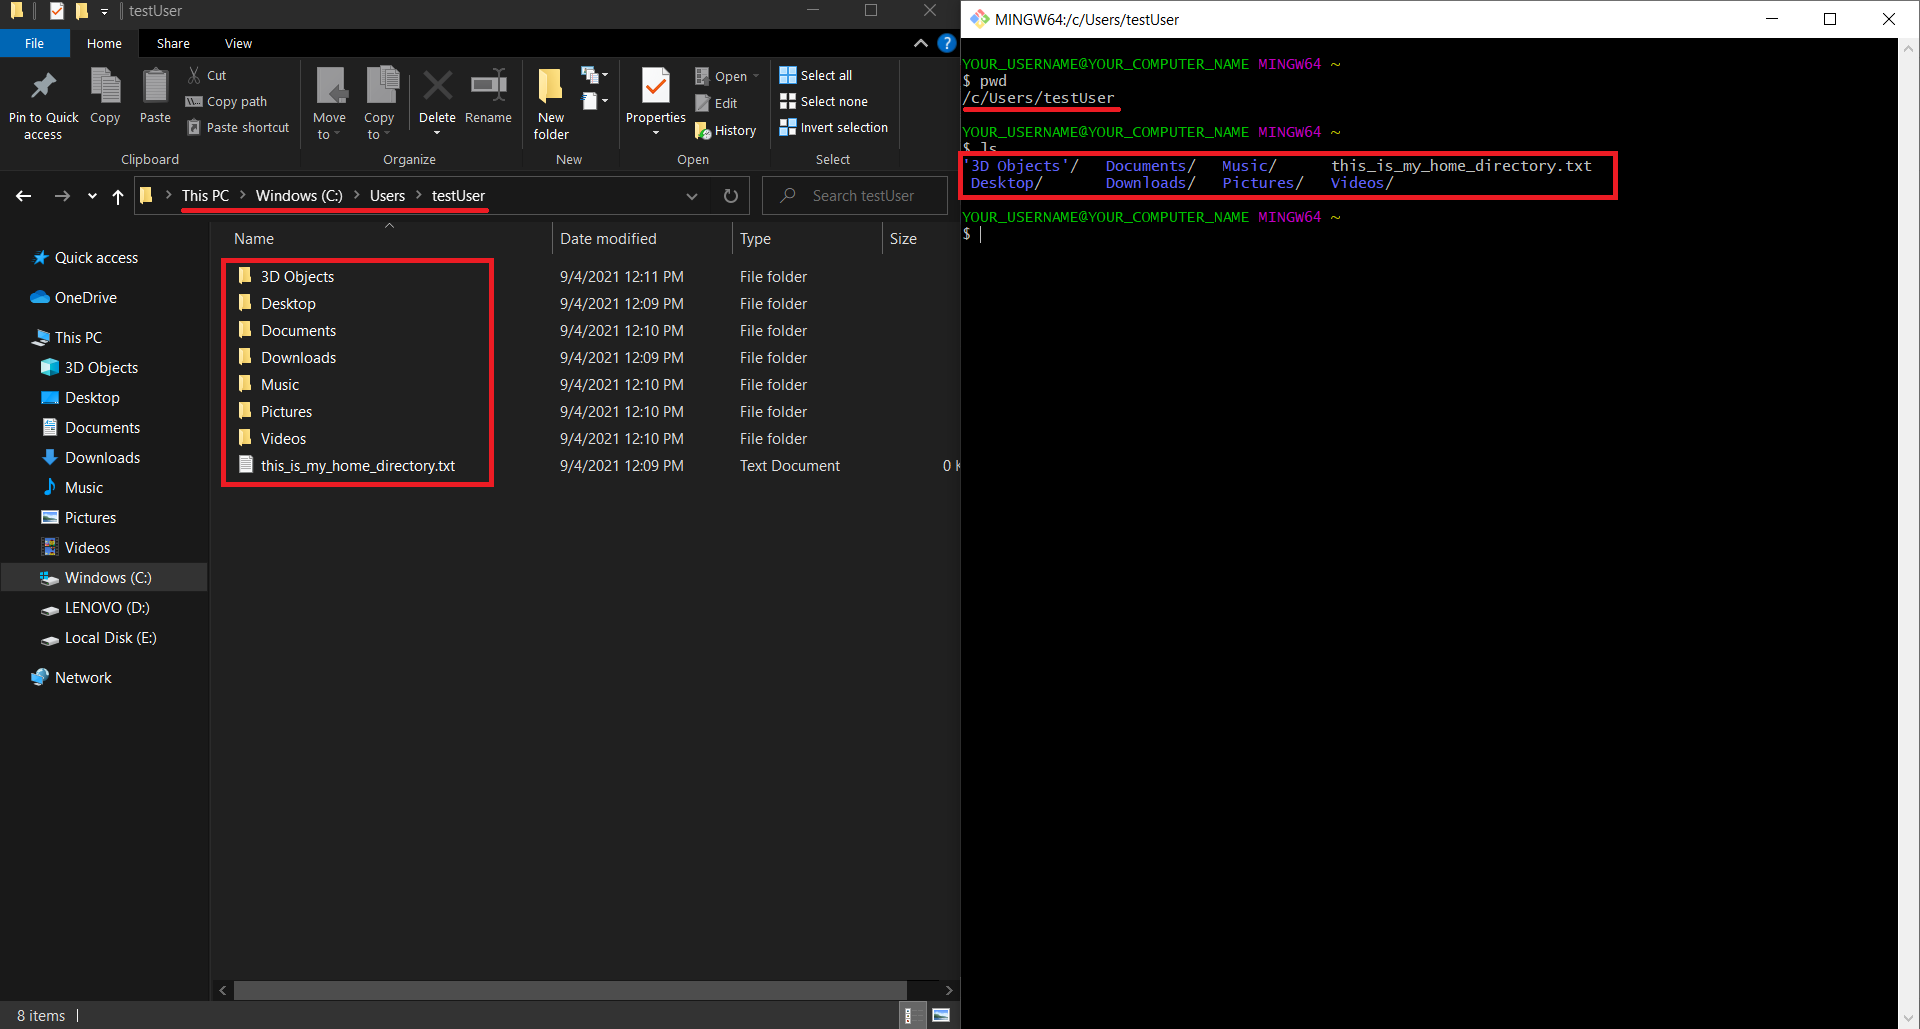
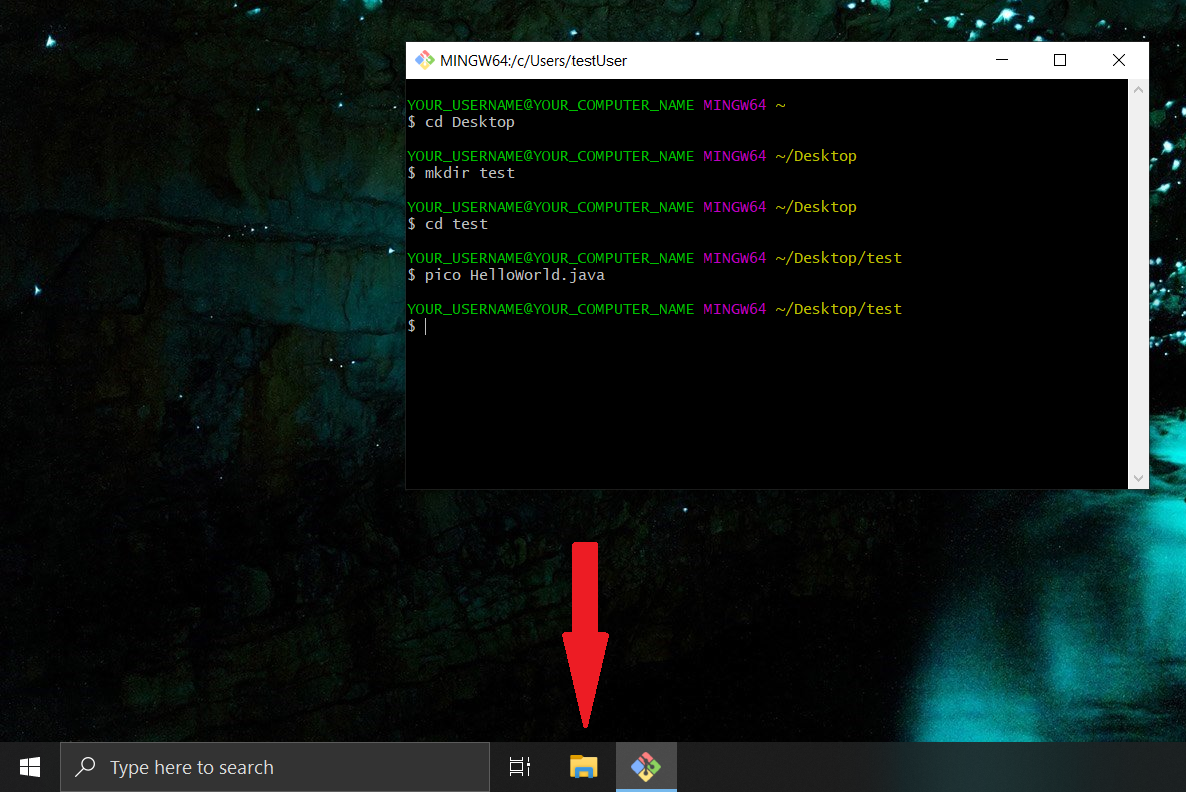
    If you start Git Bash, it places you in this "home directory" (home folder) just above your Desktop and those other folders.

See the side-by-side of the "File Explorer" view versus the "Git Bash" view above. On both sides, the red-underlined part is the "Path," (also known as the location) of your home directory:

Git bash believes your path is: /c/Users/YOUR_USERNAME
File Explorer believes your path is: C:\Users\YOUR_USERNAME

They both mean the same thing, and both refer to your home directory. However, in File Explorer, you must use the "C:\Users\YOUR_USERNAME" version, and in Git Bash, you must use the "/c/Users/YOUR_USERNAME" version.

Additionally, we have run the command to list files (ls) in Git Bash, which confirms that the files we see in the File Explorer window match the files shown by Git Bash (outlined in red on both sides).
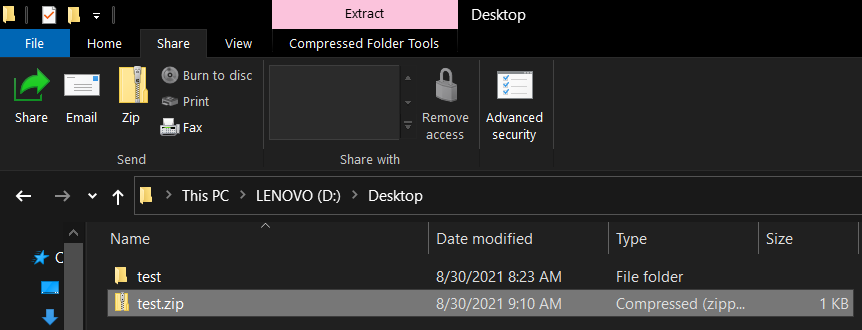
 

Making a zip file:

  • Open the file explorer/finder by going to "activities" and then to the file-cabinet icon.
    This will bring up the file explorer application. Then click on "Desktop" which will take you to the Desktop, where you should see the test folder.

  • Compress the folder into a zip file by performing the following steps:
    1. Click on the folder you just created.
    2. Click on the "Share" tab up at the top. By default you are in the "Home" tab, and will NOT see the option to zip if you do not switch to the "Share" tab.
    3. Click on the "Zip" button to create a zip file of the folder.

  • Finally, this will create a zip file:

  • To upload this into Blackboard or Google-drive, open an internet browser of your choice (Chrome/Edge/Safari/Firefox/etc.) and proceed in the usual way.


6.0    (Optional) Advanced uses: CLASSPATH


This section is only for advanced courses that need jar files to be included in CLASSPATH.

  • You can customize the Git Bash shell by creating a .bashrc or .bash_profile file inside your home directory.

  • Add jar files to your CLASSPATH by editing the .bashrc file in the home directory.