- Install Java - just once, if it's never been installed
on your PC before.
- Make new sub-directory (folder) if needed. Else
navigate there.
- Edit using Notepad.
- Compile at the command-line.
- Execute at the command-line.
- Transfer your files to the server.
Note:
- Items 2-5 are similar to the ones for
doing the same on Windows machines in T411. See
these instructions.
- However, your home machine will have different drives
and folder names.
- You can create a new folder off of the desktop called
cs1111 and put everything in sub-folders under there.
We will focus on transferring the files to the
server (for safekeeping).
Installing Java on Windows
Download and install the Java Development Kit (JDK):
- Type "Download JDK" into Google. The first link is
probably something
like this.
- Go to the (Oracle) download site and download the
latest JDK (not JRE). If you see many JDK's,
pick the one with the fewest bundles.
- After downloading, launch what you downloaded and
let the installation complete. This can take a while.
- After the installation is complete, you'll need
to tweak two important "settings" on your PC - see below.
Set two environment variables:
- This is a little tricky, so pay close attention to
the steps.
- Go to Start → Settings →
Control-panel.
- Switch to classic or old view.
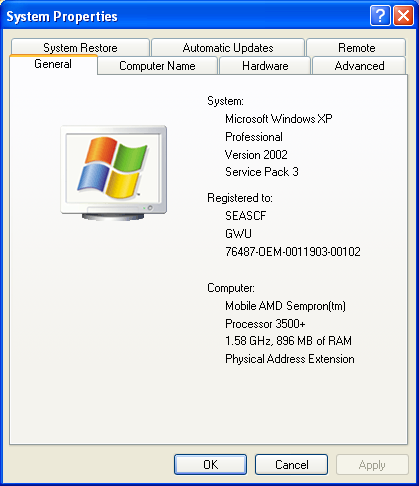
- Double-click on System. This should bring up
a window that looks like this:
- Go to the Advanced tab and click on
the Environment Variables button.
This should bring up something like:
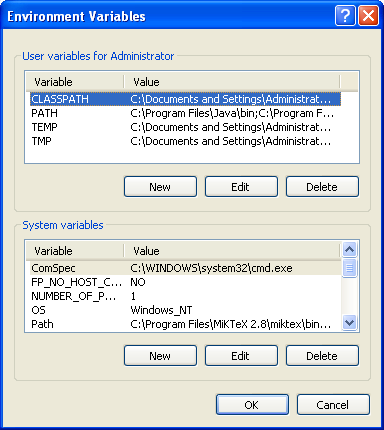
- Essentially, you will need to edit the PATH and
CLASSPATH variables. It might be that you don't
have a CLASSPATH variable, in which case
you'll need to add it (by clicking on NEW).
- Note: you need to be very careful in editing
these variables to get the edits just right.
We'll do them one-by-one below.
Editing the PATH variable:
- First, leave the environment-variable window open for now.
- Click on "My Computer" and navigate
to the C:\Program Files directory.
- From here, navigate into the Java
folder, then to jdk, then to bin.
You should see something like this:
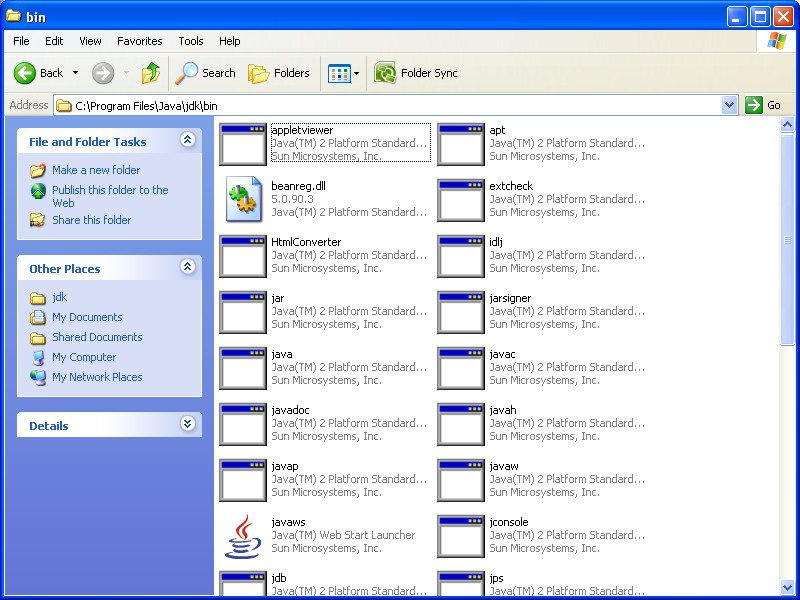
Inside, you should see the javac compiler.
- Note: some Windows installations may differ, so you
you'll need to look around until you find the right
bin that has the javac compiler.
- What we really need is the text representation
of the directory, which can be found at the top
of the window:

This is what needs to be part of the string of letters
in the PATH variable.
- Copy the string.
- Go to the PATH variable, and to its VALUE.
At the end of the line, add a semi-colon.
- Then, add the above text representation of the Java bin
directory.
- Now, click OK.
- In computerese, what you have done is this: you
have told Windows (the operating system) where to
find the compiler.
Editing the CLASSPATH variable:
- This is similar, up to the point of clicking on
CLASSPATH.
- The text to enter is simply a semicolon followed
by a period, as in ;..
- Note: If you are installing a robotics package, you'll
need to come back and edit the CLASSPATH to add
the appropriate path.
Transferring a jar file to the server
First, if you haven't already done this, you'll need
to get SSH-Client for your Windows PC.
- This is free - do a search to find out where you can get this.
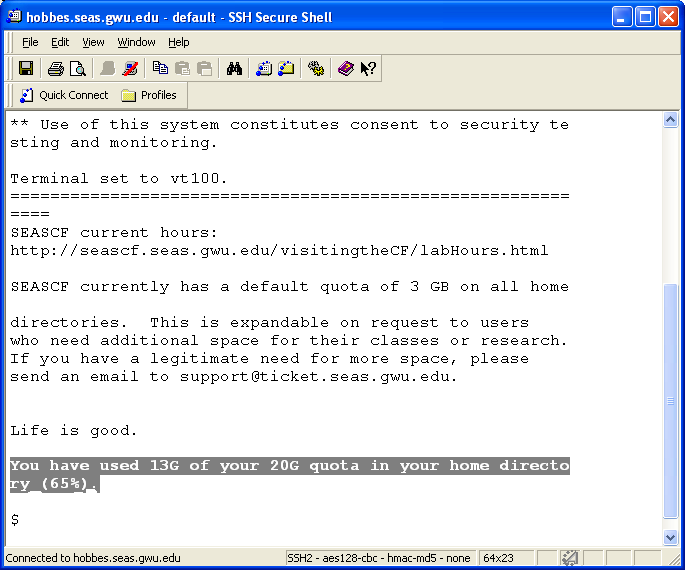
- Step 1: Run SSH-Client and login:
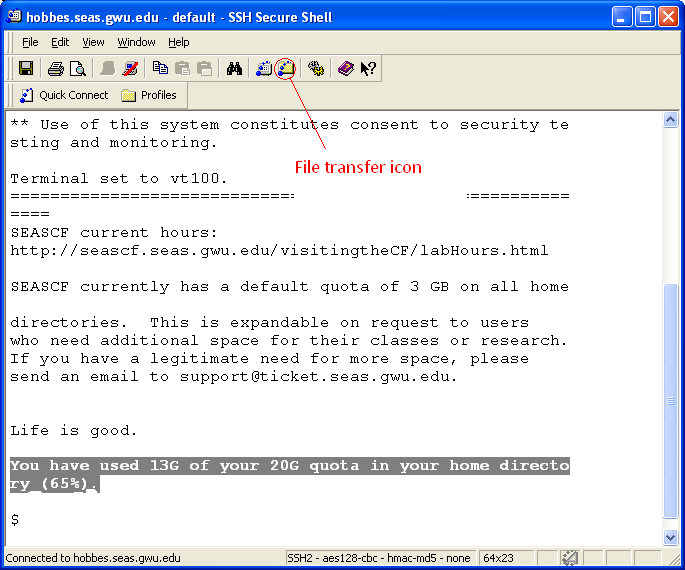
- Step 2: Click on the file-transfer icon:
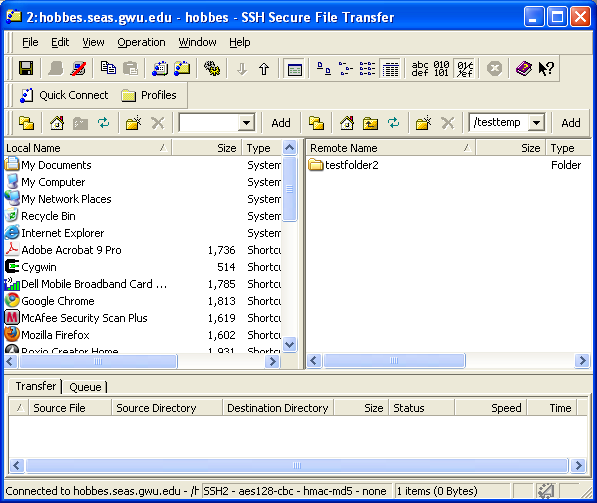
- Step 3: This opens up another window:
- Step 4: Navigate to the desired target directory:
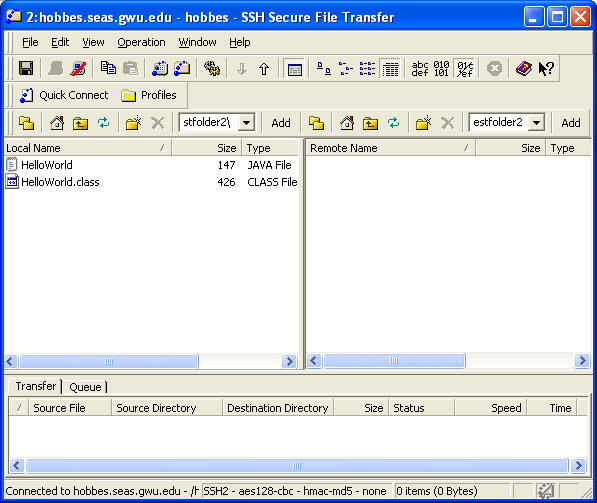
- Step 5: Transfer files by dragging across.
Similarly, one can edit etc on the Unix server and transfer
files by dragging them back to your PC.