Module 13: I/O and Networking
I/O classes: an overview
Recall how you read lines from the screen:
  InputStreamReader isr = new InputStreamReader (System.in);
  LineNumberReader lnr = new LineNumberReader (isr);

  String s = lnr.readLine();
  while (s != null) {

    // Process s

    // Read next line
    s = lnr.readLine();
  }
The package java.io contains the classes
InputStreamReader and LineNumberReader.
java.io contains more than 50 classes or interfaces
in all, a confusing array of classes related to I/O.
In this module we will begin to make some sense of these
classes.
To start with, we will divide the classes into five
categories:
- OutputStream classes:
- OutputStream itself is an abstract class from
which many output-related classes derive.
- Important: all OutputStream classes work at
the byte-level.
- It is possible to write higher-level constructs such
as int's (using DataOutputStream), but
the conceptual view is still byte-oriented.
- InputStream classes:
- InputStream itself is an abstract class from
which many input-related classes derive.
- Important: all InputStream classes work at
the byte-level.
- Given a collection of bytes, there are classes
(e.g., DataInputStream) that
can read higher-level constructs such as int's.
- Writer classes:
- Writer itself is an abstract class.
- Writer-derived classes work at the
character-level (using Unicode characters).
- Reader classes:
- Reader is the "input" counterpart of Writer.
- Miscellaneous classes:
- A number of unrelated classes are also bundled in
java.io for various uses.
- Examples include:
- File: a class for handling files, especially
with directory-related actions.
- RandomAccessFile: a class for allowing
random read or writes to a file.
- StreamTokenizer: a class that facilitates
breaking of input into tokens.
Also, a number of classes related to compression and ZIP files
are in the package java.util.zip.
Next, let's focus on the difference between InputStream
and Reader:
We will next look at some of the java.io classes
via examples.
The classic Producer-Consumer duo: sequential version
To get started, let us first write a Producer-Consumer
pair using a buffer:
- A Producer writes stuff periodically to a buffer.
- A Consumer reads stuff from the same buffer, taking
care to read valid data only.
- We will write the Producer so that it
randomly generates bytes to write, and displays these
bytes in a frame.
- We will write the Consumer so that it reads
bytes from the buffer and displays them on a frame.
- In the sequential version, no threads will be used,
so the Producer gets to run first, and then the Consumer.
At the end, the output looks like:


Here is the code:
(source file)
import java.awt.*;
import java.awt.event.*;
import java.io.*;

class Producer extends Frame {

  Label L;     // A place to write stuff.
  Buffer buf;  // Reference to the buffer.

  public Producer (Buffer buf)
  {
    // Store the reference to the buffer.
    this.buf = buf;

    // Create the frame.
    this.setSize (600,100);
    this.setLocation (0,100);
    this.setTitle ("Producer");
    this.setBackground (Color.white);
    // this.setLayout (new BorderLayout());

    // This is where we will write to.
    L = new Label ("");
    this.add (L, BorderLayout.CENTER);

    this.setVisible (true);
  }


  public void run ()
  {
    // Write 25 random bytes to the buffer.

    for (int i=1; i<=25; i++) {
      // Create a random byte
      byte k = (byte) UniformRandom.uniform (1, 100);

      // Write to label first.
      L.setText (L.getText() + " " + k);

      // Write it to the screen.
      System.out.println ("Producer: writing " + k);

      // Write integer to buffer.
      buf.write_byte (k);

      // Sleep for a while.
      try {
	Thread.sleep ((int)UniformRandom.uniform(100,1000));
      }
      catch (InterruptedException e) {
	System.out.println (e);
      }
    }
    buf.write_byte ((byte)-1);
    L.setText (L.getText() + " Done!");
  }

}


class Consumer extends Frame {

  Label L;     // Data similar to Producer.
  Buffer buf;

  public Consumer (Buffer buf)
  {
    this.buf = buf;

    this.setSize (600,100);
    this.setLocation (0, 200);
    this.setTitle ("Consumer");
    this.setBackground (Color.white);
    // this.setLayout (new BorderLayout());

    L = new Label ("");
    this.add (L, BorderLayout.CENTER);

    this.setVisible (true);
  }


  public void run ()
  {
    // Read byte values until EOF.

    while (true) {
      // Get the next byte
      byte k = buf.read_byte ();

      // Check if end-of-data.
      if (k < 0) break;

      System.out.println ("Consumer: just read " + k);

      // Write it on the frame.
      L.setText (L.getText() + " " + k);

      // Sleep for a while.
      try {
	Thread.sleep ((int)UniformRandom.uniform(500,1000));
      }
      catch (InterruptedException e) {
	System.out.println (e);
      }
    }
    L.setText (L.getText() + " Done!");
  }

}


// A buffer written as a monitor.

class Buffer {

  byte[] buf;                      // The buffer.
  int write_cursor = 0;            // Current write position.
  int read_cursor = 0;             // Current read position.

  public Buffer ()
  {
    // Allocate space.
    buf = new byte[1000];
  }

  public void write_byte (byte x)
  {
    // Write to next available space.
    buf [++write_cursor] = x;
  }

  public byte read_byte ()
  {
    // Read next byte.
    byte k = buf [++read_cursor];
    return k;
  }

}


// This is an independent quit button to quit the application.

class QuitButton extends Frame {

  public QuitButton ()
  {
    this.setSize (80,50);
    this.setLocation (0, 0);
    this.setTitle ("Quit button");
    Button quitb = new Button ("QUIT");
    quitb.setBackground (Color.red);
    quitb.addActionListener (
      new ActionListener () {
        public void actionPerformed (ActionEvent a)
	{
	  System.exit (0);
	}
      }
    );
    this.add (quitb, BorderLayout.CENTER);
    this.setVisible (true);
  }

}


public class IO1 {

  public static void main (String[] argv)
  {
    // Create an independent quit button.
    QuitButton q = new QuitButton ();

    // A buffer instance.
    Buffer buf = new Buffer ();

    // Create a producer instance and run it.
    Producer p = new Producer (buf);
    p.run();

    // Create a consumer instance and run it.
    Consumer c = new Consumer (buf);
    c.run();
  }

}
Note:
- The classes Producer and Consumer
implement the Producer and Consumer respectively.
- Consider the Producer:
- Producer extends Frame
(for the purpose of display).
- Producer has a method called run()
in which:
- Bytes are randomly generated (by a call to
UniformRandom) in the range 1-100.
- Each byte is written to the frame (using a Label).
- Each byte is written to the buffer by calling
the write_byte method of the class Buffer.
(We will describe Buffer below).
- Between writing bytes, the Producer sleeps for
a while.
- The last value written is -1, to indicate "End-of-Data".
- Consider the Consumer:
- The Consumer extends Frame.
- In a loop, the Consumer:
- Gets a byte from the buffer.
- Checks to see if the byte is "End-of-Data" (-1).
- If not "End-of-Data", the byte is displayed.
- The "sleep" in both the Producer and Consumer is only
for illustration.
(In an actual application, presumably each class would be
doing some "work" with the data).
- The class Buffer implements the buffer:
- The current write and read position are recorded
in the cursor variables write_cursor and
read_cursor.
- These variables are not really needed here, but will
be useful later when we write a threaded-version.
- The methods write_byte() and read_byte()
are self-explanatory.
- Finally, observe what happens in main() (which is
in the public class IO1):
- A stand-alone quit button for the whole application is
created.
- An instance of Buffer is created.
- A Producer instance is created and run
to completion.
- Following this, a Consumer instance is created
and run to completion. The output is shown above.
The above code will be used as the basis for a number of
examples that follow.
Producer-Consumer: threaded version
Let us re-write the above sequential version and make it
threaded (concurrent):
- Now, each of Producer and Consumer
will run as a thread, and therefore will implement Runnable:
class Producer extends Frame implements Runnable {
  // ...
}

class Consumer extends Frame implements Runnable {
  // ...
}
- Thus, in main():
    // Create an independent quit button.
    QuitButton q = new QuitButton ();

    // A buffer instance.
    Buffer buf = new Buffer ();

    // Create a producer instance and thread.
    Producer p = new Producer (buf);
    Thread pthread = new Thread (p);

    // Create a consumer instance and thread.
    Consumer c = new Consumer (buf);
    Thread cthread = new Thread (c);

    // Start the threads.
    pthread.start();
    cthread.start();
- In anticipation of using threads, we had used
the name run() for
the main-loop methods in both Producer and
Consumer -- thus, these don't need to change.
The most important change occurs in the class Buffer,
which now needs to permit only synchronized access
to the buffer.
Here is the code for Buffer:
(complete source file)
class Buffer {

  byte[] buf;                      // The buffer.
  int write_cursor = 0;            // Pointer to last written entry.
  int read_cursor = 0;             // Pointer to last read entry.
  boolean consumer_waiting =false; // A waiting flag.

  public Buffer ()
  {
    // Allocate space.
    buf = new byte[1000];
  }

  public synchronized void write_byte (byte x)
  {
    // Write to next available space.
    buf [++write_cursor] = x;

    // If consumer was waiting, notify.
    if (consumer_waiting)
      notify ();
  }

  public synchronized byte read_byte ()
  {
    // If there isn't enough to read, wait.
    if (read_cursor == write_cursor) {
      consumer_waiting = true;
      try {
	wait ();
      }
      catch (InterruptedException e) {
	System.out.println (e);
      }
      consumer_waiting = false;
    }

    // Now read next value.
    byte k = buf [++read_cursor];
    return k;
  }

}
With this background, we will now look at various I/O streams
in java.io:
- First, we will use the sequential version of Producer-Consumer
and look at alternative ways of passing data between the
Producer and Consumer.
- Second, we will use the concurrent version to illustrate
other options.
Using ByteArray's in the sequential Producer-Consumer example
Recall that the sequential version above used a buffer
(that we implemented ourselves).
Recall also that the buffer provided access methods that
consisted of writing and reading a byte.
We will now use instances of ByteArrayOutputStream
and ByteArrayInputStream to achieve the same purpose.
Here is the code:
(source file)
class Producer extends Frame {

  Label L;
  OutputStream out_stream;  // For the output.

  public Producer (OutputStream out_stream)
  {
    // Store the reference to the buffer.
    this.out_stream = out_stream;

    // Create the frame.
    this.setSize (600,100);
    this.setLocation (0,100);
    this.setTitle ("Producer");
    this.setBackground (Color.white);
    // this.setLayout (new BorderLayout());

    // This is where we will write to.
    L = new Label ("");
    this.add (L, BorderLayout.CENTER);

    this.setVisible (true);
  }


  // Must implement the run() method.

  public void run ()
  {
    // Write 25 random bytes to the buffer.

    for (int i=1; i<=25; i++) {
      // Create a random byte
      byte k = (byte) UniformRandom.uniform (1, 100);

      // Write to label first.
      L.setText (L.getText() + " " + k);

      // Write it to the screen.
      System.out.println ("Producer: writing " + k);

      // Write integer to buffer.
      try {
	out_stream.write (k);
      }
      catch (IOException e) { System.out.println (e); }

      // Sleep for a while.
      try {
	Thread.sleep ((int)UniformRandom.uniform(100,1000));
      }
      catch (InterruptedException e) { System.out.println (e); }
    }

    try {
      out_stream.write ((byte)-1);
    }
    catch (IOException e) { System.out.println (e); }

    L.setText (L.getText() + " Done!");
  }

}


class Consumer extends Frame {

  Label L;
  InputStream in_stream;  // To get data from.

  public Consumer (InputStream in_stream)
  {
    this.in_stream = in_stream;

    this.setSize (600,100);
    this.setLocation (0, 200);
    this.setTitle ("Consumer");
    this.setBackground (Color.white);
    // this.setLayout (new BorderLayout());

    L = new Label ("");
    this.add (L, BorderLayout.CENTER);

    this.setVisible (true);
  }


  public void run ()
  {
    // Read byte values until EOF.

    while (true) {
      // Get the next byte
      int i = -1;
      try {
	i = in_stream.read ();
      }
      catch (IOException e) { System.out.println (e); }

      byte k = (byte) i;

      // Check if end-of-data.
      if (k < 0) break;

      System.out.println ("Consumer: just read " + k);

      // Write it on the frame.
      L.setText (L.getText() + " " + k);

      // Sleep for a while.
      try {
	Thread.sleep ((int)UniformRandom.uniform(500,1000));
      }
      catch (InterruptedException e) { System.out.println (e); }
    }

    L.setText (L.getText() + " Done!");
  }

}


// This is an independent quit button to quit the application.

class QuitButton extends Frame {

  // ... as before ...

}


public class IO3 {

  public static void main (String[] argv)
  {
    // Create an independent quit button.
    QuitButton q = new QuitButton ();

    // Set up an output stream to write into an array.
    ByteArrayOutputStream buf_out = new ByteArrayOutputStream (1000);

    // Create a producer instance and run it.
    Producer p = new Producer (buf_out);
    p.run();

    // Retrive the array from buf_out.
    byte[] buf = buf_out.toByteArray();

    // Now wrap an input stream around the array.
    ByteArrayInputStream buf_in = new ByteArrayInputStream (buf);

    // Create a consumer instance and run it.
    Consumer c = new Consumer (buf_in);
    c.run();
  }

}
Note:
- The constructor of Producer is given an
OutputStream:
class Producer extends Frame {

  OutputStream out_stream;  // For the output.

  public Producer (OutputStream out_stream)
  {
    // Store the reference to the buffer.
    this.out_stream = out_stream;

    // ...
  }

  // ...

}
- Likewise, the constructor of Consumer is
passed an InputStream.
- Both OutputStream and InputStream
are classes defined in java.io.
- Observe how the Producer writes to an
OutputStream instance:
      try {
	out_stream.write (k);  // k is a byte
      }
      catch (IOException e) { System.out.println (e); }
(A try-catch block is required).
- Similarly, observe how the Consumer
reads from an InputStream:
      try {
	i = in_stream.read ();
      }
      catch (IOException e) { System.out.println (e); }

      byte k = (byte) i;
Here:
- Like the write, a try-catch block is required.
- Strangely, the method read() in InputStream
returns an int:
- The idea is that, the actual data is a byte that
is contained within the int as the
lowest-order byte.
(Recall: an int is four bytes).
- So, why the int?
- This is so that an "End-of-File" or "End-of-Data"
can be signalled by making the int negative
(which won't affect the byte at all).
- Note: our code checks whether the byte read is negative:
      byte k = (byte) i;

      // Check if end-of-data.
      if (k < 0) break;
This has nothing to do with Java - it is simply our own way
of signalling between the Producer and Consumer.
If Java wants to signal "End-of-Data", it will make
the int negative.
- The most interesting code is in the main() method:
- A buffer (ByteArrayOutputStream instance)
is created, of size 1000 bytes:
    // Set up an output stream to write into an array.
    ByteArrayOutputStream buf_out = new ByteArrayOutputStream (1000);
- This class derives from InputStream, and so
can be passed to the constructor of Producer:
    Producer p = new Producer (buf_out);
    p.run();
- The class is designed to manage a buffer (of bytes).
- Once the Producer has written into the buffer,
the Consumer is created to read from it:
    // Retrieve the array from buf_out.
    byte[] buf = buf_out.toByteArray();

    // Now wrap an input stream around the array.
    ByteArrayInputStream buf_in = new ByteArrayInputStream (buf);

    // Create a consumer instance and run it.
    Consumer c = new Consumer (buf_in);
    c.run();
It's hard at this time to see why InputStream's
and OutputStream's are useful. So, let's look at another
example.
Using a file in the sequential Producer-Consumer example
Next, instead of having the Producer and Consumer write
and read from a buffer, let's use a file:
- The Producer will write bytes to a file.
- The Consumer will read bytes from the file
after the Producer is done.
Here is (part of) the code:
(source file)
class Producer extends Frame {

  // ...

  public Producer (OutputStream out_stream)
  {
    // ... same as before ...
  }


  // Must implement the run() method.

  public void run ()
  {
    // ... same as before ...
  }
}


class Consumer extends Frame {

  // ...

  public Consumer (InputStream in_stream)
  {
    // ... same as before ...
  }


  public void run ()
  {
    // ... same as before ...
  }

}


class QuitButton extends Frame {
  // ... same as before ...
}


public class IO4 {

  public static void main (String[] argv)
  {
    // Create an independent quit button.
    QuitButton q = new QuitButton ();

    try {
      // ByteArrayOutputStream buf_out = new ByteArrayOutputStream (1000);

      // Set up a temporary file.
      File f = new File ("IO4_temp");

      // Create an output stream for it.
      FileOutputStream file_out = new FileOutputStream (f);

      // Create a producer instance and run it.
      // Producer p = new Producer (buf_out);
      Producer p = new Producer (file_out);
      p.run();

      // Close the file so it can be read.
      file_out.close ();

      // ByteArrayInputStream buf_in = new ByteArrayInputStream (buf);
      FileInputStream file_in = new FileInputStream (f);

      // Create a consumer instance and run it.
      // Consumer c = new Consumer (buf_in);
      Consumer c = new Consumer (file_in);
      c.run();

      file_in.close ();
    }
    catch (IOException e) { System.out.println (e); }

  }

}
Note:
Using a pipe in the sequential Producer-Consumer example
A pipe is really a buffer controlled by
the operating-system (or in Java's case, the library) to enable
communication between processes (or threads).
Fortunately, Java implements pipes and implements them using
streams.
We will now see how easy it is to modify the above code
(communicating via files) to allow the Producer
and Consumer to communicate via pipes:
- Once again, the code for Producer and
Consumer is unchanged.
- The only change is in main() where:
- Instead of passing a FileOutputStream to
the Producer, we pass a PipedOutputStream.
- Similarly, a PipedInputStream is passed to
the Consumer.
- The only real difference is in the type of object itself:
- For a file, we created a File instance and passed
this instance to both FileOutputStream and
FileInputStream.
- For pipes, the way to do it is:
Here is the main() code:
(complete source file)
public static void main (String[] argv)
{
// Create an independent quit button.
QuitButton q = new QuitButton ();
try {
      // Set up an output pipe.
      PipedOutputStream pipe_out = new PipedOutputStream ();
      // Set up an input pipe.
      PipedInputStream pipe_in = new PipedInputStream (pipe_out);
// Create a producer instance and run it.
Producer p = new Producer (pipe_out);
p.run();
// Create a consumer instance and run it.
Consumer c = new Consumer (pipe_in);
c.run();
}
catch (IOException e) { System.out.println (e); }
}
Note:
- Since the Producer and Consumer
run sequentially, all the bytes written by the Producer
to the pipe are "held" for the Consumer.
- In practice, actually pipes are often used for communication
between concurrent threads.
- In this case, communication can occur on a byte-by-byte basis.
- A pipe is one-way.
- To communicate in both directions, two pipes are needed.
Exercise 13.1
(Solution):
Modify the above code so that the Producer and
Consumer run as threads. (Hint: all your changes
will be in main() only).
Using a buffered pipe in the concurrent Producer-Consumer example
Sometimes it is desirable to avoid byte-by-byte processing:
- Consider a Producer that generates a whole
bunch of bytes and wishes to write groups of bytes.
- If the pipe is used, each byte is written to the pipe
one-by-one.
- The Consumer in turn, will read from the pipe
one byte at a time.
- This can be quite inefficient because the Consumer
thread reads a byte, then waits, then reads a byte, and so on.
We will now "wrap" a buffer around the pipe and let the
Producer control when the buffer "dumps" its contents
into the pipe:
- The code for Consumer remains unchanged.
- The code for Producer is slightly changed:
we will flush ("dump") the contents after 12 bytes are written.
- As usual, the Producer takes an OutputStream
(which defines a method called flush()).
- The only change is in the main loop of run():
  public void run ()
  {
    // Write 25 random bytes to the buffer.

    for (int i=1; i<=25; i++) {
      // Create a random byte
      byte k = (byte) UniformRandom.uniform (1, 100);

      // Write to label first.
      L.setText (L.getText() + " " + k);

      // Write it to the screen.
      System.out.println ("Producer: writing " + k);

      // Write integer to buffer.
      try {
	out_stream.write (k);
	if (i == 12) out_stream.flush ();
      }
      catch (IOException e) { System.out.println (e); }

      // Sleep for a while.
      try {
	Thread.sleep ((int)UniformRandom.uniform(100,1000));
      } catch (InterruptedException e) { System.out.println (e); }
    }

    // Write EOF and close output stream.
    try {
      out_stream.write (-1);
      out_stream.close ();    // Automatic flush.
    }
    catch (IOException e) { System.out.println (e); }

    L.setText (L.getText() + " Done!");
  }

}
- To create a buffer, we will use the class
BufferedOutputStream:
- We will have the Producer (without the
Producer knowing it) write to this class.
- We will have this class write to the pipe.
The code in main() is changed to:
(complete source file)
  public static void main (String[] argv)
  {
    // Create an independent quit button.
    QuitButton q = new QuitButton ();

    try {
      // Create the matching pipes.
      PipedOutputStream pipe_out = new PipedOutputStream ();
      PipedInputStream pipe_in = new PipedInputStream (pipe_out);

      // Wrap a buffer around the Producer.
      BufferedOutputStream buf_out = new BufferedOutputStream (pipe_out);

      // Create a producer instance and thread. Pass the buffer in.
      Producer p = new Producer (buf_out);
      Thread pthread = new Thread (p);

      // At this time, all the data is sitting in the buffer.
      // Flush it out.
      buf_out.flush();

      // Create a consumer instance and thread.
      Consumer c = new Consumer (pipe_in);
      Thread cthread = new Thread (c);

      // Start the threads.
      pthread.start();
      cthread.start();
    }
    catch (IOException e) { System.out.println (e); }
  }
Note:
- Since the BufferedOutputStream itself takes an
OutputStream in the constructor, any
output stream can be passed to it (e.g., a FileOutputStream).
- So, the Producer does not know the chain of
output streams that it actually writes to.
- In fact, no class in the chain knows anything about the type
of any other class in the chain.
- This is the real reason why the classes in java.io
are initially difficult to understand, but ultimately very
flexible.
Exercise 13.2
(Solution):
Run the above code and observe
what happens: you should see the Consumer read the data in two
bursts.
Modify the above code (only in main())
to remove the use of the BufferedOutputStream.
What do you observe?
Using sockets in the concurrent Producer-Consumer example
Now we will make our first foray into networking by using
sockets:
- The Producer and Consumer will run
on different machines.
- They will use a socket to communicate:
- The Producer will write its bytes to a socket.
- The Consumer will read bytes from the socket.
First, a small tutorial on sockets:
- The internet suite of protocols has a layer of software
called TCP (Transmission Control Protocol) that handles
"connections" between machines.
- TCP is responsible for creating and managing connections
(or "sessions", as they are sometimes called).
- TCP actually breaks up a user's bytes into bunches called
packets and passes these bunches to a lower-level layer called IP.
- It is IP's responsibility to get a packet across the net
to the destination's IP layer, which then passes it up to the
destination's TCP layer.
- TCP handles connections as follows:
- First, one of the two ends of the connection must
designate itself as the "server end" by selecting a
"port" to listen to:
- Typically, a "server" tells TCP that it is going
to listen in on a designated port number.
- Afterwards, the other end (the "client") tells its
TCP layer that it wants to connect to the port number on
the destination machine.
- When a connection is set up, both ends are given a
socket by which they can communicate.
- The actual communication can be both ways: either
end can write or read.
- Of course, separate streams are used for the different
directions, so no confusion can occur.
- About ports:
- A port is a number (integer).
- A port is a pre-defined "meeting place" for two
applications to hook-up.
- Port numbers in the range 1-5000 are reserved for
well-known applications, such as HTTP (which uses port 80).
(Do NOT use port numbers in this range)
- The port number needs to be decided beforehand
and is usually hard-coded into your code.
- The examples below will use port number 5010.
(Please use the port number assigned to you for your
own code).
Java makes the use of sockets easy by wrapping input and
output streams around them.
This means that you don't really need to know how sockets
work - you only need to set up a socket and get its streams.
Here's what we will do in our Producer-Consumer example:
- Since we want to run two different programs on two different
machines, we will split the code into two files:
- The file IO7_client.java will contain the
Producer, running as a TCP "client".
- The file IO7_server.java will contain the
Consumer, running as a TCP "server".
- The Producer will run locally whereas the
the Consumer will run on a remote machine.
- Since both Producer and Consumer fire
up windows (frames), we need to let the remote machine
bring up a window.
Here are the instructions
to make this happen.
Here is the code for the Producer:
(source file)
import java.awt.*;
import java.awt.event.*;
import java.io.*;
import java.net.*;

class Producer extends Frame implements Runnable {

  // ... same as before ...

}


class QuitButton extends Frame {

  // ... same as before ...

}


public class IO7_client {

  public static void main (String[] argv)
  {
    // Create an independent quit button.
    QuitButton q = new QuitButton ();

    try {
      // Open a socket to the server.
      // Address: felix.seas.gwu.edu, port 5010.
      Socket soc = new Socket ("felix.seas.gwu.edu", 5010);
      InetAddress remote_machine = soc.getInetAddress();
      System.out.println ("Producer as client: attempting connection"
			  + " to " + remote_machine);

      // Note: server must be fired up first!

      // Now create the output stream and hand off to producer.
      OutputStream out_stream = soc.getOutputStream ();

      // Create a producer instance and thread.
      Producer p = new Producer (out_stream);
      Thread pthread = new Thread (p);

      // Start the threads.
      pthread.start();
    }
    catch (IOException e) { System.out.println (e); }
  }

}
And here is the code for the Consumer:
(source file)
class Consumer extends Frame implements Runnable {

  // ... same as before ...

}

// ...

public class IO7_server {

  public static void main (String[] argv)
  {
    // Create an independent quit button.
    QuitButton q = new QuitButton ();

    try {
      // Create a listening service for connections
      // at the designated port number.
      ServerSocket srv = new ServerSocket (5010);

      // When a connection is made, get the socket.
      // The method accept() blocks until then.
      System.out.println ("Consumer as server: waiting for a connection");
      Socket soc = srv.accept ();

      // At this stage, the connection will have been made.
      InetAddress remote_machine = soc.getInetAddress();
      System.out.println ("Consumer as server: accepted a connection"
			  + " from " + remote_machine);

      // We are going to listen, so get an InputStream
      // and hand it over to the consumer.
      InputStream in_stream = soc.getInputStream ();

      // Create a consumer instance and thread.
      Consumer c = new Consumer (in_stream);
      Thread cthread = new Thread (c);

      // Start the thread.
      cthread.start();
    }
    catch (IOException e) { System.out.println (e); }
  }

}
To run the programs:
- First, run the server (IO7_server) on the remote machine.
- The server will wait for a connection.
- Then, run the client (IO7_client) on the local machine.
Exercise 13.3
Try it out - run the programs as indicated above, but change
the port number to your assigned port number.
Note:
- The package java.net needs to be imported.
- Consider the server (the Consumer):
- The code for the class Consumer remains untouched.
- In main():
- A ServerSocket instance is created with
the designated port number (5010):
      // Create a listening service for connections
      // at the designated port number.
      ServerSocket srv = new ServerSocket (5010);
- The accept() method is used to wait for
the client to connect:
Socket soc = srv.accept ();
- When a connection is made, a Socket instance
is returned.
- A Socket has an associated InputStream
and OutputStream.
- In this case, we want only the InputStream
(Since the Consumer only reads):
      // We are going to listen, so get an InputStream
      // and hand it over to the consumer.
      InputStream in_stream = soc.getInputStream ();
- Finally, the InputStream is passed to the
unwitting Consumer:
Consumer c = new Consumer (in_stream);
- Consider the client (the Producer):
- The code for Producer remains the same.
- In main():
- A Socket is opened to the designated
remote address and port number:
Socket soc = new Socket ("felix.seas.gwu.edu", 5010);
- The instance is created only if the connection is
successful.
- Since we only want to write, we get an OutputStream:
      // Now create the output stream and hand off to producer.
      OutputStream out_stream = soc.getOutputStream ();
- The class InetAddress is a useful class that
stores a bunch of information about a machine:
- Calling a Socket's getInetAddress()
method will return an instance for the remote machine.
- From this class, you can get the host address and the
hostname.
- It implements the toString() method, which
prints this information out.
About "clients" and "servers":
- Usually, our view of a "server" is some big piece of software
that provides a lot of "service", like a database or a webserver.
- The usage of "client" and "server" above is only
from the point of view of a TCP connection:
- A "server" is something that "owns" a port and waits there
listening for a connection.
- A "client" is something that "knows" the port number,
the "server" machine, and attempts a connection.
- Thus, the actual purpose of the programs that communicate
is not important from the point of view of TCP.
- To see why, let us instead write the Producer as a "server"
and the Consumer as a "client":
- Once again, the code for Producer and
Consumer are unchanged.
- We will write the Producer in IO8_server.java:
- Only the main() method is different.
- Here's the relevant code:
(complete source file)
// Create a listening service for connections
// at the designated port number.
ServerSocket srv = new ServerSocket (5010);

// When a connection is made, get the socket.
// The method accept() blocks until then.
System.out.println ("Producer as server: waiting for a connection");
Socket soc = srv.accept ();

// At this stage, the connection will have been made.
InetAddress remote_machine = soc.getInetAddress();
System.out.println ("Producer as server: accepted a connection"
			  + " from " + remote_machine);

// We are going to write, so get the output stream.
OutputStream out_stream = soc.getOutputStream ();

// Create a producer instance and thread.
Producer p = new Producer (out_stream);
Thread pthread = new Thread (p);

// Start the threads.
pthread.start();
- Similarly, here is the Consumer, written as
a "client":
(complete source file)
  // Open a socket to the server.
  // Address: felix.seas.gwu.edu, port 5010.
  Socket soc = new Socket ("felix.seas.gwu.edu", 5010);
  InetAddress remote_machine = soc.getInetAddress();
  System.out.println ("Consumer as client: attempting connection"
			  + " to " + remote_machine);

  // Note: server must be fired up first!

  // Now create the input stream for the Consumer.
  InputStream in_stream = soc.getInputStream ();

  // Create a consumer instance and thread.
  Consumer c = new Consumer (in_stream);
  Thread cthread = new Thread (c);

  // Start the thread.
  cthread.start();
Exercise 13.4
(
Client-Solution
Server-Solution
):
In this exercise, you will create a "client"
(use this template)
and "server"
(use this template)
pair in which:
- The server listens on your designated port number
on a remote machine.
- The client reads the value "1" or "2" from the command line
(via argv) and transmits this value as a single byte
to the server.
- The server reads this value and prints it to screen.
Handling connections from multiple clients
Very often, a server needs to handle multiple simultaneous
connections:
- For example, the telnet daemon that listens
for telnet-connections, actually handles multiple connections
simultaneously.
- Most often, each connection is meant to be handled in
parallel - by a separate thread.
- Note: if a client tries to connect to a "busy" server
(one that does not handle multiple clients and one that is
currently handling a client), the connection will fail after
a brief timeout period.
Fortunately, it is rather easy to handle multiple connections
now that we know how to create threads.
As an example, let us create a server that reads a single byte
from a client, but can handle as many clients as desired:
- The following code is typical:
      // Create a listening service for connections
      // at the designated port number.
      ServerSocket srv = new ServerSocket (5010);

      // When a connection is made, get the socket.
      // The method accept() blocks until then.
      while (true) {
	System.out.println ("MultiClientServer: waiting for a connection");

	// Wait for a connection.
	Socket soc = srv.accept ();

	// Now create an instance of the class that can deal
	// with the connection.
	IndividualClientServer ics = new IndividualClientServer (soc);

	// Create a thread for it.
	Thread clienthandler = new Thread (ics);

	// Fire off the thread and go back to listening
	// for the next connection.
	clienthandler.start();
      }
- Note:
- Listening for a connection is the same as before:
ServerSocket srv = new ServerSocket (5010);
- We have written a (thread-able) class called
IndividualClientServer to handle the actual
work of the connection:
class IndividualClientServer implements Runnable {

  Socket soc;

  public IndividualClientServer (Socket soc)
  {
    this.soc = soc;
  }

  public void run ()
  {
    try {
      // At this stage, the connection will have been made.
      InetAddress remote_machine = soc.getInetAddress();

      // Get the input stream to listen to.
      InputStream in_stream = soc.getInputStream();

      // Read a byte
      int i = in_stream.read ();

      byte k = (byte) i;

      System.out.println ("IndividualClientServer: accepted a connection"
			  + " from " + remote_machine + " BYTE=" + k);
    }
    catch (IOException e) { System.out.println (e); }
  }

}
- This class takes the Socket instance
(which is different for each connection).
- Reading and writing can be done using the
Socket's streams.
Exercise 13.5
(Solution):
In this exercise, you will observe a multi-client server
in action (without actually writing one).
Use the client code in Exercise 13.4 and modify it so that
port number 5010 is used. Then, follow the instructions
given in class.
Producer-Consumer with the Producer as an applet
Let us return to the Producer-Consumer (with sockets) example and
write an applet version:
- The Producer will be an applet (Client)
- The Consumer will be stand-alone program (Server).
- The same method of communication will be used: sockets.
The code changes are minimal:
The code (Producer code
and Consumer code) is
straightforward and will not be discussed any further.
The class DataOutputStream
Now we will look at the class DataOutputStream:
We will use our Producer-Consumer framework to
examine DataOutputStream:
- We will use the threaded version of Producer-Consumer
that uses pipes for communication.
- The Producer will attach a DataOutputStream
to the output stream, and write a few things to it.
- Between each group of data, the Producer will write
the byte 7f.
- The Consumer will read bytes as before and print out
a hex version of each byte.
Here's the code:
(source file)
class Producer extends Frame implements Runnable {

  // ...

  public void run ()
  {
    try {

      byte separator = 127;

      DataOutputStream dos = new DataOutputStream (out_stream);

      dos.writeBoolean (true);

      out_stream.write (separator);

      dos.writeInt (5);

      out_stream.write (separator);

      dos.writeChars ("ABC");

      out_stream.write (separator);

      dos.writeUTF ("ABC");

      out_stream.write (separator);

      dos.writeBytes ("ABC");

      out_stream.write (separator);

      L.setText ("" + true + ", 5, ABC, ABC, ABC");
    }
    catch (IOException e) { System.out.println (e); }

    // Write EOF and close output stream.
    try {
      out_stream.write (-1);
      out_stream.close ();
    }
    catch (IOException e) { System.out.println (e); }

    L.setText (L.getText() + " Done!");
  }
}


class Consumer extends Frame implements Runnable {

  // ...

  public void run ()
  {
    // Read byte values until EOF.

    while (true) {
      // Get the next byte
      int i = -1;
      try {
	i = in_stream.read ();
      }
      catch (IOException e) { System.out.println (e); }

      // Extract byte.
      byte k = (byte) i;

      // Check if end-of-data.
      if ( (i < 0) || (k < 0) ) break;

      // Convert to hex.
      String hex = Integer.toHexString (k);

      System.out.println ("Consumer: just read " + k + " (Hex: " + hex + ")");

      // Write it on the frame.
      L.setText (L.getText() + " " + hex);

      // Sleep for a while.
      try {
	Thread.sleep ((int)UniformRandom.uniform(5,10));
      }
      catch (InterruptedException e) { System.out.println (e); }
    }

    L.setText (L.getText() + " Done!");
    try {
      in_stream.close ();
    }
    catch (IOException e) { System.out.println (e); }

  }

}

// ...
When run, the result produced is:


Note:
- The boolean value true gets
written as a single byte (1).
- The int value 5 is written as
four bytes.
- Since writeChars() writes in Unicode,
each character takes up two bytes.
- Observe that the UTF representation of "ABC"
uses a 0 byte to indicate Ascii, along with
the number of following bytes (3), after which
the Ascii codes for "ABC" follow.
- Finally, the writeBytes() method writes
directly in the standard encoding used by the native
operating system - Ascii in our case.
You can use DataOutputStream to write data to a file:
  File f = new File ("output.data");
  FileOutputStream fos = new FileOutputStream (f);
  DataOutputStream dos = new DataOutputStream (fos);
  // Now write to the file, e.g.,
  dos.writeInt (5):
- Here, the resulting file will not have Ascii text, but
the raw bytes corresponding to the DataOutputStream.
- For example, with the above piece of code, 4 bytes
will be written.
The class PrintWriter
Before getting to PrintWriter, let us revisit
the difference between an OutputStream and
a Writer:
The most useful type of Writer is the PrintWriter
class:
- PrintWriter supports many overloaded versions
of print() and println() methods that
allow you to write any Java type.
- Each Java type is converted to a String by
PrintWriter.
- This string is the final "output" of PrintWriter.
- Where does this string finally go to?
Depends on where you want to send it! (File, screen, socket, whatever).
- PrintWriter has four constructors:
  public class PrintWriter extends Writer {
    public PrintWriter (Writer w);
    public PrintWriter (Writer w, boolean flush);
    public PrintWriter (OutputStream out);
    public PrintWriter (OutputStream out, boolean flush);
  }
- Two constructors take Writer instances.
- Two constructors take OutputStream instances:
since it is really common to send the results to a byte-stream.
- A boolean value can be set to indicate that the
internal buffer should be flushed when println()
is called.
Let us now make our Producer write some stuff using a
PrintWriter and examine the byte output with our
hex-reading Consumer:
(source file)
class Producer extends Frame implements Runnable {

  // ...

  public void run ()
  {
    try {

      byte separator = 127;

      DataOutputStream dos = new DataOutputStream (out_stream);

      dos.writeInt (5);

      out_stream.write (separator);

      dos.writeChars ("ABC");

      out_stream.write (separator);

      PrintWriter pw = new PrintWriter (out_stream, true);

      pw.print (5);
      pw.flush ();

      out_stream.write (separator);

      pw.print ("ABC");
      pw.flush ();

      out_stream.write (separator);

      L.setText ("" + true + ", 5, ABC, 5, ABC");
    }
    catch (IOException e) { System.out.println (e); }

    // ...

  }
}


class Consumer extends Frame implements Runnable {

  // ...

}

// ...
The result produced is:


Note:
- For comparison, the equivalent output from DataOutputStream
is shown.
- Observe that print(5) produces the Ascii code
for "5".
- Similarly, "ABC" is written in Ascii by PrintWriter.
(Because it knows it is writing to an OutputStream).
Using PrintWriter and LineNumberReader
The input equivalent of PrintWriter is
LineNumberReader:
- LineNumberReader derives from Reader.
- Unfortunately, it is not as nice as PrintWriter in
two ways:
- It does not directly take in an InputStream
the way PrintWriter takes in an OutputStream.
(Instead you must first create an InputStreamReader).
- It has only one method for reading that's
useful: readLine()
We will now write a "Chat" program that uses pipes to
communicate:
(source file)
class ChatClient extends Frame implements Runnable {

  OutputStream out_stream;  // The streams.
  InputStream in_stream;
  PrintWriter pw;

  TextField tf;             // For the user to write in.

  Panel message_panel;      // To display the conversation.
  GridLayout grid_layout;
  ScrollPane sc;

  public ChatClient (OutputStream out_stream, InputStream in_stream)
  {
    // Store the stream references and create a PrintWriter
    this.out_stream = out_stream;
    this.in_stream = in_stream;
    pw = new PrintWriter (out_stream, true);

    // Create the frame.
    this.setSize (400,200);
    this.setLocation (0,100);
    this.setTitle ("Chat Client");
    this.setBackground (Color.white);
    // this.setLayout (new BorderLayout());

    // This is where messages will be displayed:
    grid_layout = new GridLayout (1,1);
    message_panel = new Panel (grid_layout);
    sc = new ScrollPane ();
    sc.add (message_panel);
    this.add (sc, BorderLayout.CENTER);

    tf = new TextField ();
    tf.setForeground (Color.blue);
    tf.addActionListener (
      new ActionListener () {
        public void actionPerformed (ActionEvent a)
	{
	  if (tf.getText().equalsIgnoreCase ("Bye")) {
	    try {
	      ChatClient.this.pw.println ("Bye");
	      ChatClient.this.out_stream.close ();
	      ChatClient.this.dispose ();
	    }
	    catch (IOException e) { System.out.println (e); }
	  }
	  else {
	    display_text ("ME: " + tf.getText(), Color.blue);
	    pw.println (tf.getText());
	    tf.setText("");
	  }
	}
      }
    );
    this.add (tf, BorderLayout.SOUTH);

    this.setVisible (true);
  }


  // Display text on a message panel using Label's.

  void display_text (String s, Color c)
  {
    // Create the label.
    Label L = new Label (s);
    L.setForeground (c);

    // Add to the message panel.
    message_panel.add (L);
    message_panel.invalidate();

    // Increment the layout rows for the next message.
    grid_layout.setRows (grid_layout.getRows() + 1);

    // Scroll to the bottom.
    int height = sc.getViewportSize().height;
    sc.setScrollPosition (0, height);

    // Re-compute the display.
    this.validate();
  }

  // Must implement the run() method.

  public void run ()
  {
    try {
      // Only reading needs to be done here.
      InputStreamReader isr = new InputStreamReader (in_stream);
      PushbackReader pbr = new PushbackReader (isr);
      LineNumberReader lnr = new LineNumberReader (pbr);


      // Read line by line.
      String s = lnr.readLine();
      while (s != null) {
	s = s.trim();
	display_text ("YOU: " + s, Color.red);
	if (s.equalsIgnoreCase ("Bye"))
	  break;
	s = lnr.readLine();
      }
      in_stream.close ();
    }
    catch (IOException e) { System.out.println (e); }

  }

}


// ...

public class IO12 {

  public static void main (String[] argv)
  {
    // ...

    try {
      // Create the matching pipes. Note that one pipe
      // is given to the constructor of the other.
      PipedOutputStream pipe_out1 = new PipedOutputStream ();
      PipedInputStream pipe_in1 = new PipedInputStream (pipe_out1);

      PipedOutputStream pipe_out2 = new PipedOutputStream ();
      PipedInputStream pipe_in2 = new PipedInputStream (pipe_out2);

      // Create one client instance and thread.
      ChatClient c1 = new ChatClient (pipe_out1, pipe_in2);
      Thread c1_thread = new Thread (c1);

      // Create another client instance and thread.
      ChatClient c2 = new ChatClient (pipe_out2, pipe_in1);
      Thread c2_thread = new Thread (c2);

      // Start the threads.
      c1_thread.start();
      c2_thread.start();
    }
    catch (IOException e) { System.out.println (e); }

  }

}
Note:
- We use a TextField to allow user entry of each
"chat" line of text.
- A message Panel that scrolls is used to display
the conversation.
- The main() program creates two ChatClient's
and connects two pipes between them.
- Consider the output:
- The ChatClient takes in an OutputStream
without knowing what the actual medium is.
- To this, a PrintWriter is attached:
pw = new PrintWriter (out_stream, true);
- The second parameter indicates that an automatic
flush is desired with each println() call.
- Everytime the user hits return in the TextField,
the ActionListener is invoked.
- Here, the latest text in the TextField
is retrieved and sent to the PrintWriter:
        public void actionPerformed (ActionEvent a)
	{
	  if (tf.getText().equalsIgnoreCase ("Bye")) {
	    try {
	      ChatClient.this.pw.println ("Bye");
	      ChatClient.this.out_stream.close ();
	      ChatClient.this.dispose ();
	    }
	    catch (IOException e) { System.out.println (e); }
	  }
	  else {
	    display_text ("ME: " + tf.getText(), Color.blue);
	    pw.println (tf.getText());
	    tf.setText("");
	  }
	}
- Note the unusual syntax in accessing a top-level
variable (out_stream) inside an inner class:
- Consider the input:
- Every communication protocol needs a way of gracefully
ending the connection:
- In this case, we have decided to look for the
string "Bye" as signifying the end.
- We could have used a single byte like "-1", but
it is better to a code that is at the same level
as the rest of the communication (strings, in this case).
- Observe that two pipes were needed in this case, one
for each direction.
- Finally, note that a null is returned
when there is no input:
- For a file, this means EOF was reached.
- For a connection, this means the connection was ended.
Exercise 13.6
(Solution):
Modify the above code so that sockets are used as the
medium of communication. Test your code by using your
assigned port number. Note:
You will need a chat "server" (the one that listens on a port) and
you will need a chat "client" (one that connects to the given port).
Since both are similar, do the following:
- Write both version in the same file.
- Let the command line arguments determine which version
to use:
- If no command line argument is typed, assume it's the
server.
- If a command line argument is used, assume it's the
client and the command line argument is the internet address
(e.g., felix.seas.gwu.edu) of the server.
The only changes you need to make are in main().
Use this template.
The command line stuff is implemented for you.
HTTP: downloading a web page
It is quite easy to write code to download a page
since the HTTP protocol is a text-based protocol.
We will download Yahoo's homepage with the following
code:
(source file)
public class IO13 {

  public static void main (String[] argv)
  {
    try {
      // Open a socket to a known webserver.
      Socket soc = new Socket ("www.yahoo.com", 80);
      InetAddress remote_machine = soc.getInetAddress();
      System.out.println ("Connection made to " + remote_machine);

      // Now create the output and input streams
      OutputStream out_stream = soc.getOutputStream ();
      PrintWriter pw = new PrintWriter (out_stream);
      InputStream in_stream = soc.getInputStream();
      InputStreamReader isr = new InputStreamReader (in_stream);
      LineNumberReader lnr = new LineNumberReader (isr);

      // Ask for the index.html page.
      pw.print ("GET index.html /HTTP/1.0\n\n");
      pw.flush ();

      // Get the page.
      String s = lnr.readLine ();
      while (s != null) {
	System.out.println (s);
	s = lnr.readLine ();
      }

      // Close the streams.
      pw.close ();
      lnr.close ();
      soc.close ();
    }
    catch (IOException e) { System.out.println (e); }
  }

}
Note:
- The standard port for webservers is 80.
- Once the connection is made and the Socket
instance is generated, we obtain the Socket's
input and output streams.
- To the output stream, we attach a PrintWriter
(since we want to write text).
- To the input stream, we attach a LineNumberReader
(in steps).
- To actually request a particular page, the HTTP protocol
demands that you:
- Send a line of text beginning with "GET",
followed by the page name, followed by "/HTTP/1.0".
- Then send a blank line.
- Since we are using print(), the first
\n ends the current line, whereas the second
ends the blank line.
- We need to call the flush() method to ensure
that everthing was sent out.
- Presumably, the webserver reacts by sending you the
result: the page itself.
- To read the page (line-by-line), we use the
readLine() method of LineNumberReader.
- When the webserver has sent everything, it terminates
the connection.
- We know the connection is terminated when we get
a null from readLine().
- The page returned is an HTML file. Since Java 1.1 cannot not
display it, we just write it to the screen. Java 1.2 provides
a display and so this file could be fed to the class that
handles HTML.
HTTP: making a query
Making a query is as easy as obtaining a page. You just
have to know what to tell the webserver:
- First, you have to know the name of script you will pass the
query to.
- Then you have to know how the script expects the query.
- Here is the script and query string used by Yahoo (as of Nov. 30):
"/bin/search?p=java:" (The query string is "java").
- Typically, it looks like "/cgi-bin/search.pl?blahblah".
Only the "GET" portion of the code needs to change:
(source file)
public class IO14 {

  public static void main (String[] argv)
  {
      // ...

      // Make the query.
      pw.print ("GET /bin/search?p=java\n\n");
      pw.flush ();

      // Get the results.
      String s = lnr.readLine ();
      while (s != null) {
	System.out.println (s);
	s = lnr.readLine ();
      }

      // ...

  }

}
HTTP: making a query using POST
The GET method of HTTP allows only one line of text to be
sent (to the webserver) as the query.
To allow for more complicated stuff to be sent to the
webserver (such as the entries in a form), the POST method
can be used:
source file)
      pw.print ("POST /bin/search?\n");
      pw.print ("Content-type: plain/text\n");
      pw.print ("Content-length: 100\n");
      pw.print ("p=java");
      pw.print ("\n\n");
      pw.flush ();
Note:
- In this case, Yahoo returned an HTML file indicating
that it does not implement POST queries.
- In general, you have to know what the script at the
other end is expecting.
- For details on POST, consult an HTTP book.
HTTP: using the URL class
In the above code, we explicitly used the machine address
and port number.
A higher-level approach is to specify the URL of the file
directly.
This is possible using the URL class in java.net.
The URL is also useful for extracting the machine name
and port number.
For example:
(source file)
      // Create a URL instance.
      URL u = new URL ("http://www.yahoo.com/index.html");
      System.out.println ("Protocol: " + u.getProtocol());
      System.out.println ("Host: " + u.getHost());
      System.out.println ("Port: " + u.getPort());
      // Note: default port number is -1, but the protocol handler
      // knows what to do.
      System.out.println ("File: " + u.getFile());

      // The openStream method makes the connection.
      InputStream in_stream = u.openStream();

      // Wrap high-level streams around this.
      InputStreamReader isr = new InputStreamReader (in_stream);
      LineNumberReader lnr = new LineNumberReader (isr);

      System.out.println ("Input stream opened");

      // Now read the result.
      String s = lnr.readLine ();
      while (s != null) {
	System.out.println (s);
	s = lnr.readLine ();
      }

      lnr.close ();
Note:
- The openStream() method of URL
is the one that makes the connection.
- Currently, openStream() only implements
HTTP and FTP.
- A lot of abstract classes are provided that enable you
to define your own protocols and protocol handlers.
HTTP: using the URL class for FTP
Since URL's can specify a protocol and since Java handles
FTP, the same code as above can be used for FTP:
(source file)
      // Create a URL instance.
      URL u = new URL ("ftp://sunsite.unc.edu/README");
      System.out.println ("Protocol: " + u.getProtocol());
      System.out.println ("Host: " + u.getHost());
      System.out.println ("Port: " + u.getPort());
      // Default port number is -1, but it still works.
      System.out.println ("File: " + u.getFile());

      // Open a connection.
      InputStream in_stream = u.openStream();

      // Wrap a LineNumberReader
      InputStreamReader isr = new InputStreamReader (in_stream);
      LineNumberReader lnr = new LineNumberReader (isr);

      System.out.println ("Input stream opened");

      // Fetch the file.
      String s = lnr.readLine ();
      while (s != null) {
	System.out.println (s);
	s = lnr.readLine ();
      }

      lnr.close ();
More about file I/O: handling EOF
We will use a FileInputStream to read from a file:
- We will read byte-by-byte until the end of the file.
- Remember that the read() method returns
an int from which we extract the byte.
- If the int is negative, EOF has been reached.
Here is the code:
(source file)
      // Create a file input stream.
      FileInputStream in_stream = new FileInputStream ("blah.txt");

      // Read from the file.
      int i = in_stream.read();
      int count = 1;
      while (i >= 0) {
	System.out.println ("byte# " + count + ": " + i);
	count++;
	i = in_stream.read();
      }
      in_stream.close ();
More about file I/O: handling EOF at a higher-level
If we are reading at a higher-level (using LineNumberReader),
we use the fact that EOF is signalled when a null is
returned, as the following code shows:
(source file)
      // Read from a text file using LineNumberReader
      FileInputStream in_stream = new FileInputStream ("blah2.txt");
      InputStreamReader osr = new InputStreamReader (in_stream);
      LineNumberReader lnr = new LineNumberReader (osr);

      // EOF is signalled by returning a null string.
      String s = lnr.readLine ();
      while (s != null) {
	System.out.println (s);
	s = lnr.readLine ();
      }
      lnr.close ();
(The curious reader might want to see what the file
blah2.txt actually contains).
Exercise 13.7
(Solution):
A FileReader combines the steps of using
a FileInputStream and a InputStreamReader.
Thus, you pass a filename (of a text file) to a FileReader
instance, and wrap a LineNumberReader around the result.
Use this template
to read from the file /home/guest/drum/public/blah3.txt
More about file I/O: using DataOutputStream to write records
In many applications, you need to write fixed-size records
into a file.
In the following example:
- We will create Person (remember?) instances
and write the corresponding data to a file.
- To make the records fixed-size, we will make the
name field exactly 5 characters long.
- After writing three records, we will examine the file
byte-by-byte, and then read two records back.
Here is the code:
(source file)
// The familiar Person class.

class Person {
  String name;
  int age;

  public Person (String name, int age)
  {
    this.age = age;

    // Make sure the length is exactly five.
    if (name.length() > 5)
      this.name = name.substring (0,5);
    else {
      this.name = name;
      for (int i=name.length()+1; i<=5; i++)
	this.name = this.name + " ";
    }
  }

  public String toString ()
  {
    return "Person: name=" + name + ", age=" + age;
  }

}

public class IO20 {

  public static void main (String[] argv)
  {
    try {
      // Writing using DataInputStream.
      FileOutputStream file_out = new FileOutputStream ("Persons.data");
      DataOutputStream dos = new DataOutputStream (file_out);

      // Create three Person instances.
      Person p = new Person ("aaa", 16);
      System.out.println ("Write: " + p);
      dos.writeChars (p.name);
      dos.writeInt (p.age);

      p = new Person ("bbbb", 32);
      System.out.println ("Write: " + p);
      dos.writeChars (p.name);
      dos.writeInt (p.age);

      p = new Person ("cccccccc", 64);
      System.out.println ("Write: " + p);
      dos.writeChars (p.name);
      dos.writeInt (p.age);

      dos.close ();

      // First, let's look at the raw data in the file.
      FileInputStream fis = new FileInputStream ("Persons.data");
      int k = fis.read();
      int count = 1;
      while (k >= 0) {
	byte b = (byte) k;
	String hex = Integer.toHexString (b);
	System.out.println ("Byte #" + count + ": " + hex);
	count ++;
	k = fis.read();
      }
      fis.close();

      // Now read in the data.
      fis = new FileInputStream ("Persons.data");
      DataInputStream dis = new DataInputStream (fis);

      char[] name_array = new char[5];
      for (int i=0; i<5; i++)
	name_array[i] = dis.readChar();
      String name = new String (name_array);
      int age = dis.readInt();
      System.out.println ("Read: name=" + name + ", age=" + age);

      name_array = new char[5];
      for (int i=0; i<5; i++)
	name_array[i] = dis.readChar();
      name = new String (name_array);
      age = dis.readInt();
      System.out.println ("Read: name=" + name + ", age=" + age);

      dis.close();
    }
    catch (IOException e) { System.out.println (e); }
  }

}
When run, the output produced is:
Write: Person: name=aaa  , age=16
Write: Person: name=bbbb , age=32
Write: Person: name=ccccc, age=64
Byte #1: 0
Byte #2: 61
Byte #3: 0
Byte #4: 61
Byte #5: 0
Byte #6: 61
Byte #7: 0
Byte #8: 20
Byte #9: 0
Byte #10: 20
Byte #11: 0
Byte #12: 0
Byte #13: 0
Byte #14: 10
Byte #15: 0
Byte #16: 62
Byte #17: 0
Byte #18: 62
Byte #19: 0
Byte #20: 62
Byte #21: 0
Byte #22: 62
Byte #23: 0
Byte #24: 20
Byte #25: 0
Byte #26: 0
Byte #27: 0
Byte #28: 20
Byte #29: 0
Byte #30: 63
Byte #31: 0
Byte #32: 63
Byte #33: 0
Byte #34: 63
Byte #35: 0
Byte #36: 63
Byte #37: 0
Byte #38: 63
Byte #39: 0
Byte #40: 0
Byte #41: 0
Byte #42: 40
Read: name=aaa  , age=16
Read: name=bbbb , age=32
More about file I/O: using RandomAccessFile
The class RandomAccessFile allows you to grab
any byte in any file.
Since access in the middle of the file is not stream-oriented
behavior, this class is a stand-alone class (it is not a stream).
In the example below:
- We will use the same file as created above with the
Person instances.
- We will perform both reading and writing with
RandomAccessFile.
- For comparison, we show how to skip bytes using
DataInputStream.
Here is the code:
      File f = new File ("Persons.data");
      int len = (int) f.length();
      int record_size = len / 3;
      System.out.println ("Record size = " + record_size);

      // Let's get the second record.
      FileInputStream fis = new FileInputStream (f);
      DataInputStream dis = new DataInputStream (fis);
      dis.skipBytes (record_size);

      char[] name_array = new char[5];
      for (int i=0; i<5; i++)
	name_array[i] = dis.readChar();
      String name = new String (name_array);
      int age = dis.readInt();
      System.out.println ("Read: name=" + name + ", age=" + age);

      dis.close();

      // Using a RandomAccessFile
      RandomAccessFile raf = new RandomAccessFile (f, "rw");
      raf.seek (record_size);
      name_array = new char[5];
      for (int i=0; i<5; i++)
	name_array[i] = raf.readChar();
      name = new String (name_array);
      age = raf.readInt();
      System.out.println ("Read: name=" + name + ", age=" + age);

      // Writing.
      raf.seek (2*record_size);
      Person p = new Person ("ddd", 24);
      raf.writeChars (p.name);
      raf.writeInt (p.age);

      // Read again.
      raf.seek (2*record_size);
      name_array = new char[5];
      for (int i=0; i<5; i++)
	name_array[i] = raf.readChar();
      name = new String (name_array);
      age = raf.readInt();
      System.out.println ("Read: name=" + name + ", age=" + age);
      raf.close();
More about file I/O: reading from a GZIP file
The package java.util.zip provides classes to:
- Read from and write to gzipped files.
- Read from and write to ZIP files (generated from PKZIP, for example).
- Read from and write to JAR files. (JAR is Java's
own version of tar, that actually uses ZIP).
In the example below, we will read from the gzipped file
blah4.txt.gz.
Here is the code:
(source file)
      // Wrap the appropriate streams in the right order.
      FileInputStream file_stream = new FileInputStream ("blah4.txt.gz");
      GZIPInputStream gstream = new GZIPInputStream (file_stream);
      InputStreamReader osr = new InputStreamReader (gstream);
      LineNumberReader lnr = new LineNumberReader (osr);

      // Read.
      String s = lnr.readLine ();
      while (s != null) {
	System.out.println (s);
	s = lnr.readLine ();
      }
      lnr.close ();
Note:
- GZIPInputStream takes the raw byte file,
uncompresses it and produces a raw byte stream, which
is fed into other streams.
- In this case, the original file was a text file,
so we use a LineNumberReader.
- GZIP compressees only one file at a time; it does not
handle archives unlike ZIP or JAR.
More about file I/O: reading from a JAR file
In this example, we will read from a JAR file:
- The JAR file will be called blah.jar.
- We do not know in advance how many files have been
packed into the JAR file.
- JAR and ZIP files are identical, as will see.
Here is the code:
(source file)
      // First open the ZIP file.
      ZipFile zip_file = new ZipFile ("blah.jar");

      // Get an Enumeration of its contents.
      Enumeration e = zip_file.entries ();
      int count = 1;

      // Process one by one.
      while (e.hasMoreElements()) {
	// Get an element.
	ZipEntry zip_entry = (ZipEntry) e.nextElement();

	// Get an input stream attached to the entry.
	InputStream in_stream = zip_file.getInputStream(zip_entry);

	// Wrap high-level reader around the input stream.
	InputStreamReader osr = new InputStreamReader (in_stream);
	LineNumberReader lnr = new LineNumberReader (osr);

	System.out.println ("ZIP ENTRY #" + count + ": " + zip_entry);

	// Read.
	String s = lnr.readLine ();
	while (s != null) {
	  System.out.println (s);
	  s = lnr.readLine ();
	}
	lnr.close ();
	count++;

	// Repeat.
      }
Note:
- An Enumeration instance allows you to walk
through the list of entries one-by-one.
- Each entry is a regular file and so must be read
in the regular way, with a LineNumberReader
(for a text file).
- JAR files are useful in sending a bunch of classes over
the net:
- By using the archive attribute of the
<applet> tag in HTML, you can cause the whole
compressed bunch to be transferred in one shot.
- Otherwise, a separate connection is used for each class.
Writing objects to streams and reading them in
Java has a powerful mechanism that lets you write object
instances directly to a stream.
For example, you can write a Person instance
directly using the writeObject() method of
ObjectOutputStream.
      ObjectOutputStream oos = new ObjectOutputStream (out_stream);
      Person p = new Person ("Murderous Matt", 28);
      oos.writeObject (p);
Later, you can read (from the same medium) the Person
instance with code like:
      ObjectInputStream ois = new ObjectInputStream (in_stream);
      Person p = (Person) ois.readObject();
To write or read such instances, the class that you want
to write must implement the Serializable interface:
(source file)
public class Person implements Serializable {

  String name;
  int age;

  public Person (String name, int age)
  {
    this.name = name;
    this.age = age;
  }

  public String toString ()
  {
    return "Person:toString: name=" + name + ", age=" + age;
  }

}
Here, Serializable is a "marker" interface (with
no methods), to indicate to the compiler that you want to allow
reading and writing to streams.
Now, let us create a Producer that writes Person
instances and a Consumer that reads them.
Here is the code for the Producer:
(source file)
class Producer implements Runnable {

  OutputStream out_stream;

  public Producer (OutputStream out_stream)
  {
    // Store the reference to the output stream.
    this.out_stream = out_stream;
  }


  // Must implement the run() method.

  public void run ()
  {
    try {
      // Get an instance of the object output stream.
      ObjectOutputStream oos = new ObjectOutputStream (out_stream);

      // Create some Person instances and write them out.
      Person p = new Person ("Murderous Matt", 28);
      System.out.println (p);
      oos.writeObject (p);

      p = new Person ("Necromancing Nancy", 33);
      System.out.println (p);
      oos.writeObject (p);

      oos.close ();
    }
    catch (IOException e) { System.out.println (e); }
  }

}

public class IO27_client {

  public static void main (String[] argv)
  {
    try {
      // Open a socket to the server.
      // Address: felix.seas.gwu.edu, port 5010.
      Socket soc = new Socket ("felix.seas.gwu.edu", 5010);
      InetAddress remote_machine = soc.getInetAddress();
      System.out.println ("Producer as client: attempting connection"
			  + " to " + remote_machine);

      // Note: server must be fired up first!

      // Now create the output stream and hand off to producer.
      OutputStream out_stream = soc.getOutputStream ();

      // Create a producer instance and thread.
      Producer p = new Producer (out_stream);
      Thread pthread = new Thread (p);

      // Start the threads.
      pthread.start();
    }
    catch (IOException e) { System.out.println (e); }
  }

}
We will make the Producer and Consumer communicate over the
net using sockets.
Here is the code for the Consumer:
(source file)
class Consumer implements Runnable {

  InputStream in_stream;

  public Consumer (InputStream in_stream)
  {
    this.in_stream = in_stream;
  }

  public void run ()
  {
    try {
      // Open an ObjectInputStream.
      ObjectInputStream ois = new ObjectInputStream (in_stream);

      // Read Person instances from the stream.
      Person p = (Person) ois.readObject();
      System.out.println (p);

      p = (Person) ois.readObject();
      System.out.println (p);

      ois.close();
    }
    catch (IOException e) { System.out.println (e); }
    catch (ClassNotFoundException e) { System.out.println (e); }
 }

}


public class IO27_server {

  public static void main (String[] argv)
  {
    try {
      // Create a listening service for connections
      // at the designated port number.
      ServerSocket srv = new ServerSocket (5010);

      // When a connection is made, get the socket.
      // The method accept() blocks until then.
      System.out.println ("Consumer as server: waiting for a connection");
      Socket soc = srv.accept ();

      // At this stage, the connection will have been made.
      InetAddress remote_machine = soc.getInetAddress();
      System.out.println ("Consumer as server: accepted a connection"
			  + " from " + remote_machine);

      // We are going to listen, so get an InputStream
      // and hand it over to the consumer.
      InputStream in_stream = soc.getInputStream ();

      // Create a consumer instance and thread.
      Consumer c = new Consumer (in_stream);
      Thread cthread = new Thread (c);

      // Start the thread.
      cthread.start();
    }
    catch (IOException e) { System.out.println (e); }
  }

}
The output (to the screen) at the Producer end is:
Producer as client: attempting connection to felix.seas.gwu.edu/128.164.9.3
Person:toString: name=Murderous Matt, age=28
Person:toString: name=Necromancing Nancy, age=33
Similarly, the output at the Consumer end is:
Consumer as server: waiting for a connection
Consumer as server: accepted a connection from aphid.seas.gwu.edu/128.164.3.88
Person:toString: name=Murderous Matt, age=28
Person:toString: name=Necromancing Nancy, age=33
Note:
- Thus, actual object instance created at run-time can be
written to a stream and read from it.
- Use an ObjectOutputStream to write objects
and an ObjectInputStream to read objects.
- To write (or read) objects:
- The class must implement the Serializable
interface.
- Every member (data) of the class that is a class
must implement the Serializable interface ... etc
recursively.
- When writeObject is invoked on an instance:
- Java builds a representation of the instance using
what it finds on the heap (The reflection mechanism makes this possible).
- If any member variable is a class instance,
writeObject is invoked recursively.
- Care is taken to avoid writing multiple copies of a
single instance.
- If you are not happy about the way your favorite class
is written to a stream, you can implement your own writing
to a stream, by implementing the Externalizable interface.
- We have only scratched the surface of this topic.
More about applets: start() and stop() methods
We will now return to Applet's and cover some
additional topics.
In the example below, we will look at using the
start() and stop() methods of Applet:
- The start() method is called to start the
real work of the applet.
- It is called after calling init(), which is typically
where you place your initialization code.
- If you don't overload this method, the default implementation
does nothing.
- However, the start() and stop() methods
are intended to give you control when the user goes "off-page".
- This is so that you can stop doing resource-consuming
computations (like animations) during this period.
- In our example, we will use the Dog race code of the
previous module: whenever the user goes off-page, we will
"freeze" the race.
- When the user goes "off-page", the stop()
method is called (by the browser).
- When the user returns to the page, the start()
method is called.
Since the code is quite simple, only the start()
and stop() methods will be shown:
(complete source file)
  public void stop ()
  {
    DogGroup.suspend ();
  }

  public void start ()
  {
    DogGroup.resume ();
  }
Note:
- Here, we only need to suspend the thread group when
stop() is called.
- Similarly, when start() is called, we
resume the threads.
- This is precisely what you need to do if you are running
an animation.
More about applets: using the AppletContext
AppletContext
is a class in package
java.applet
that allows some limited interaction with the browser.
In the example below, we will use the "context" as follows:
- First, we will create a two-frame web-page in which
the applet is loaded into one frame.
- In the applet, we will display a
TextField
for the user to enter a URL.
- Once the user enters a URL, we will bring up the corresponding
HTML file in the other frame.
- Thus, the application is a very crude "browser within a browser".
First, here is the HTML file that contains the two
frames. Let's call it
main.html:
<html>
  <body>
    <frameset border=2 framespacing=0 frameborder=6 cols="300,*">
      <frame name="part1"  src="main_part1.html" marginheight=2
        marginwidth=2 scrolling="no" noresize>
      <frame name="part2" src="main_part2.html" marginheight=2
        marginwidth=2 scrolling="yes" noresize>
    </frameset>
  </body>
</html>
Thus,
main_part1.html
will contain the applet and
main_part2.html will
be used for displaying pages:
Next, the applet code:
(source file)
public class IO26 extends Applet {

  TextField tf;            // A textfield for the URL.
  AppletContext context;   // The applet context variable.

  public void init ()
  {
    // We will place the text field inside a colored box.
    this.setBackground (Color.pink);

    // Create a 20-column text field.
    tf = new TextField (20);
    tf.setForeground (Color.blue);
    tf.addActionListener (
      new ActionListener () {
        public void actionPerformed (ActionEvent a)
        {
	  // This method is written below.
	  display_URL (tf.getText());
	}
      }
    );

    this.add (tf);
    this.setVisible (true);

    // Get the applet context ready.
    context = this.getAppletContext();
  }

  void display_URL (String s)
  {
    try {
      // Parse the URL.
      URL u = new URL (s);

      // Fetch and display in the second frame.
      context.showDocument (u, "part2");
    }
    catch (MalformedURLException e) { System.out.println (e); }
  }

}
Here is the result:
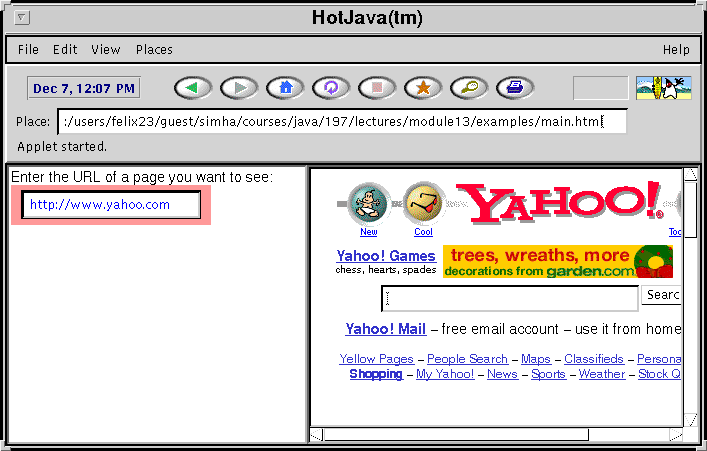
Note:
- We used the showDocument() method to ask the
browser to get a page and show it in the other frame.
- The frame was indicated using the frame name. (part1).
- The showDocument() method has a variation that
does not use frames. In this case, the page will replace the
current page.
- AppletContext also has a method called
showStatus() which lets you display a string on
the browser's status line.
More about applets: playing a sound clip
At this time Java provides limited support for sound:
only .au files are handled.
In the example below (the Dog race), we will add a thread
to provide some sound.
The main loop will be augmented as follows:
    // Create two dog instances with different ID's.
    Dog d1 = new Dog (1, c);
    Dog d2 = new Dog (2, c);

    // Create a ThreadGroup instance.
    DogGroup = new ThreadGroup ("All dogs");

    // Create a Thread instance for each dog.
    // Note: the class Dog must implement the
    // Runnable interface.
    Thread d1_thread = new Thread (DogGroup, d1);
    Thread d2_thread = new Thread (DogGroup, d2);

    Dog.start_race();

    // Start running the threads.
    // ("start" is a method in Thread).
    d1_thread.start();
    d2_thread.start();

    // Create a sound thread.
    Soundtrack strack = new Soundtrack (sound);
    Thread sthread = new Thread (DogGroup, strack);
    sthread.start();
Thus, we will build a class called Soundtrack
to handle playing of sound:
class Soundtrack implements Runnable {

  AudioClip sound;

  public Soundtrack (AudioClip sound)
  {
    this.sound = sound;
  }

  public void run ()
  {
      sound.loop();
  }

}
Note:
Exercise 13.8:
Try executing the code to see
the result:
- Since it is written as an applet, you will need the file
Race2.html to feed into
appletviewer.